When I think of summertime, I think of water and the beach. I grew up near South Padre Island, and, as a child, we would go there every weekend. During the summer, we would spend weeks there sinking our toes in the sand and water and breathing in the ocean breeze. That’s where some of my happiest memories were made. So it comes as no surprise that I love coastal design. When it comes to coastal decor, you don’t have to splurge to have a high end looking pieces. Luckily, there are easy ways to bring beautiful and affordable coastal elements into your home, and one of them is a DIY shell frame. Here’s how to create your own.
How to Make Your Own DIY Shell Picture Frame
What you need:
- Seashells
- Picture frame
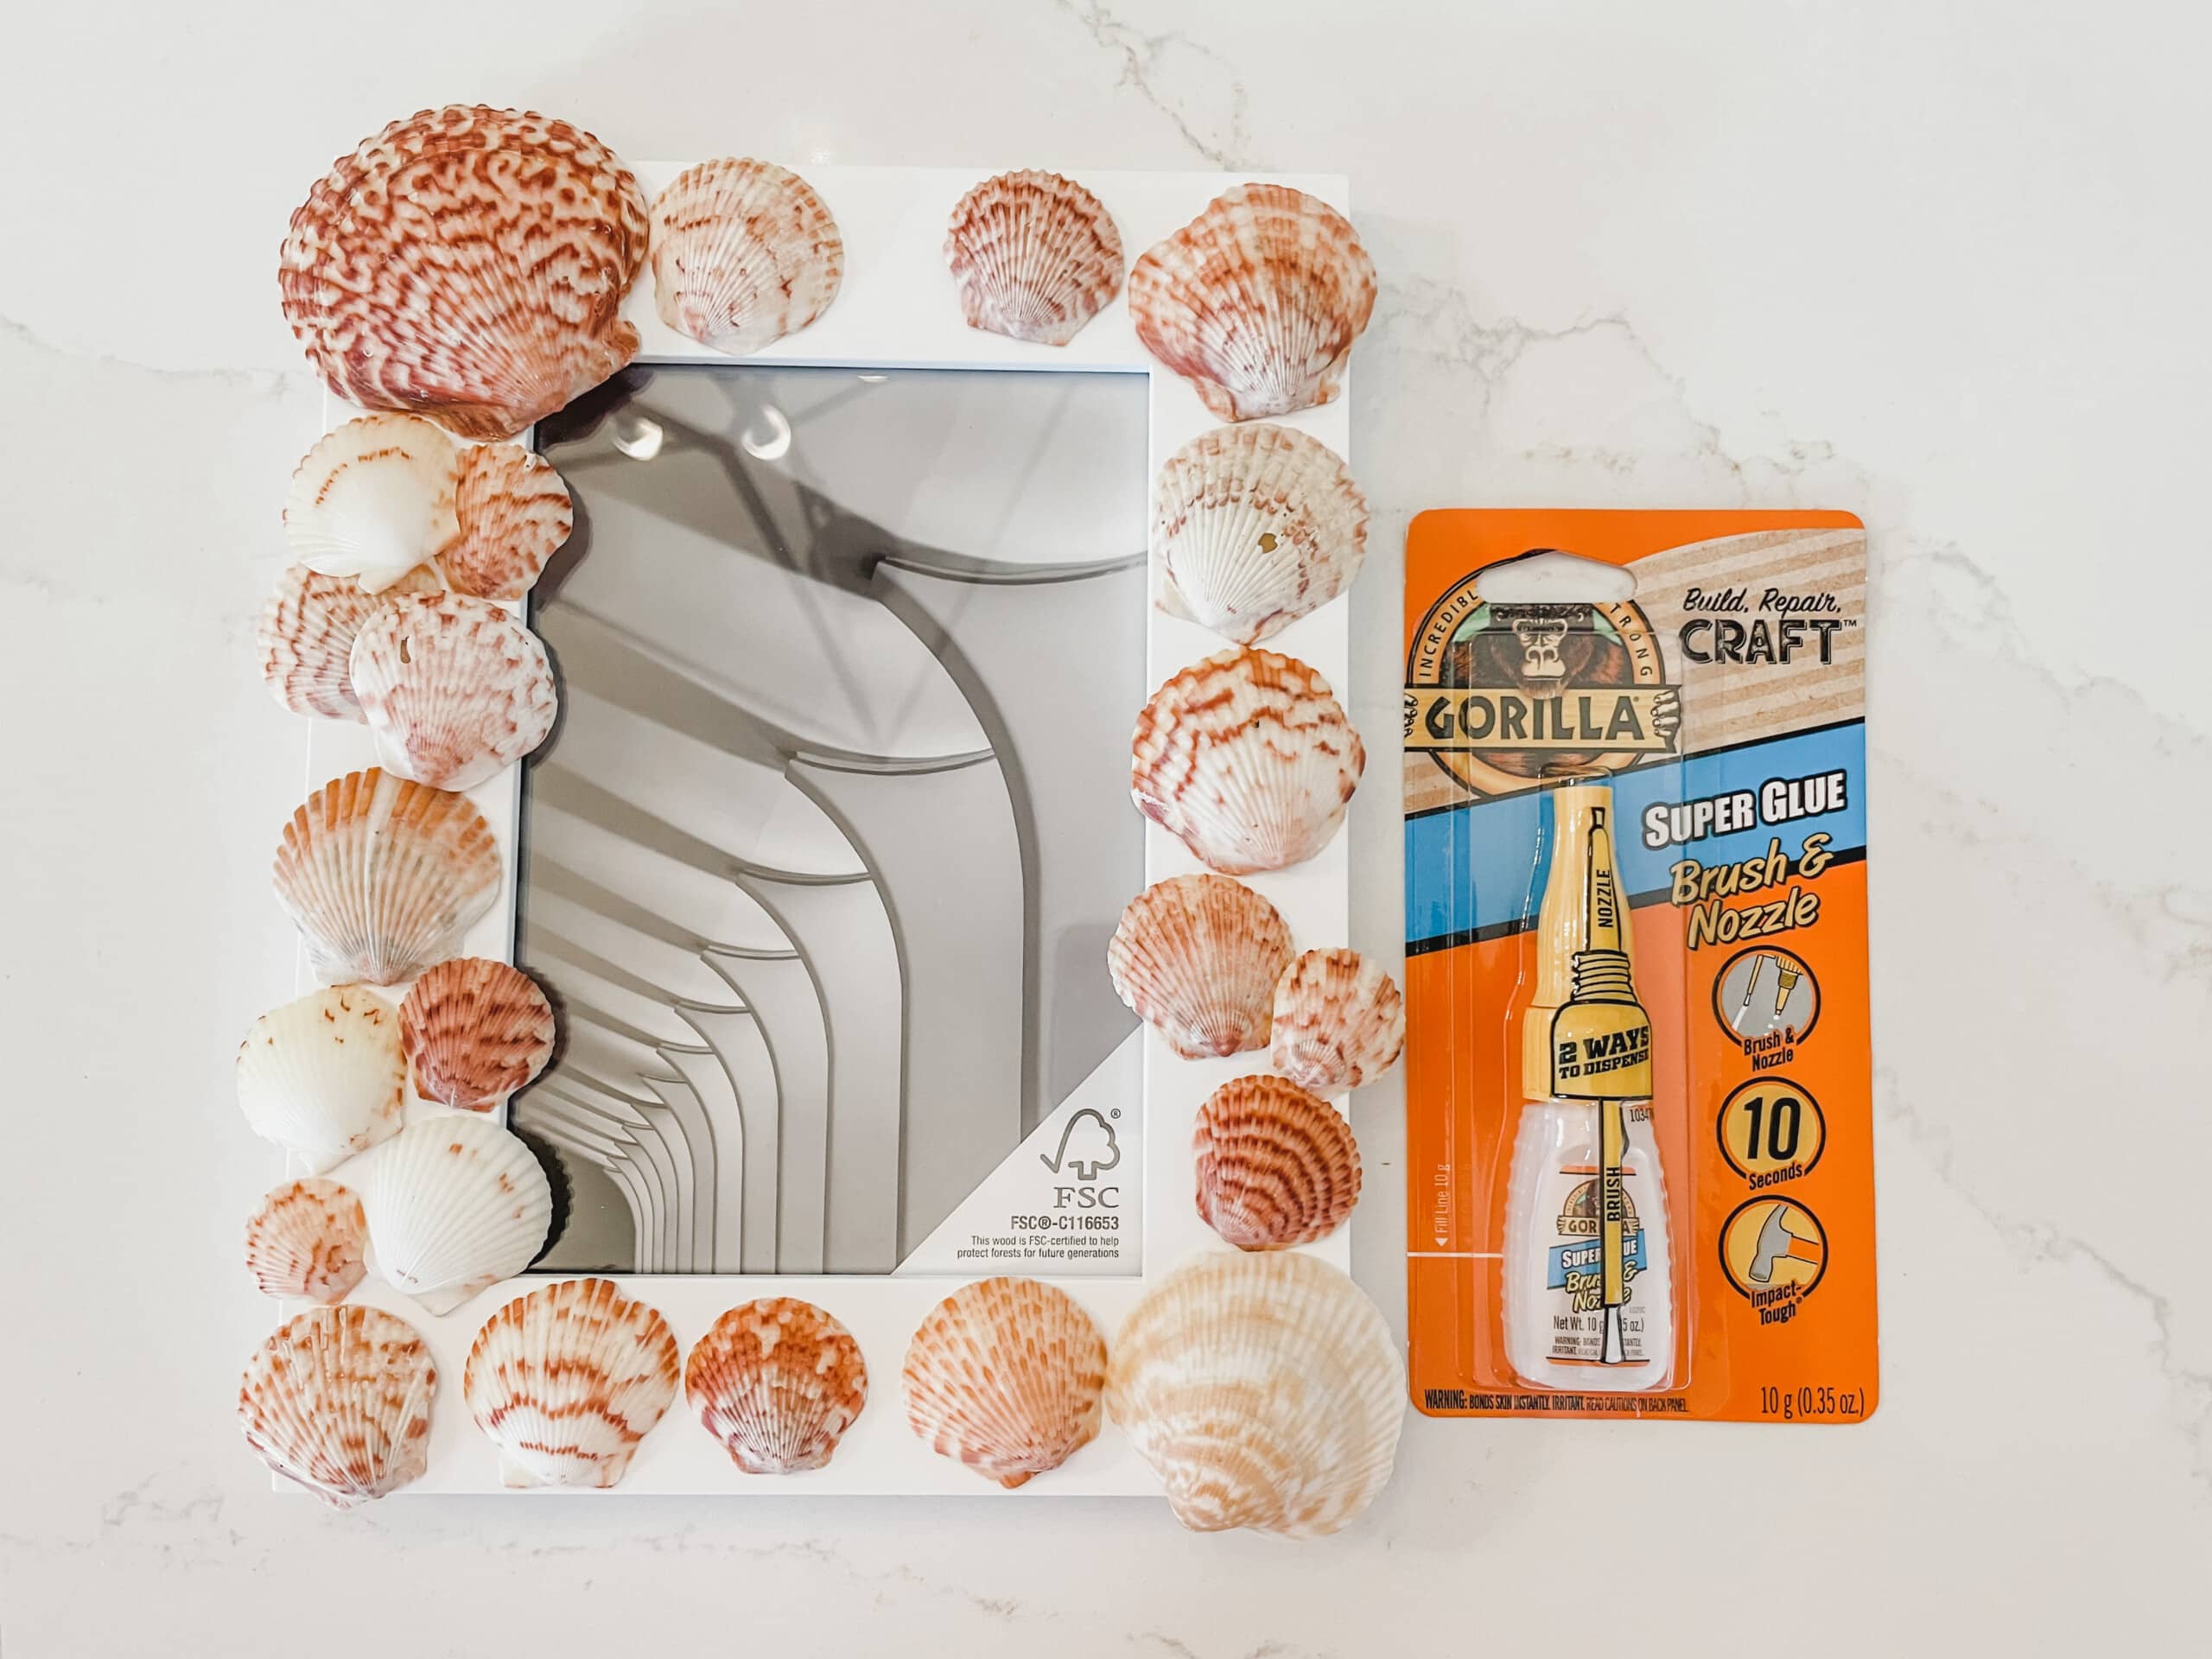
- Craft glue or hot glue gun
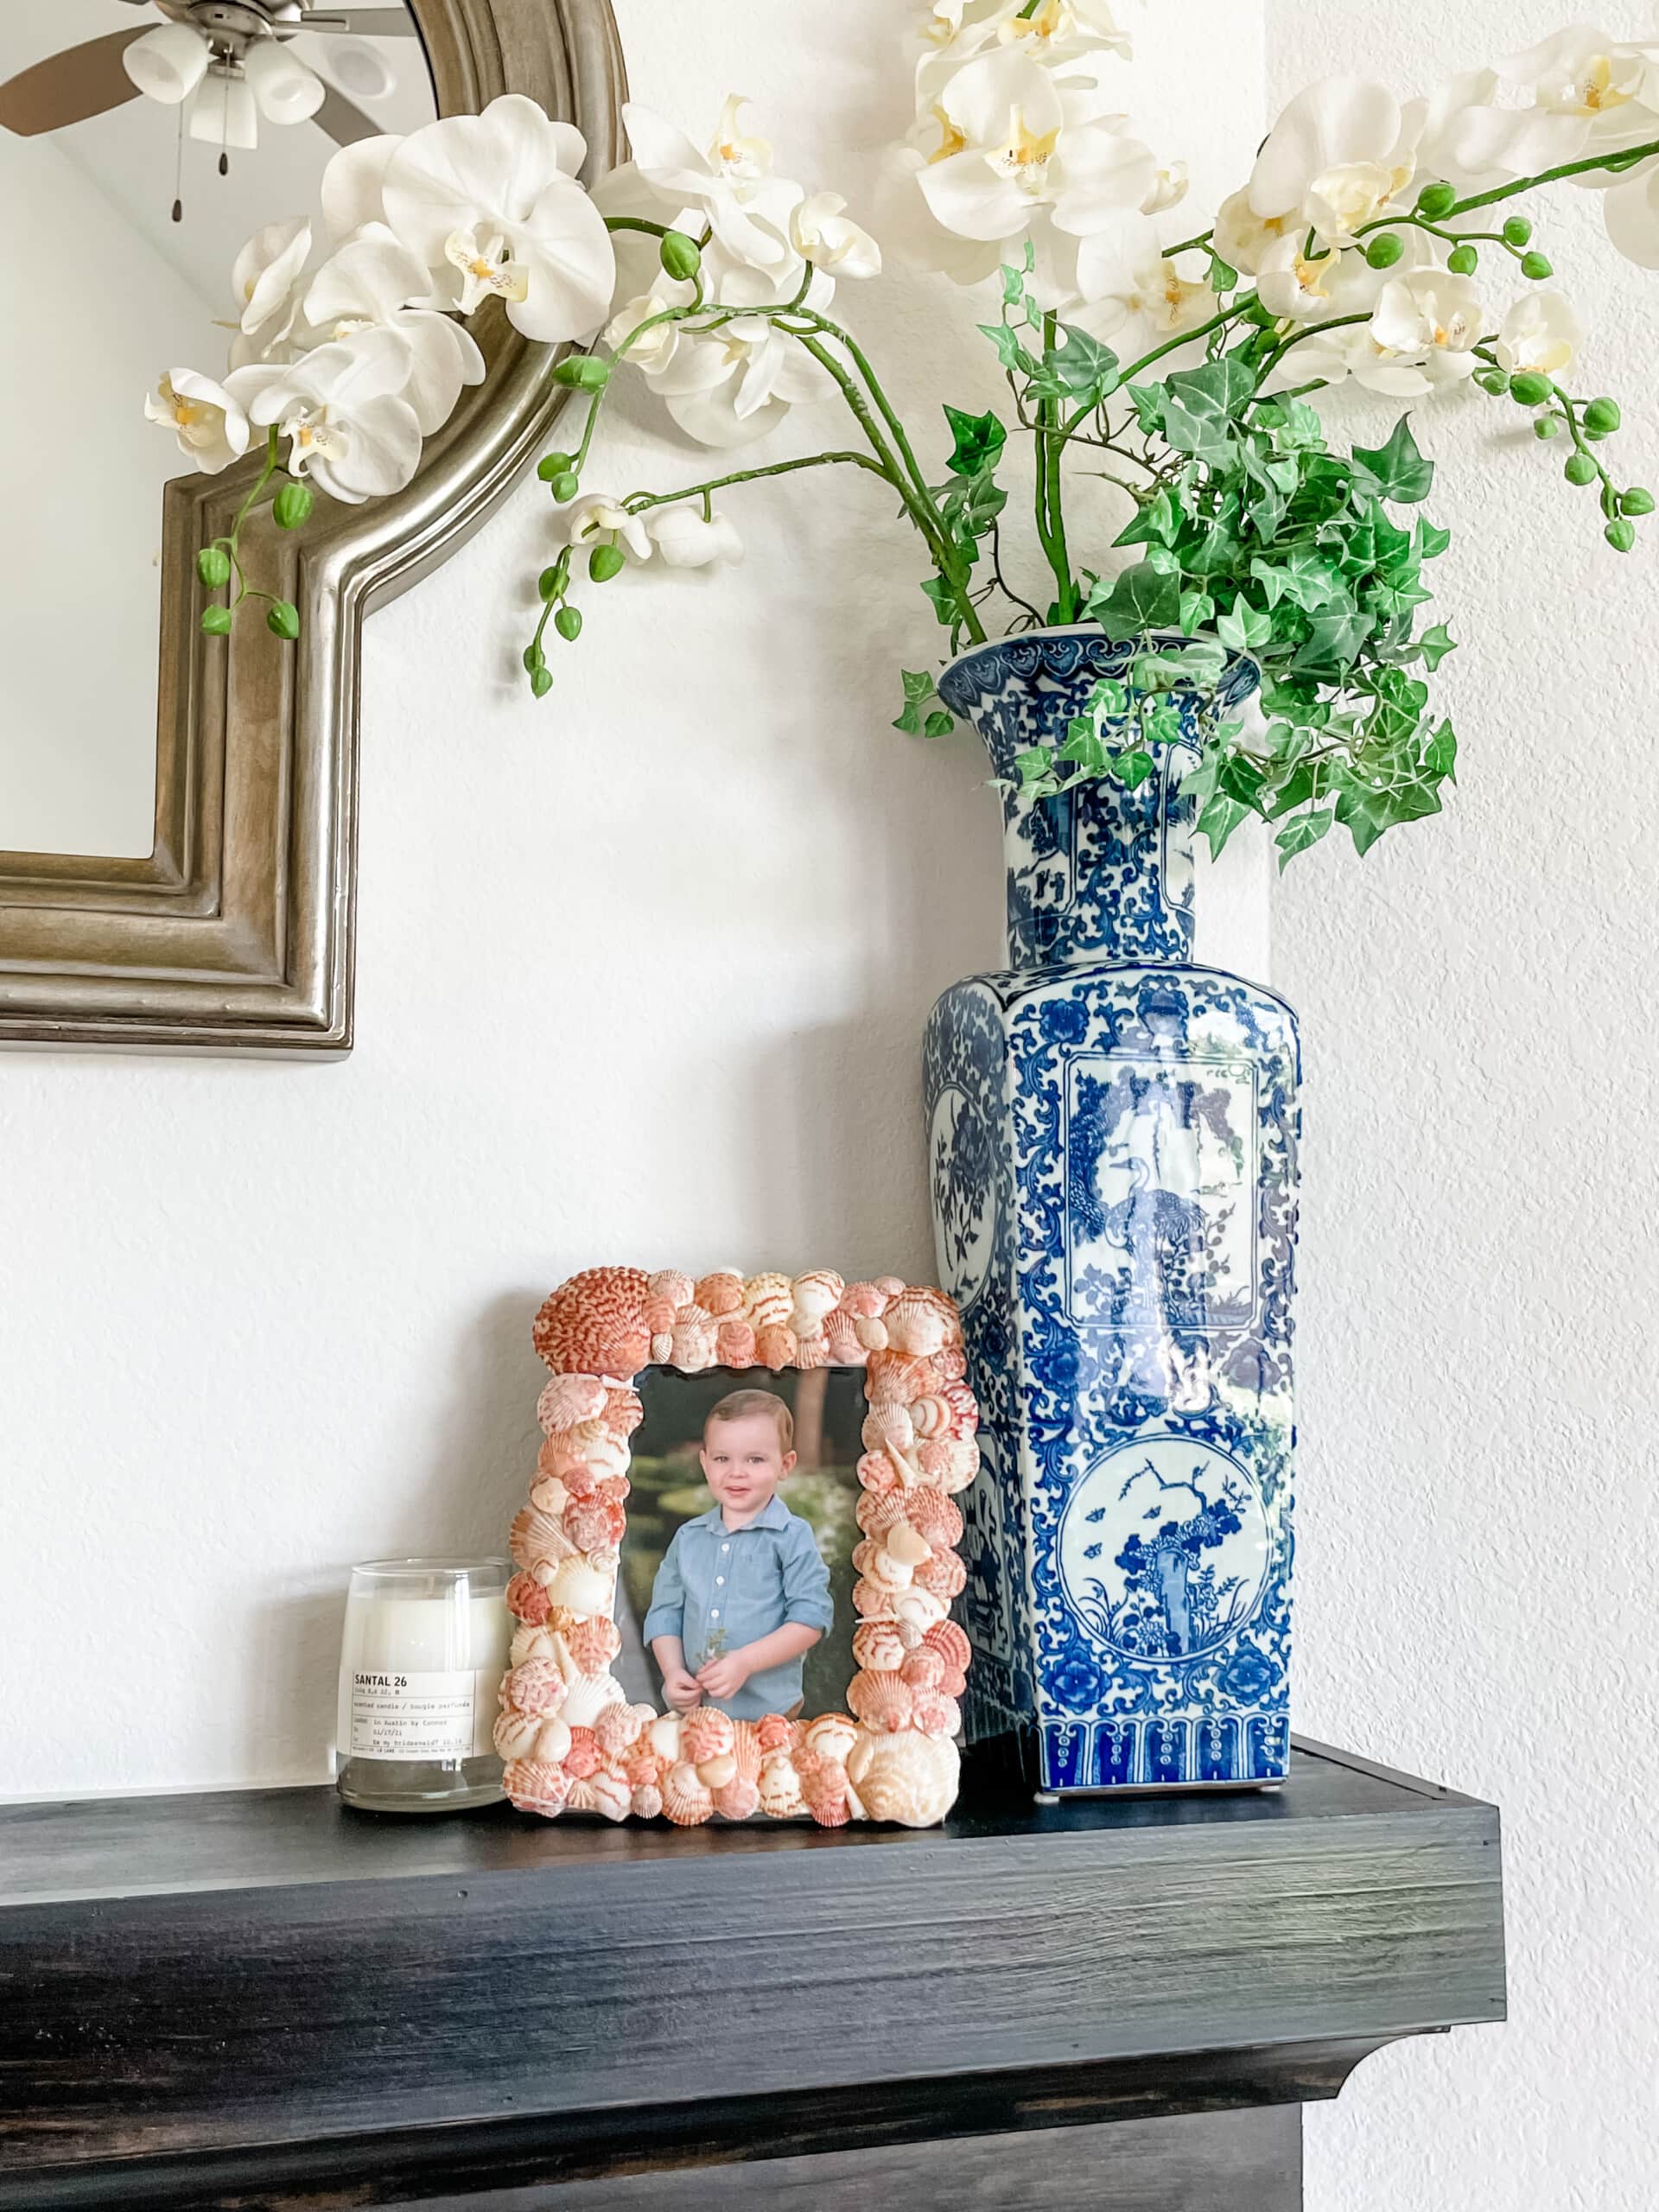
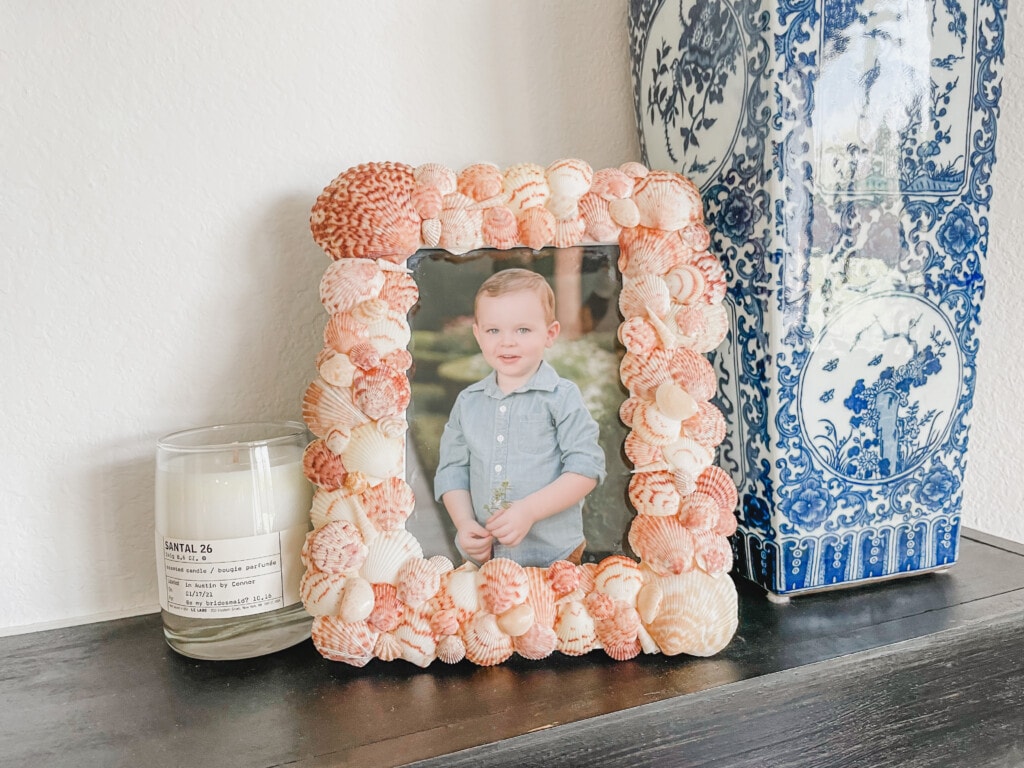
I love this craft because you can design your picture frame with the seashells from your next beach trip! The shells that I used were collected from a family trip to Florida when I was five months pregnant with my son. So every time I look at my DIY shell frame, it reminds me of the trip that our family took. You can even put a picture in the frame from your beach trip!
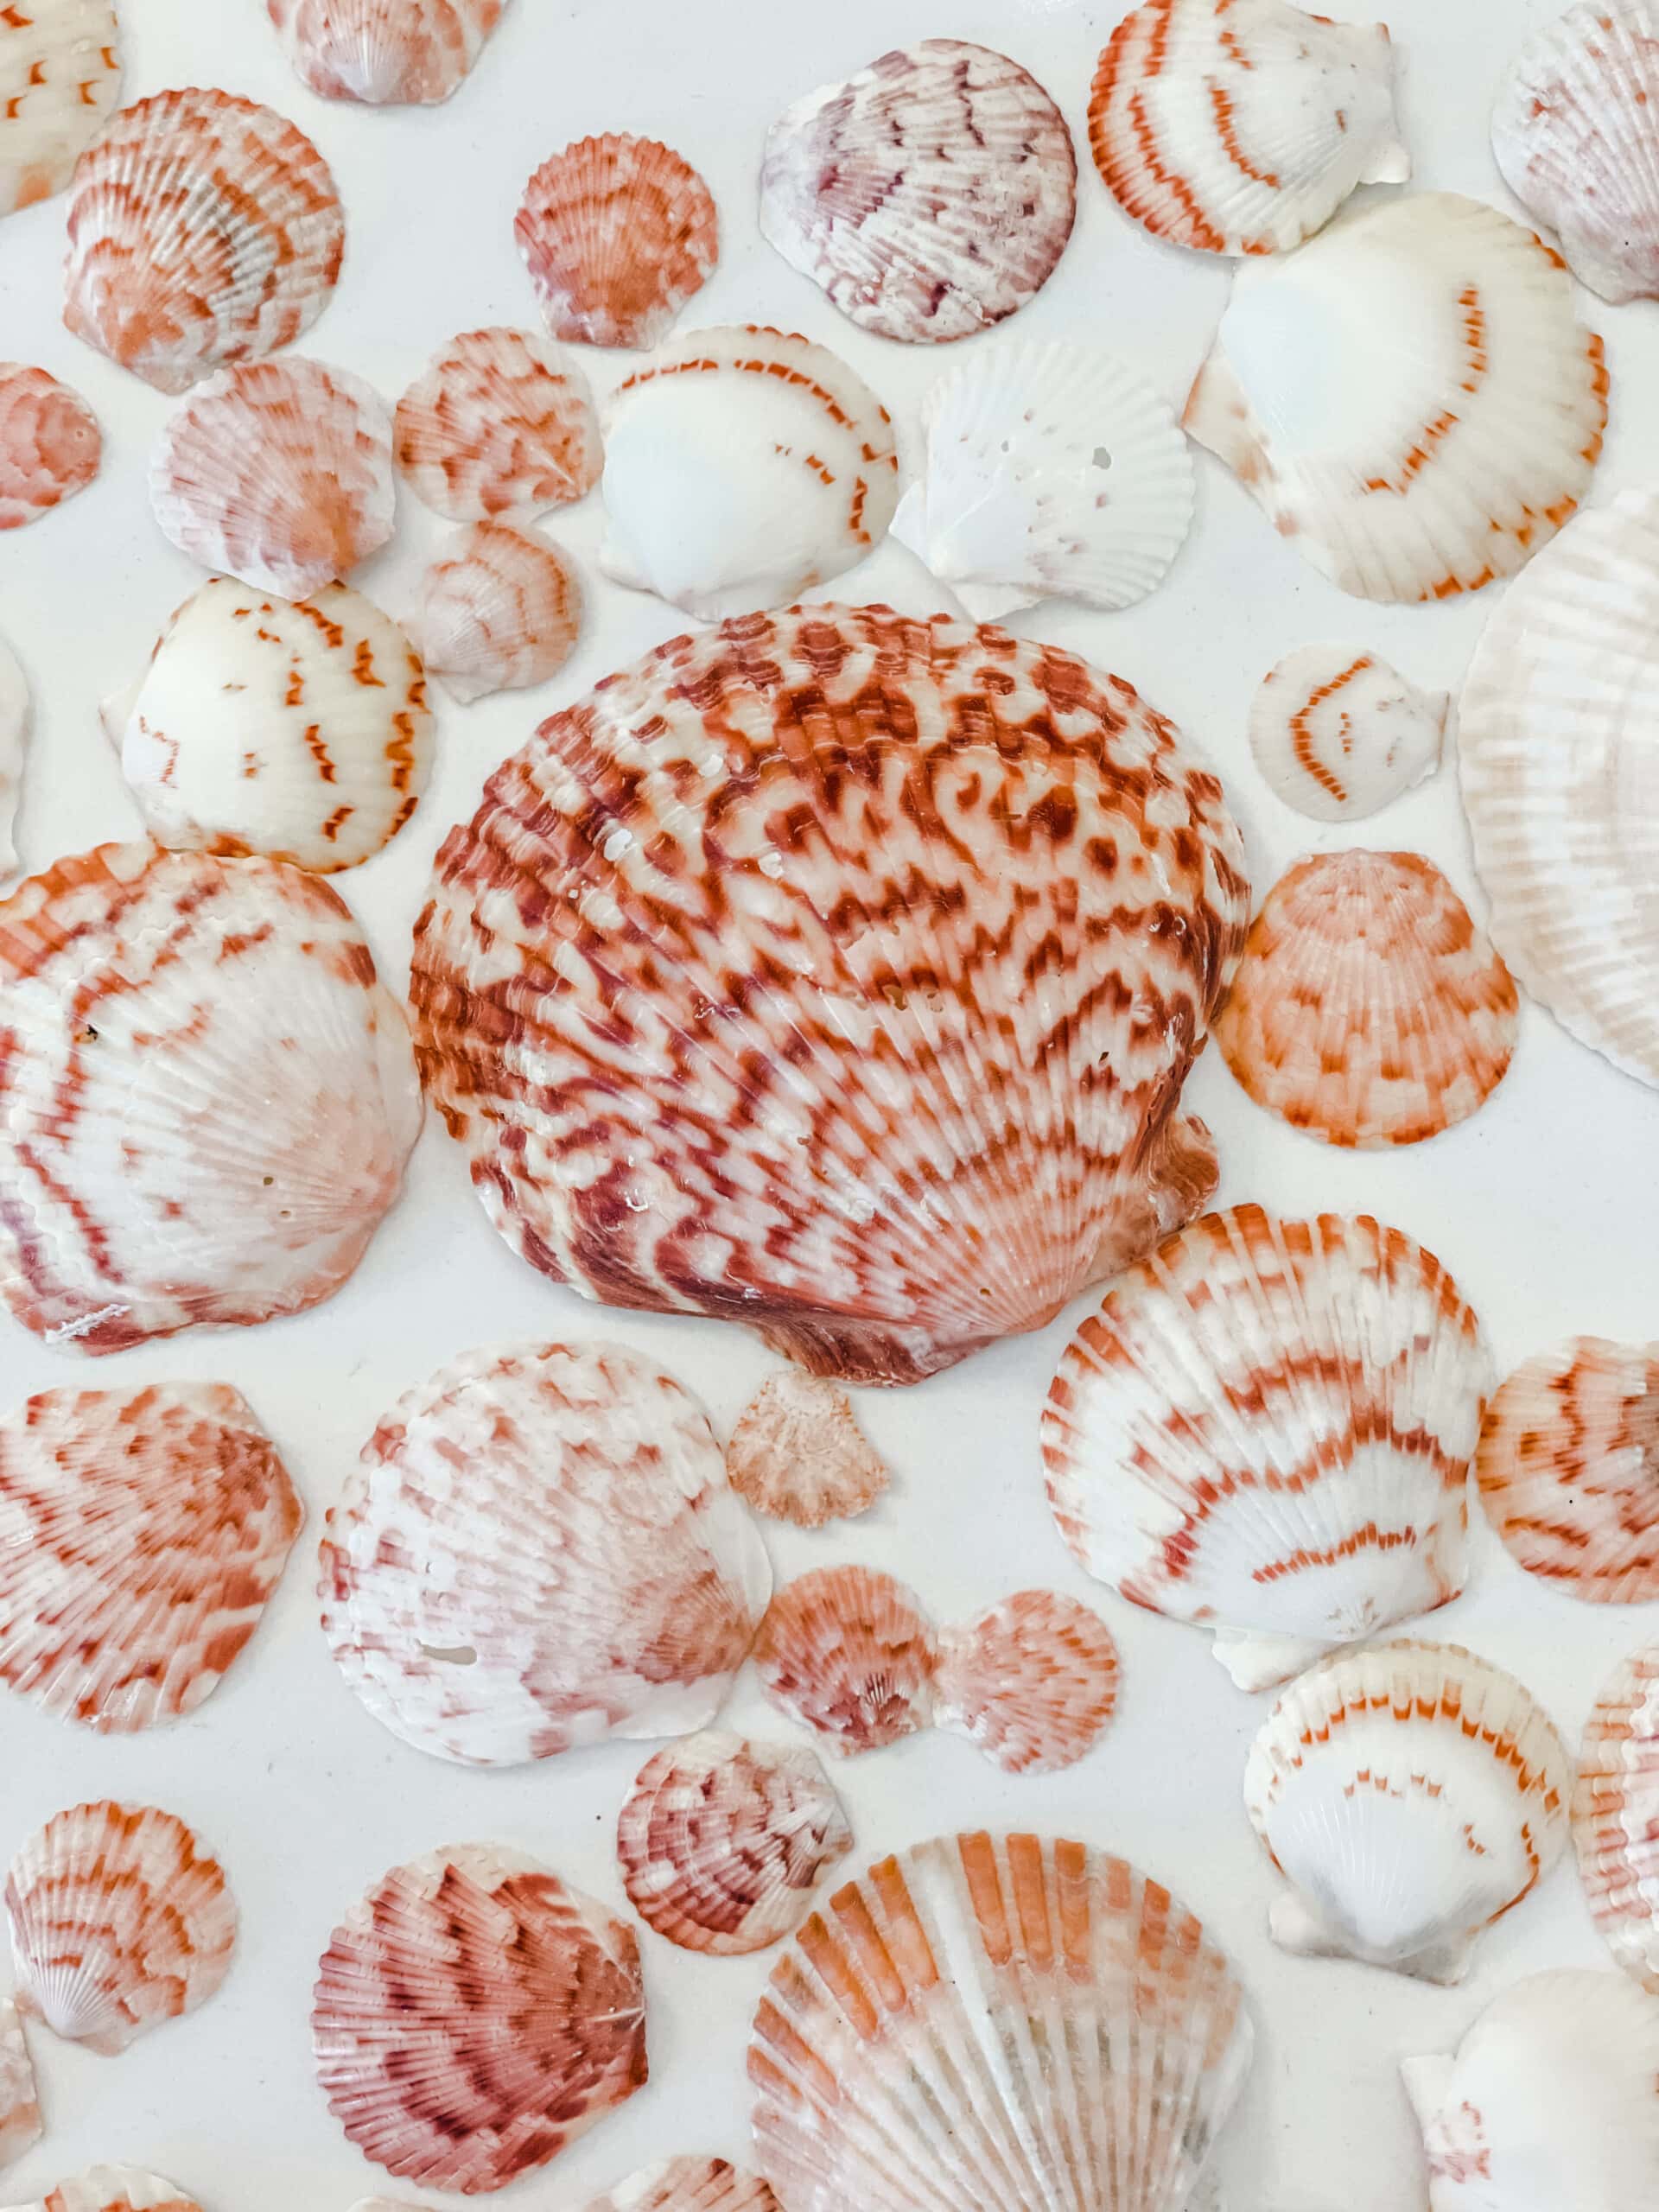
While you’re at the beach, look for seashells that you love. Maybe it’s a certain shape or color that you like. Save them and bring them home with you to create your own shell frame. And if you’re unable to find the right shells or going to the beach isn’t on your itinerary, you can always purchase some pretty shells too.
Once you have all of the items, you are ready to get started.
Prepare the Seashells
If you are using seashells that you collected from your trip, make sure that you wash them thoroughly to remove all sand and debris. Let them dry. Then pick out the shells that you want to use on your frame. I had put all of my shells that we collected in a box and took out all of the coral-colored shells for my DIY shell frame.

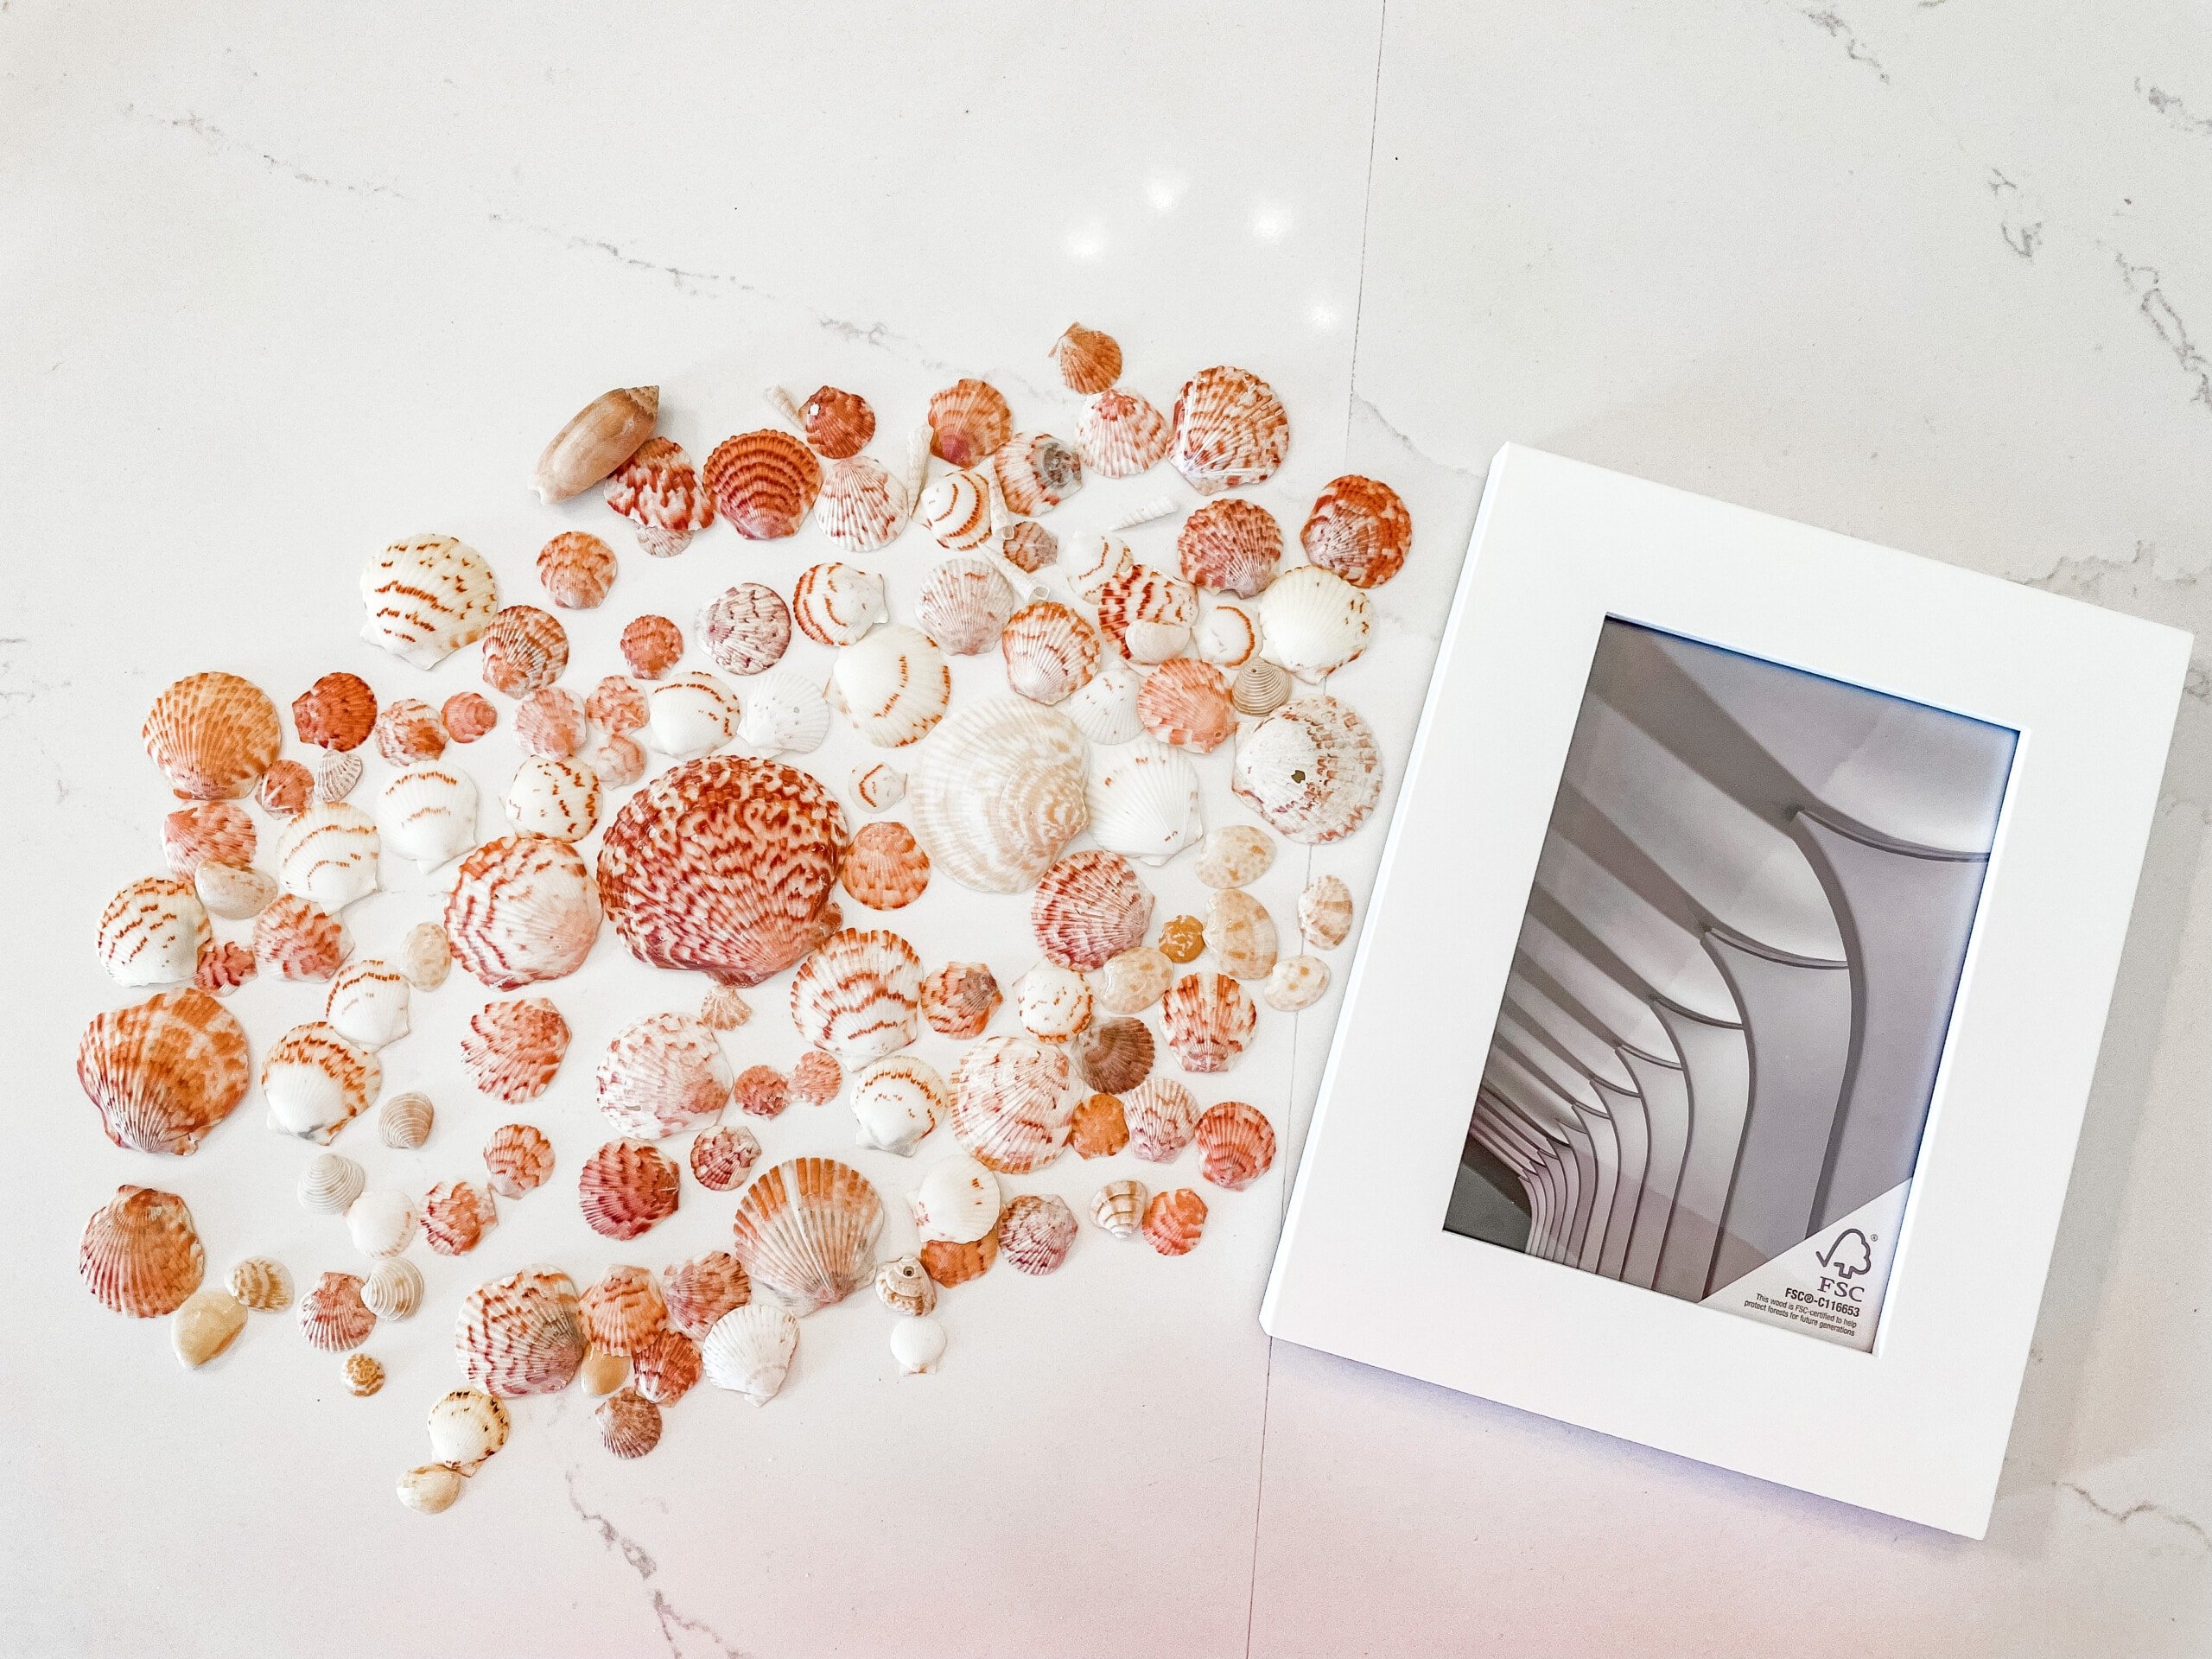
Create a Layout
Next, think of a layout that you want to start with for your shell frame. Lay them out, so you have an idea of what type of look you want. (I purchased this frame and it’s only $5!)
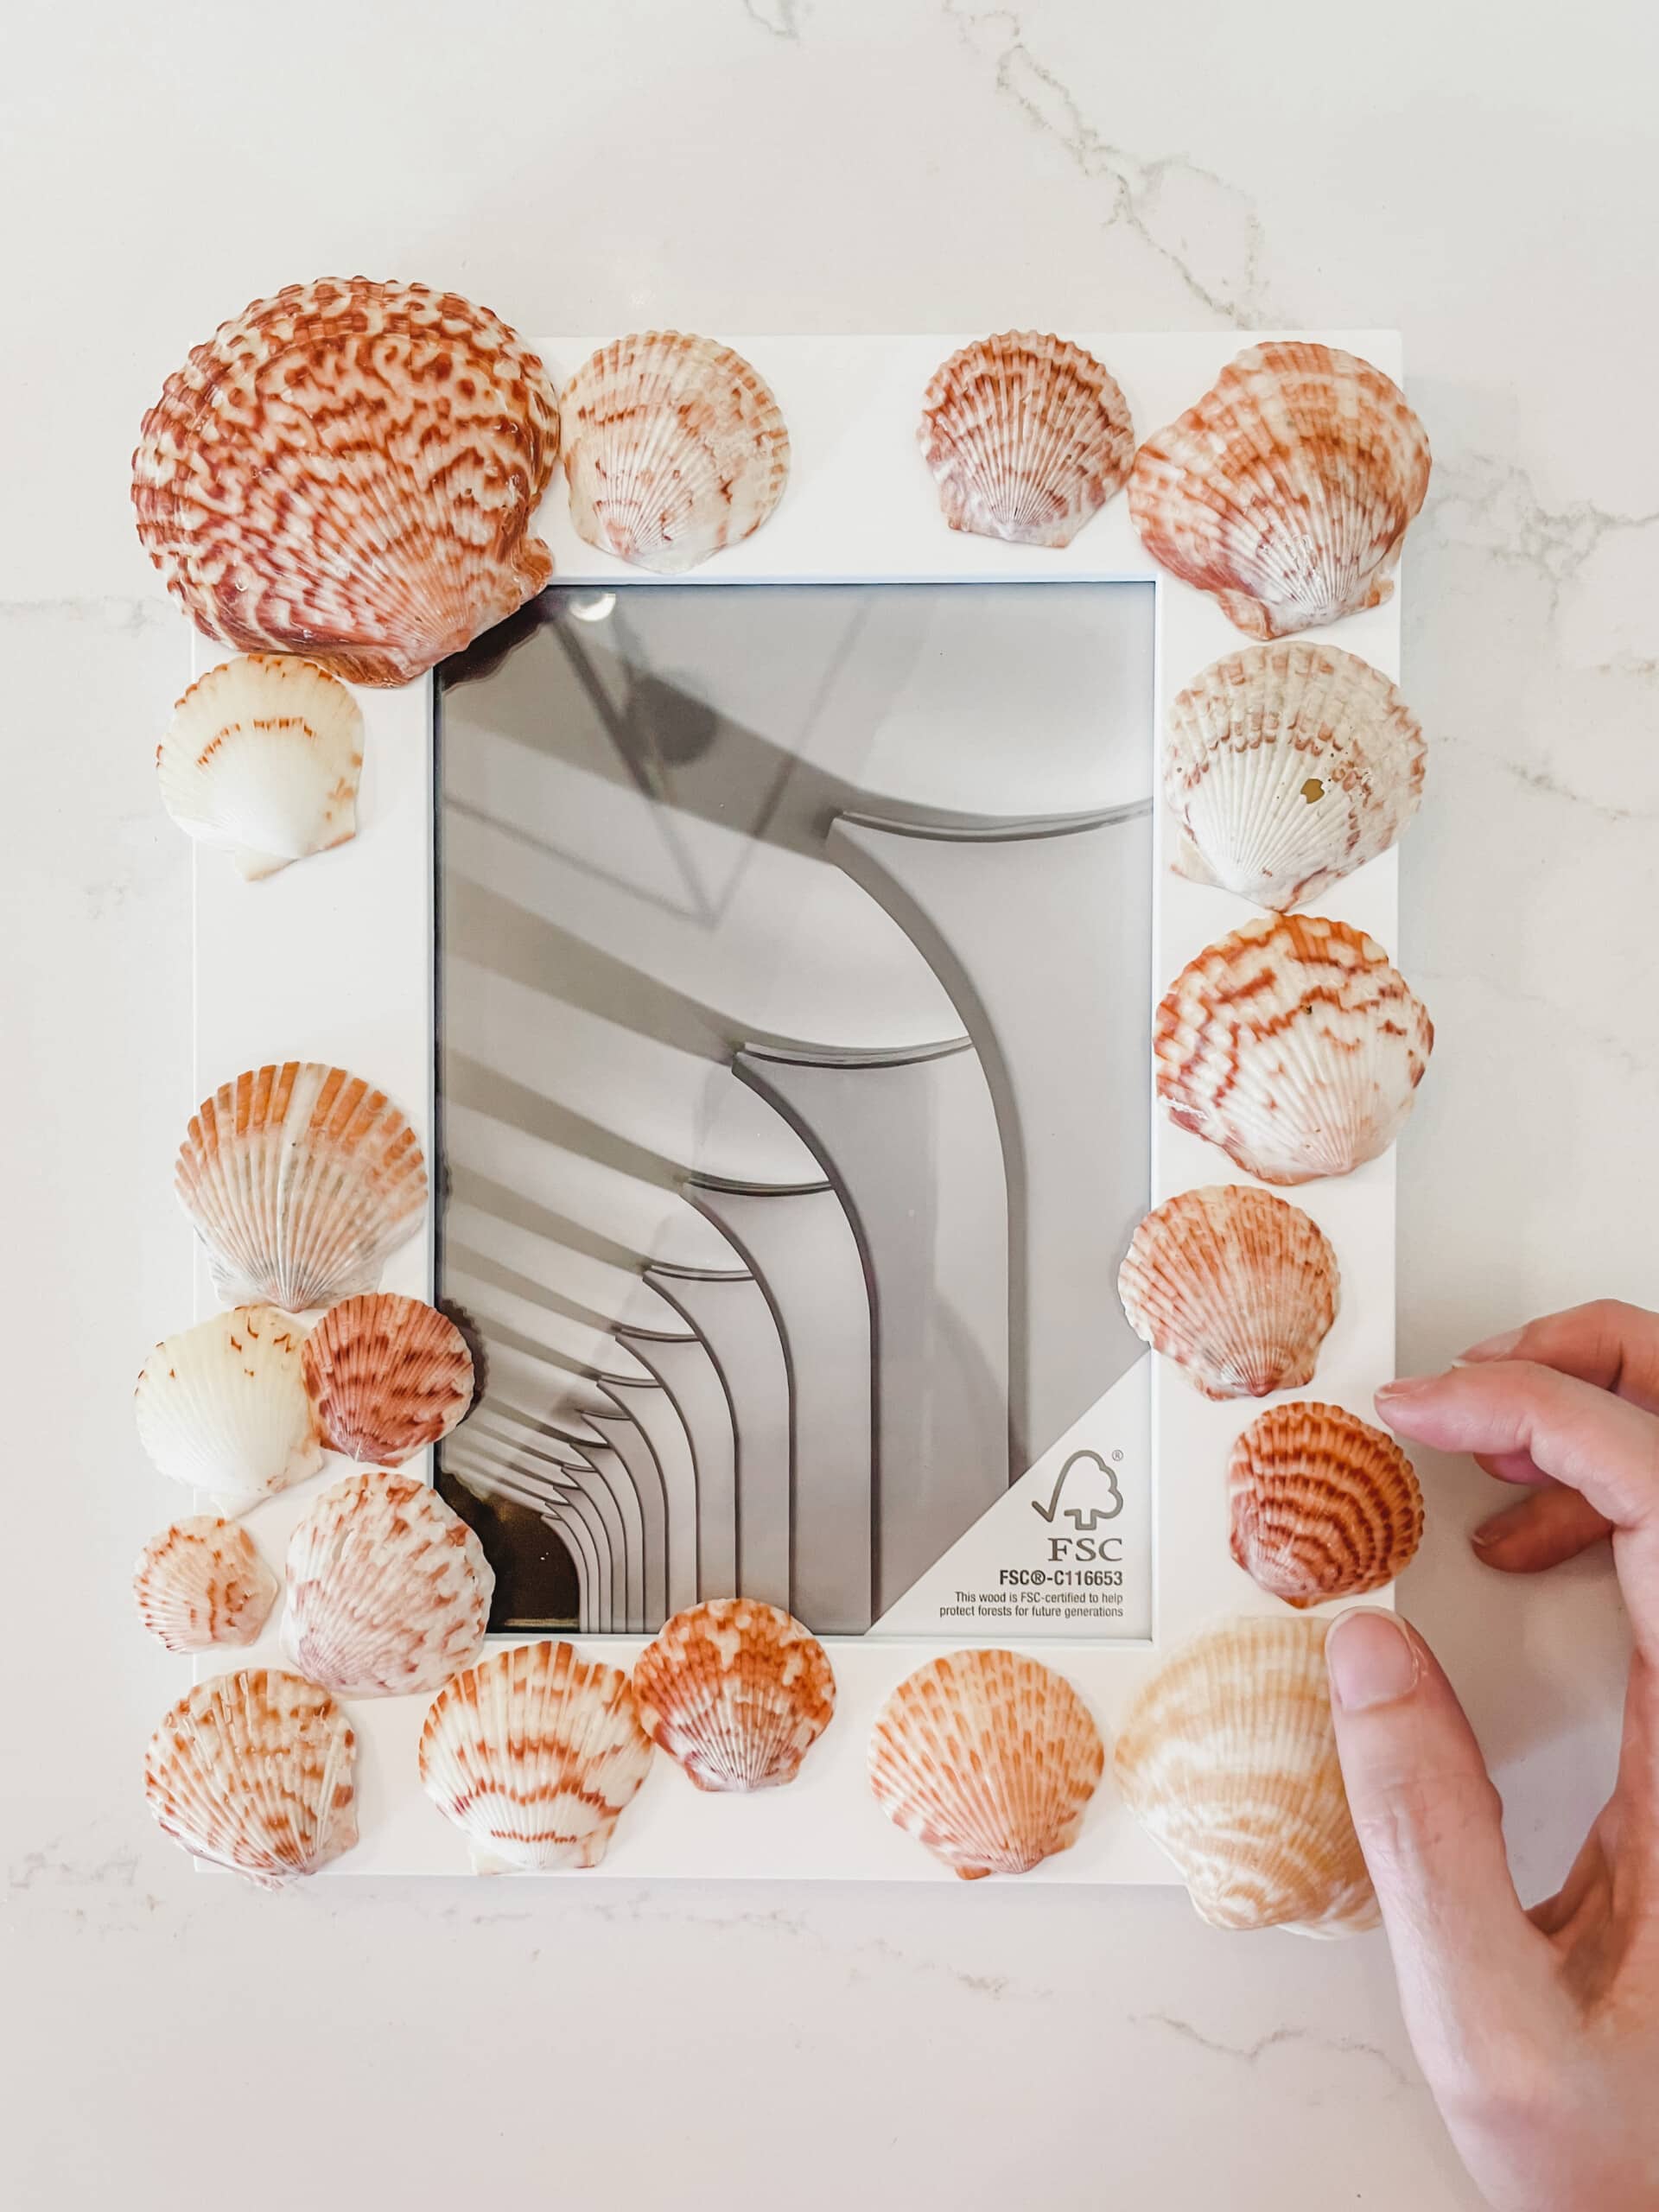
Once you have an idea of your layout, you can begin gluing your main shells. Flip over the shell and apply a small amount of glue on the edges that will touch the frame. Hold it down for a few seconds to make sure that it sticks and stays on the frame.
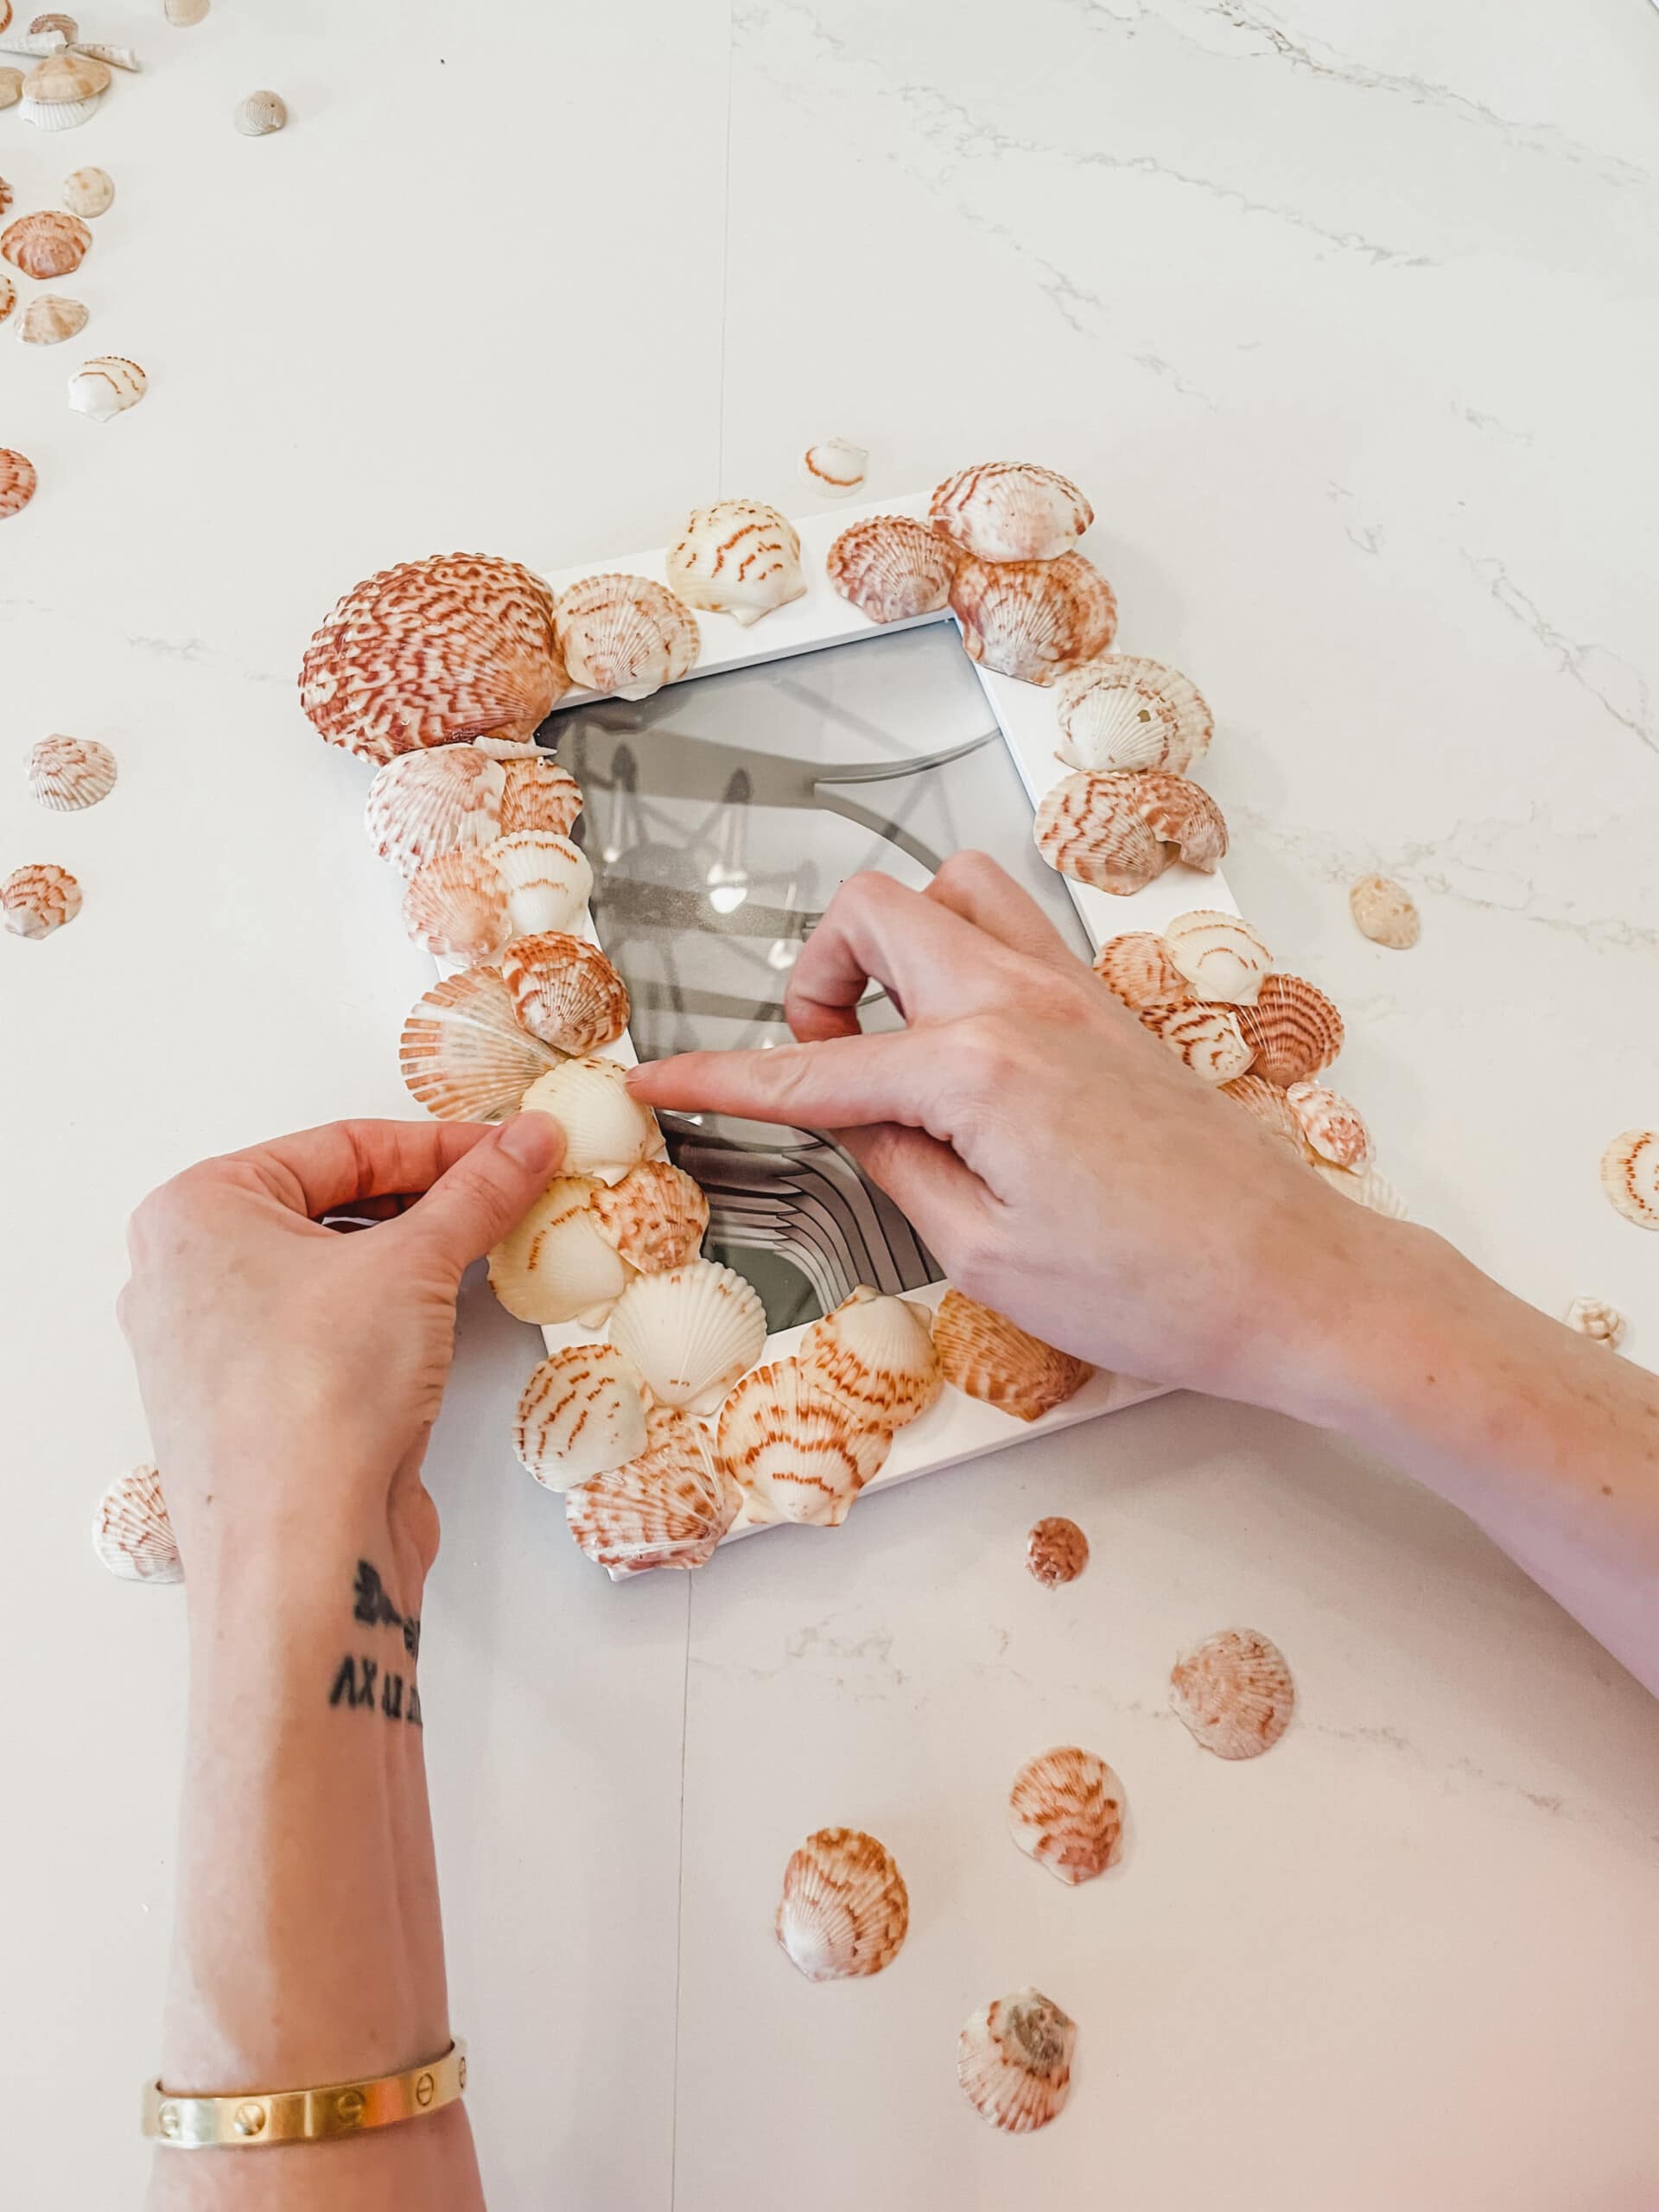
When choosing shells, it’s okay if some of the shells are chipped or have cracks because you will layer other shells over them. This will help fill out your frame entirely for a more complete and professional quality look.
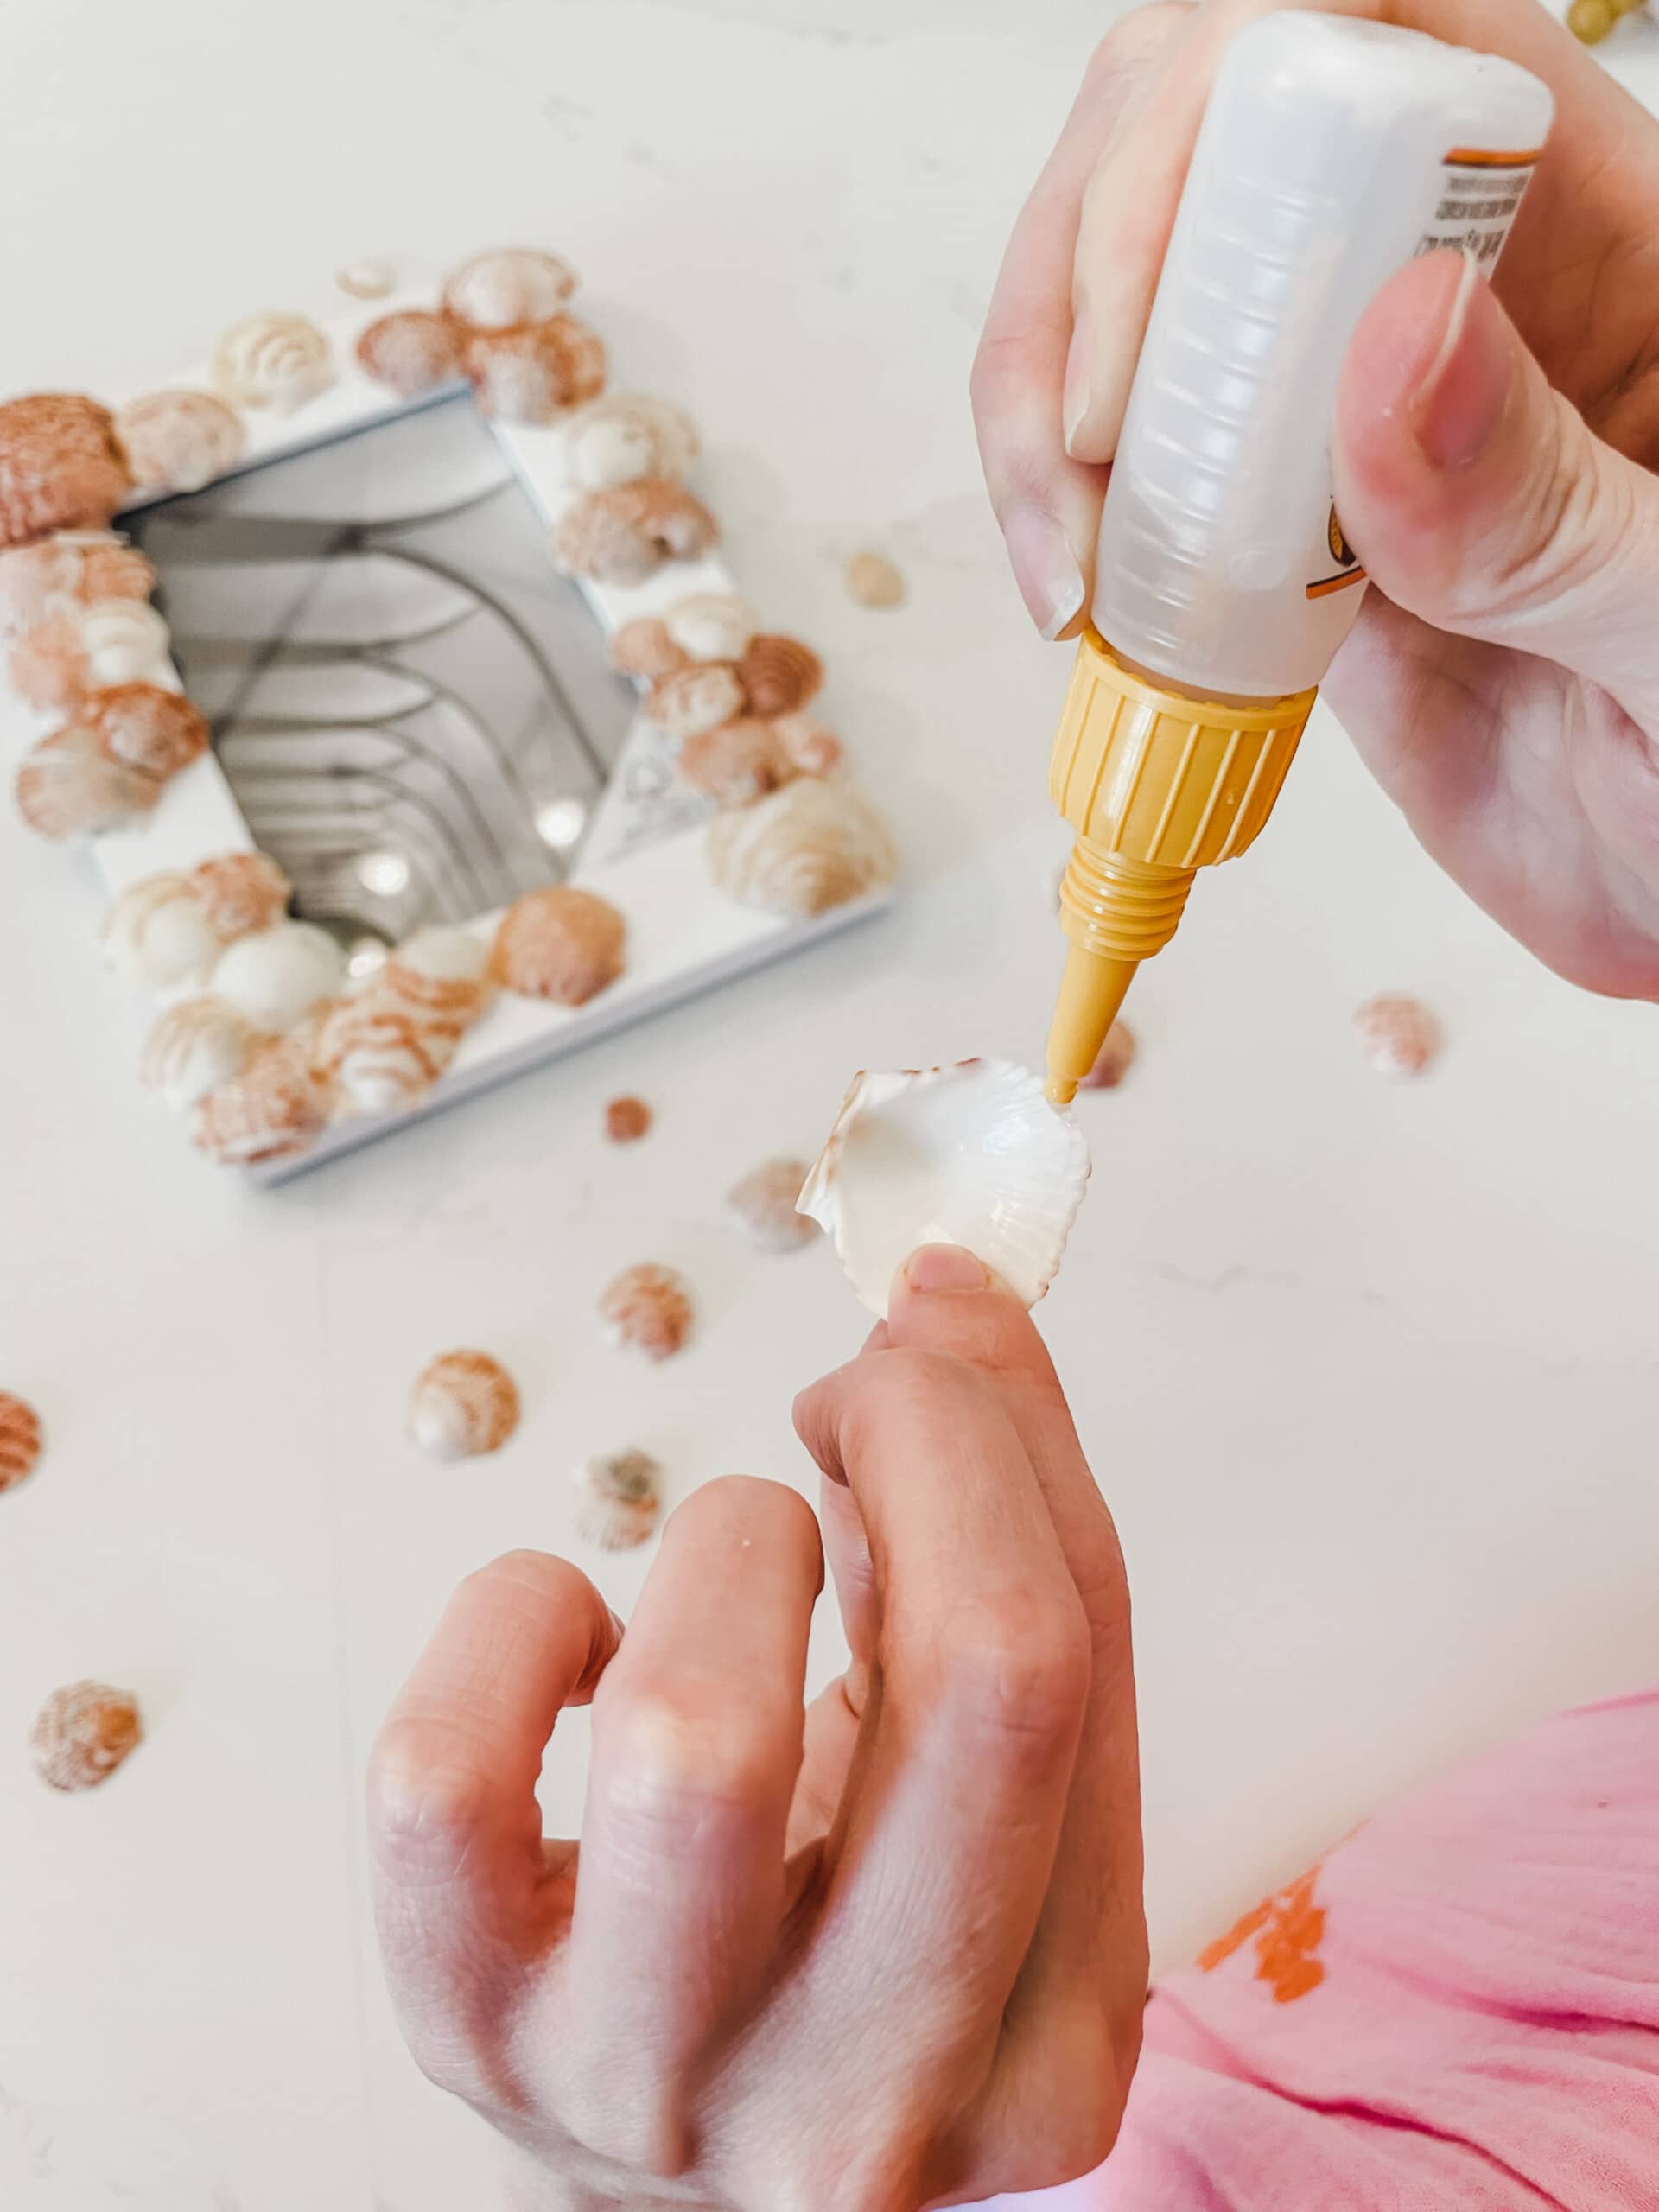
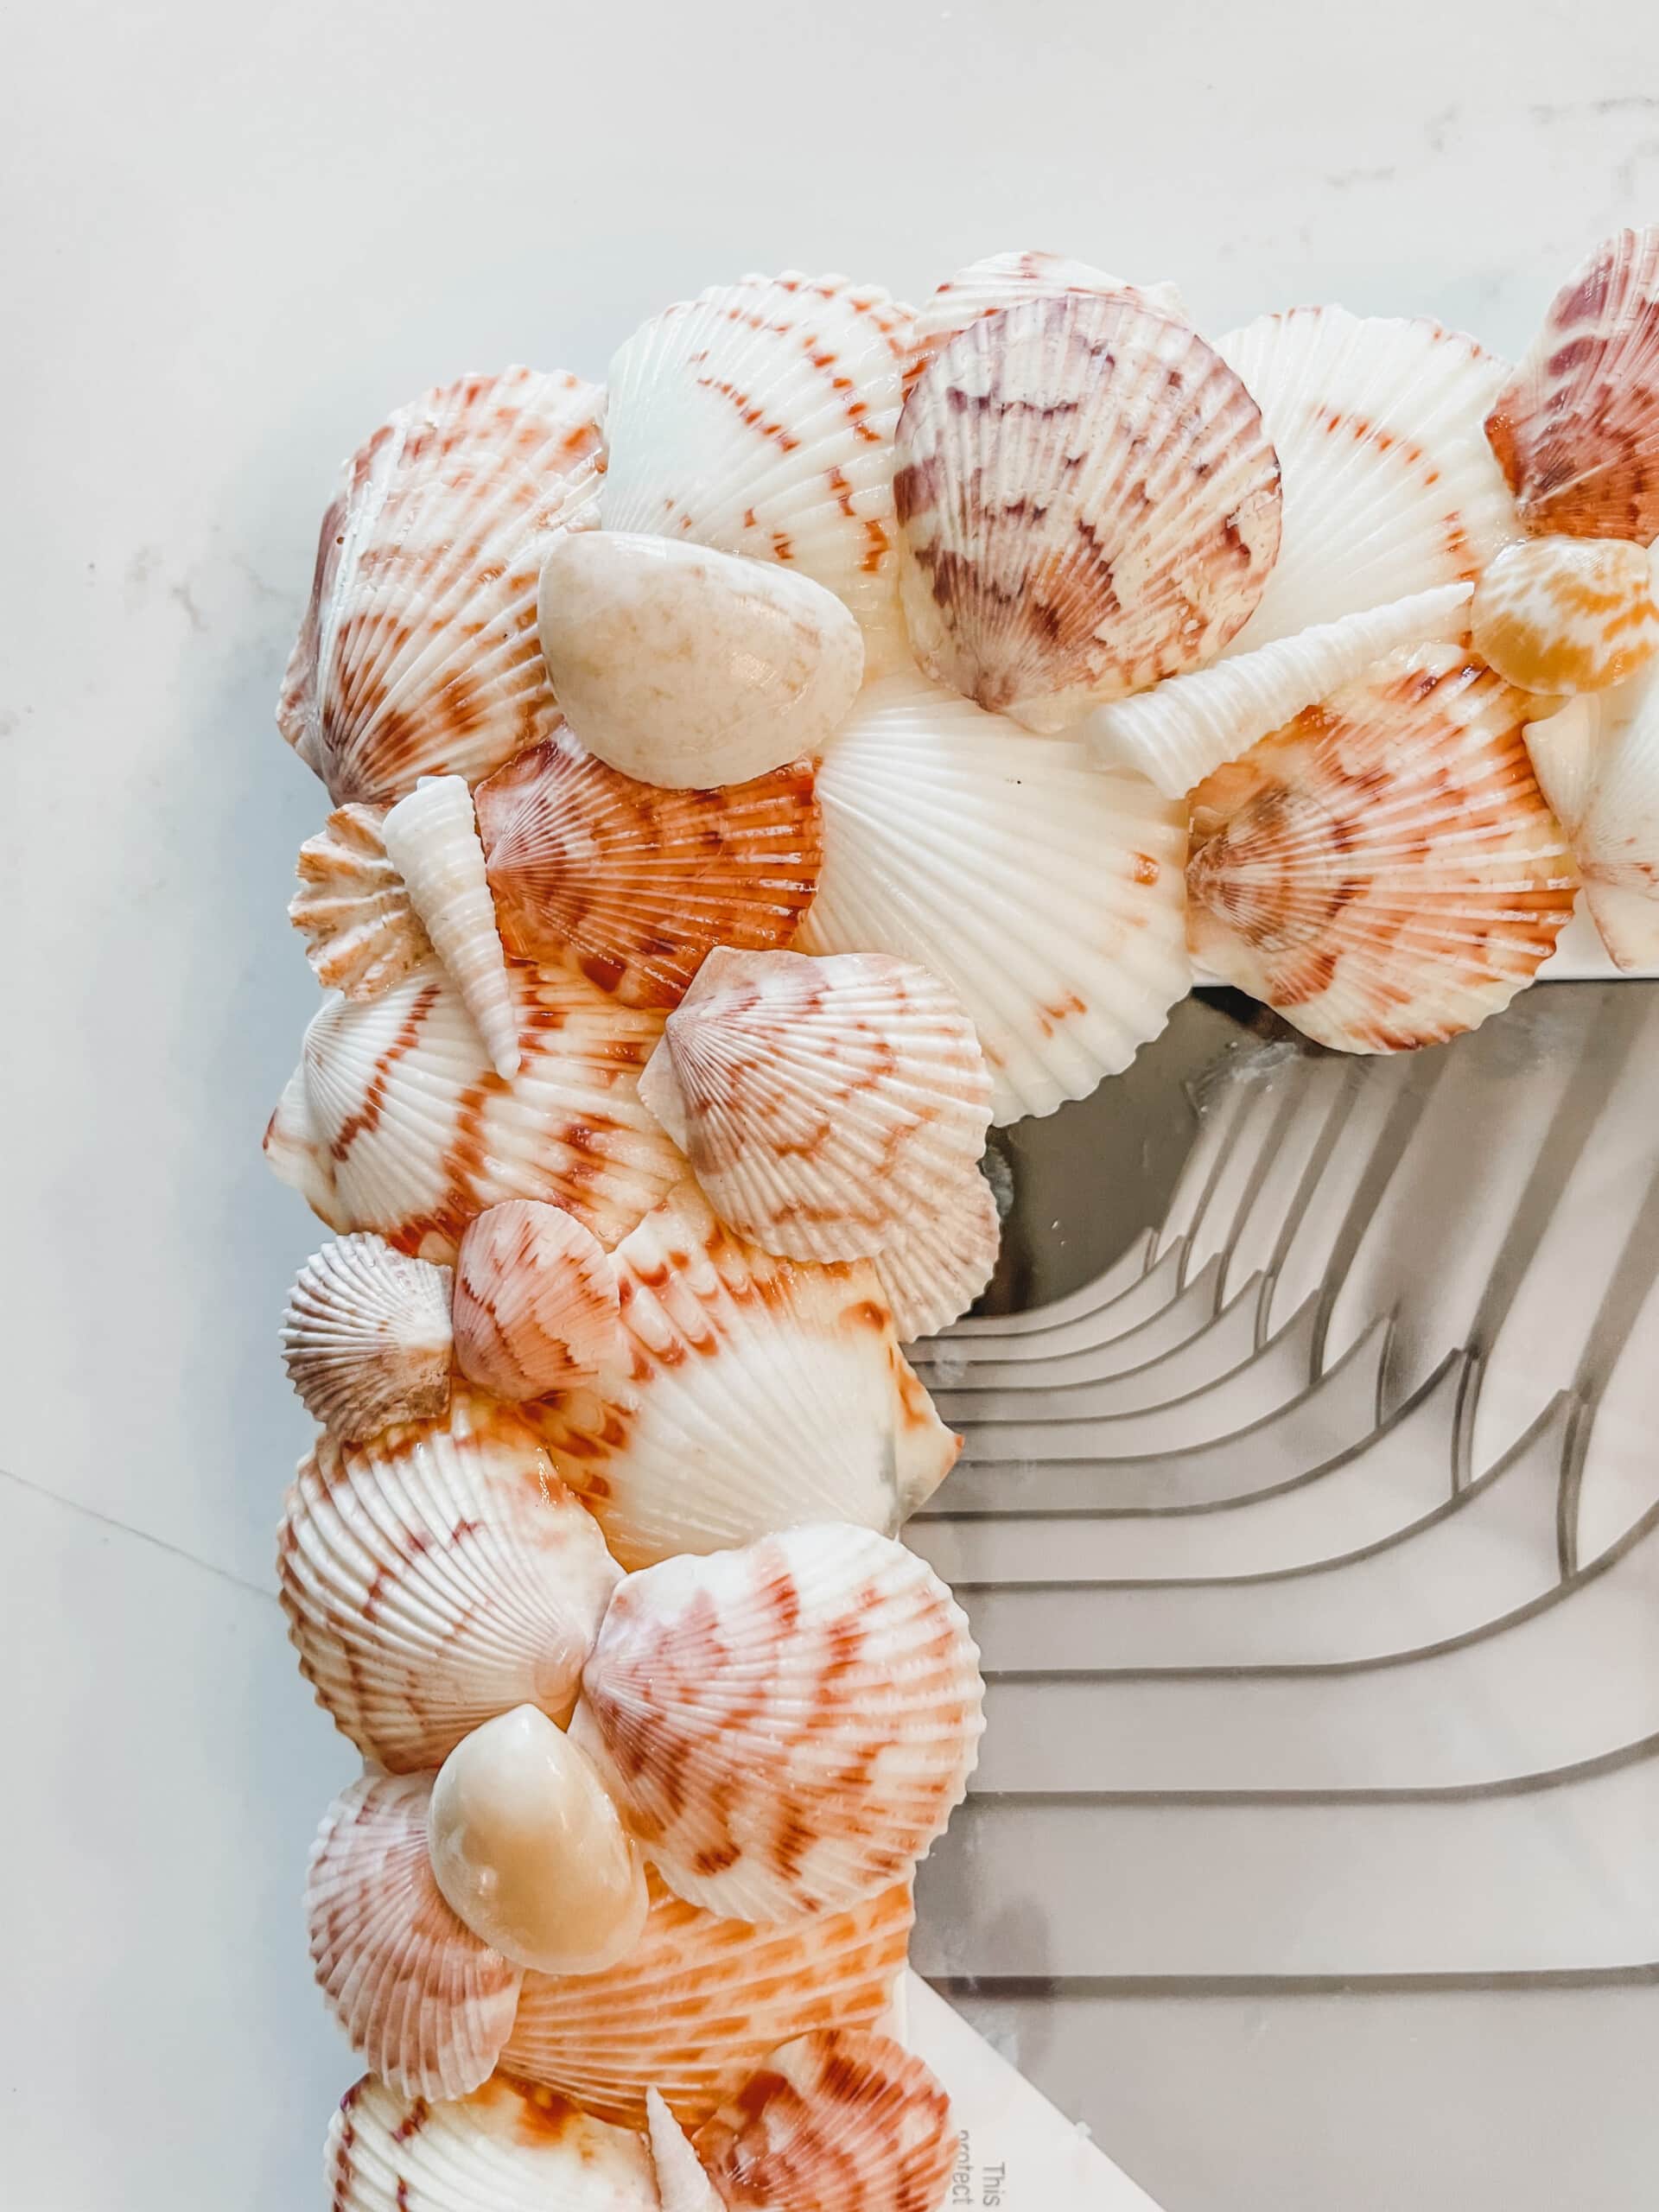
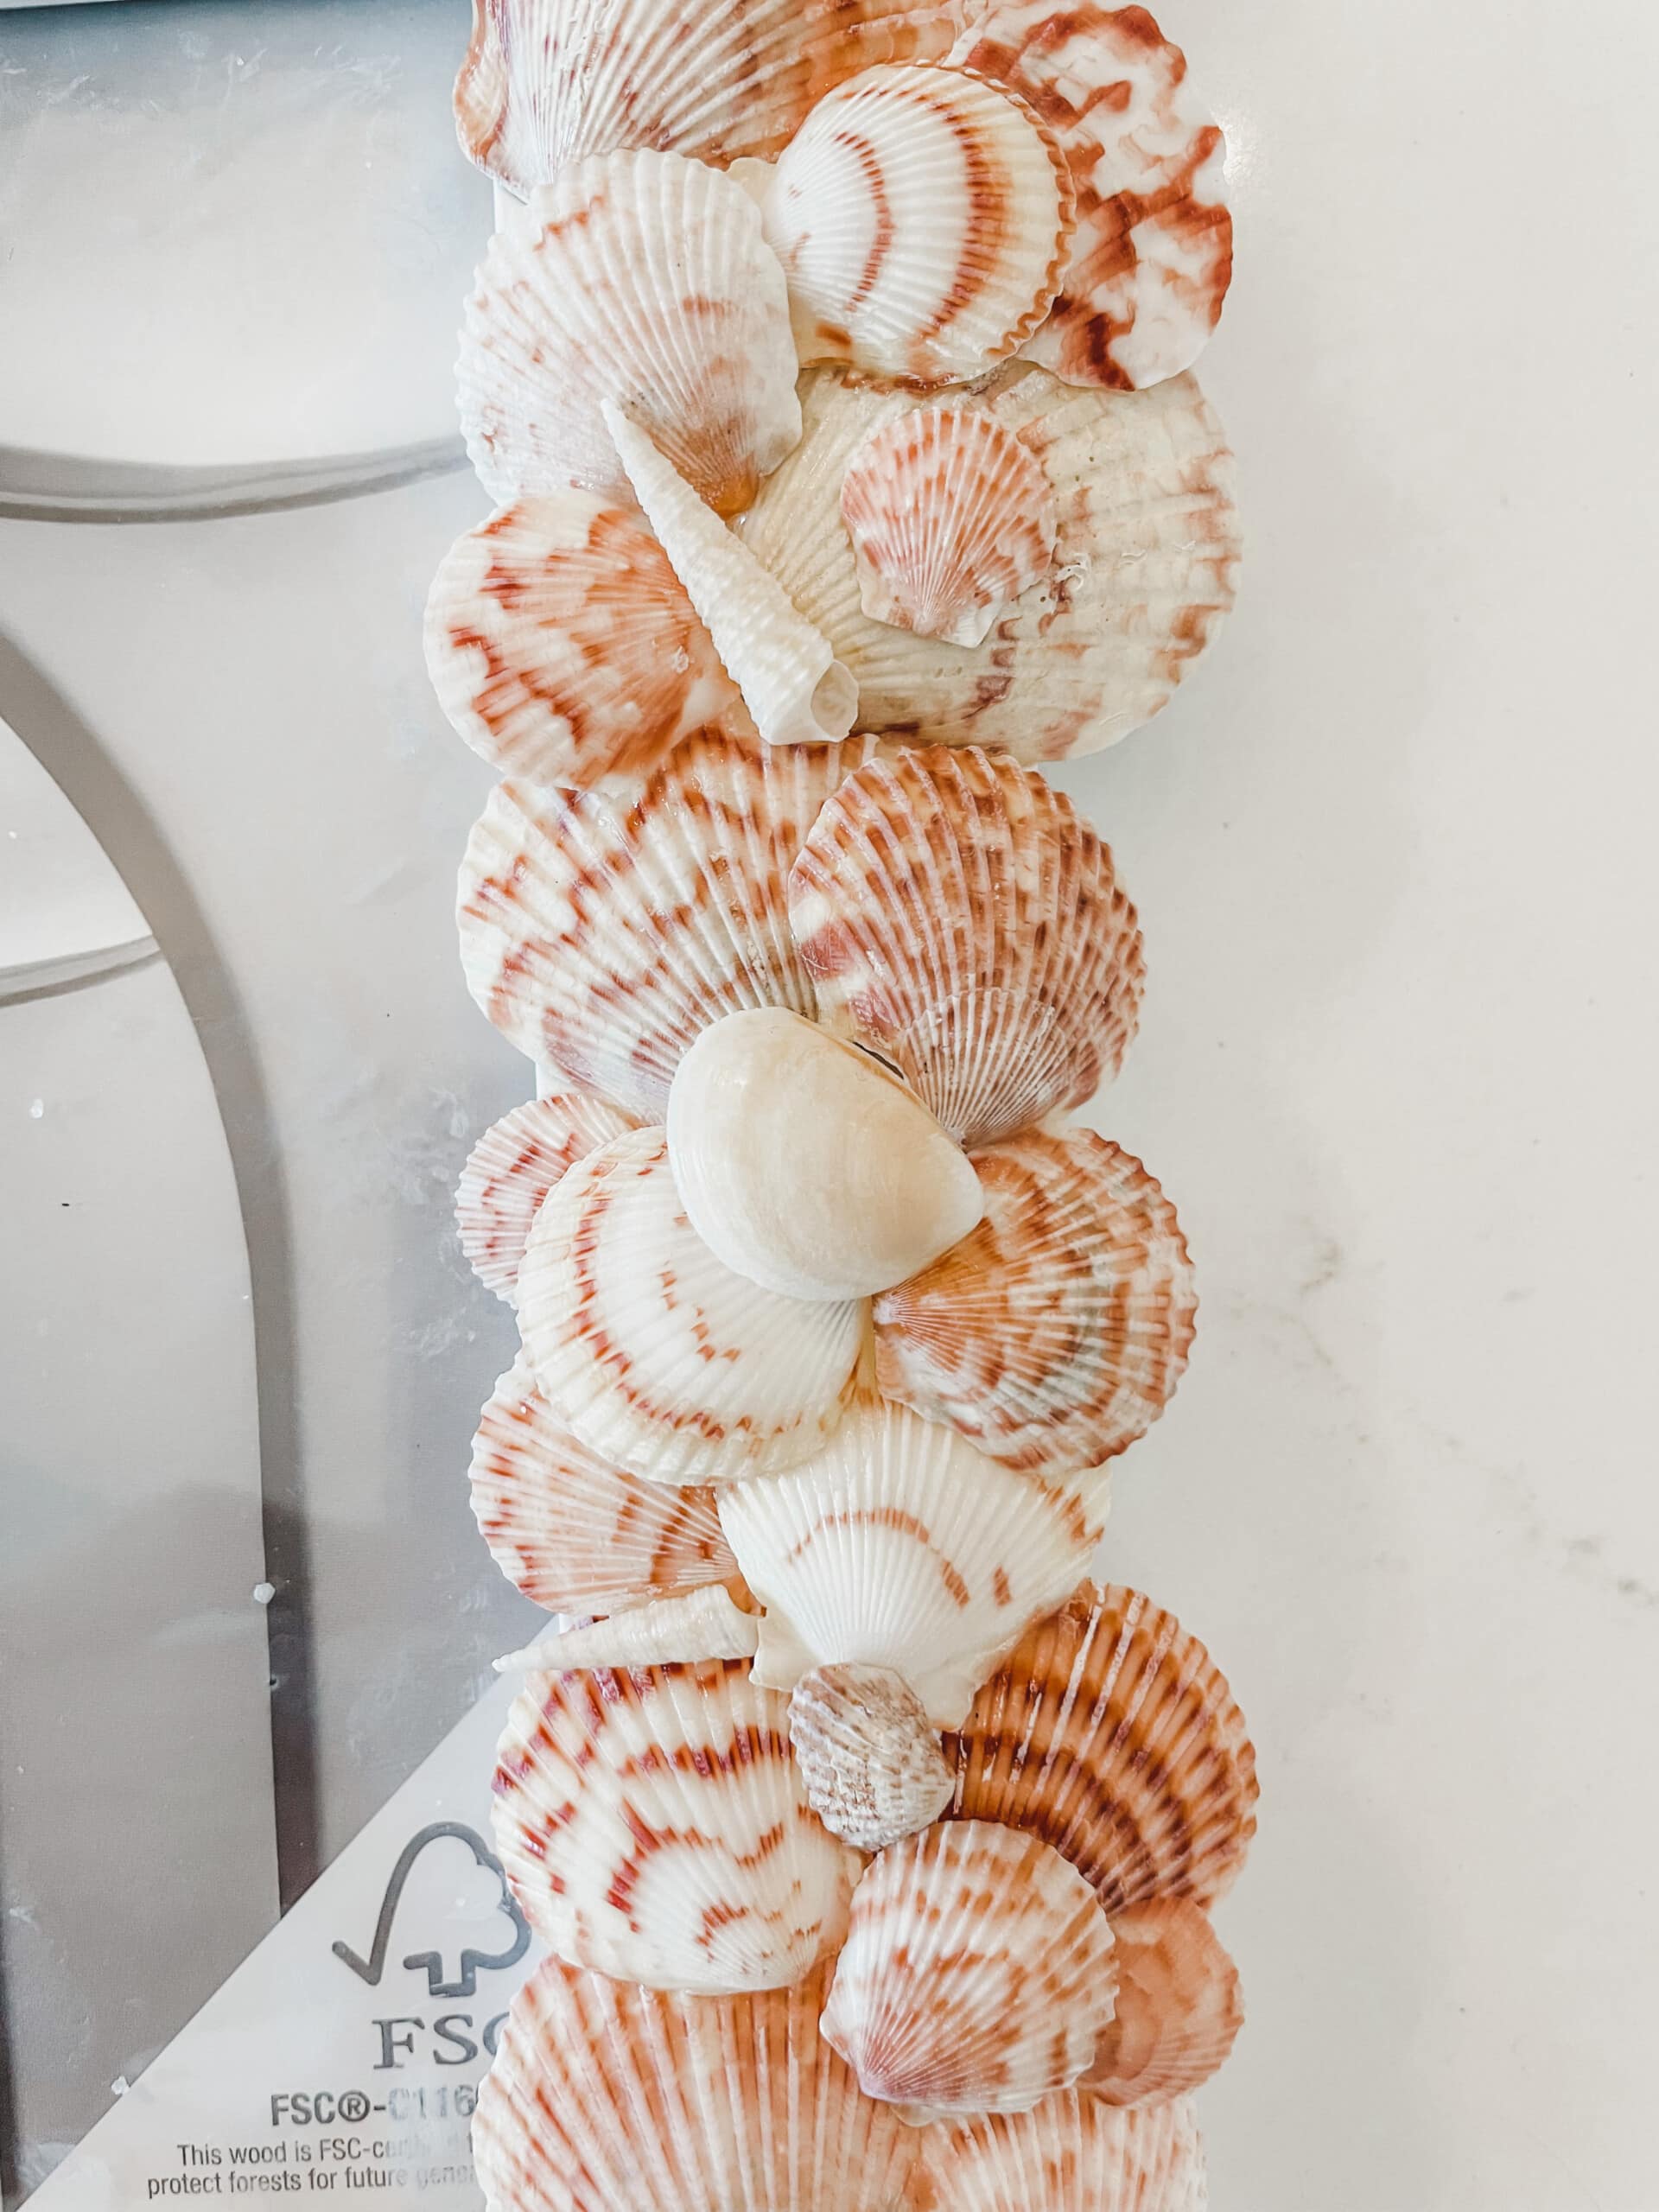
Layer
When your main shells are glued to your picture frame, begin layering smaller seashells to fill in the cracks.
Soon your frame will be filled with your beautiful seashells! Your guests are sure to comment on your embellished new frame.
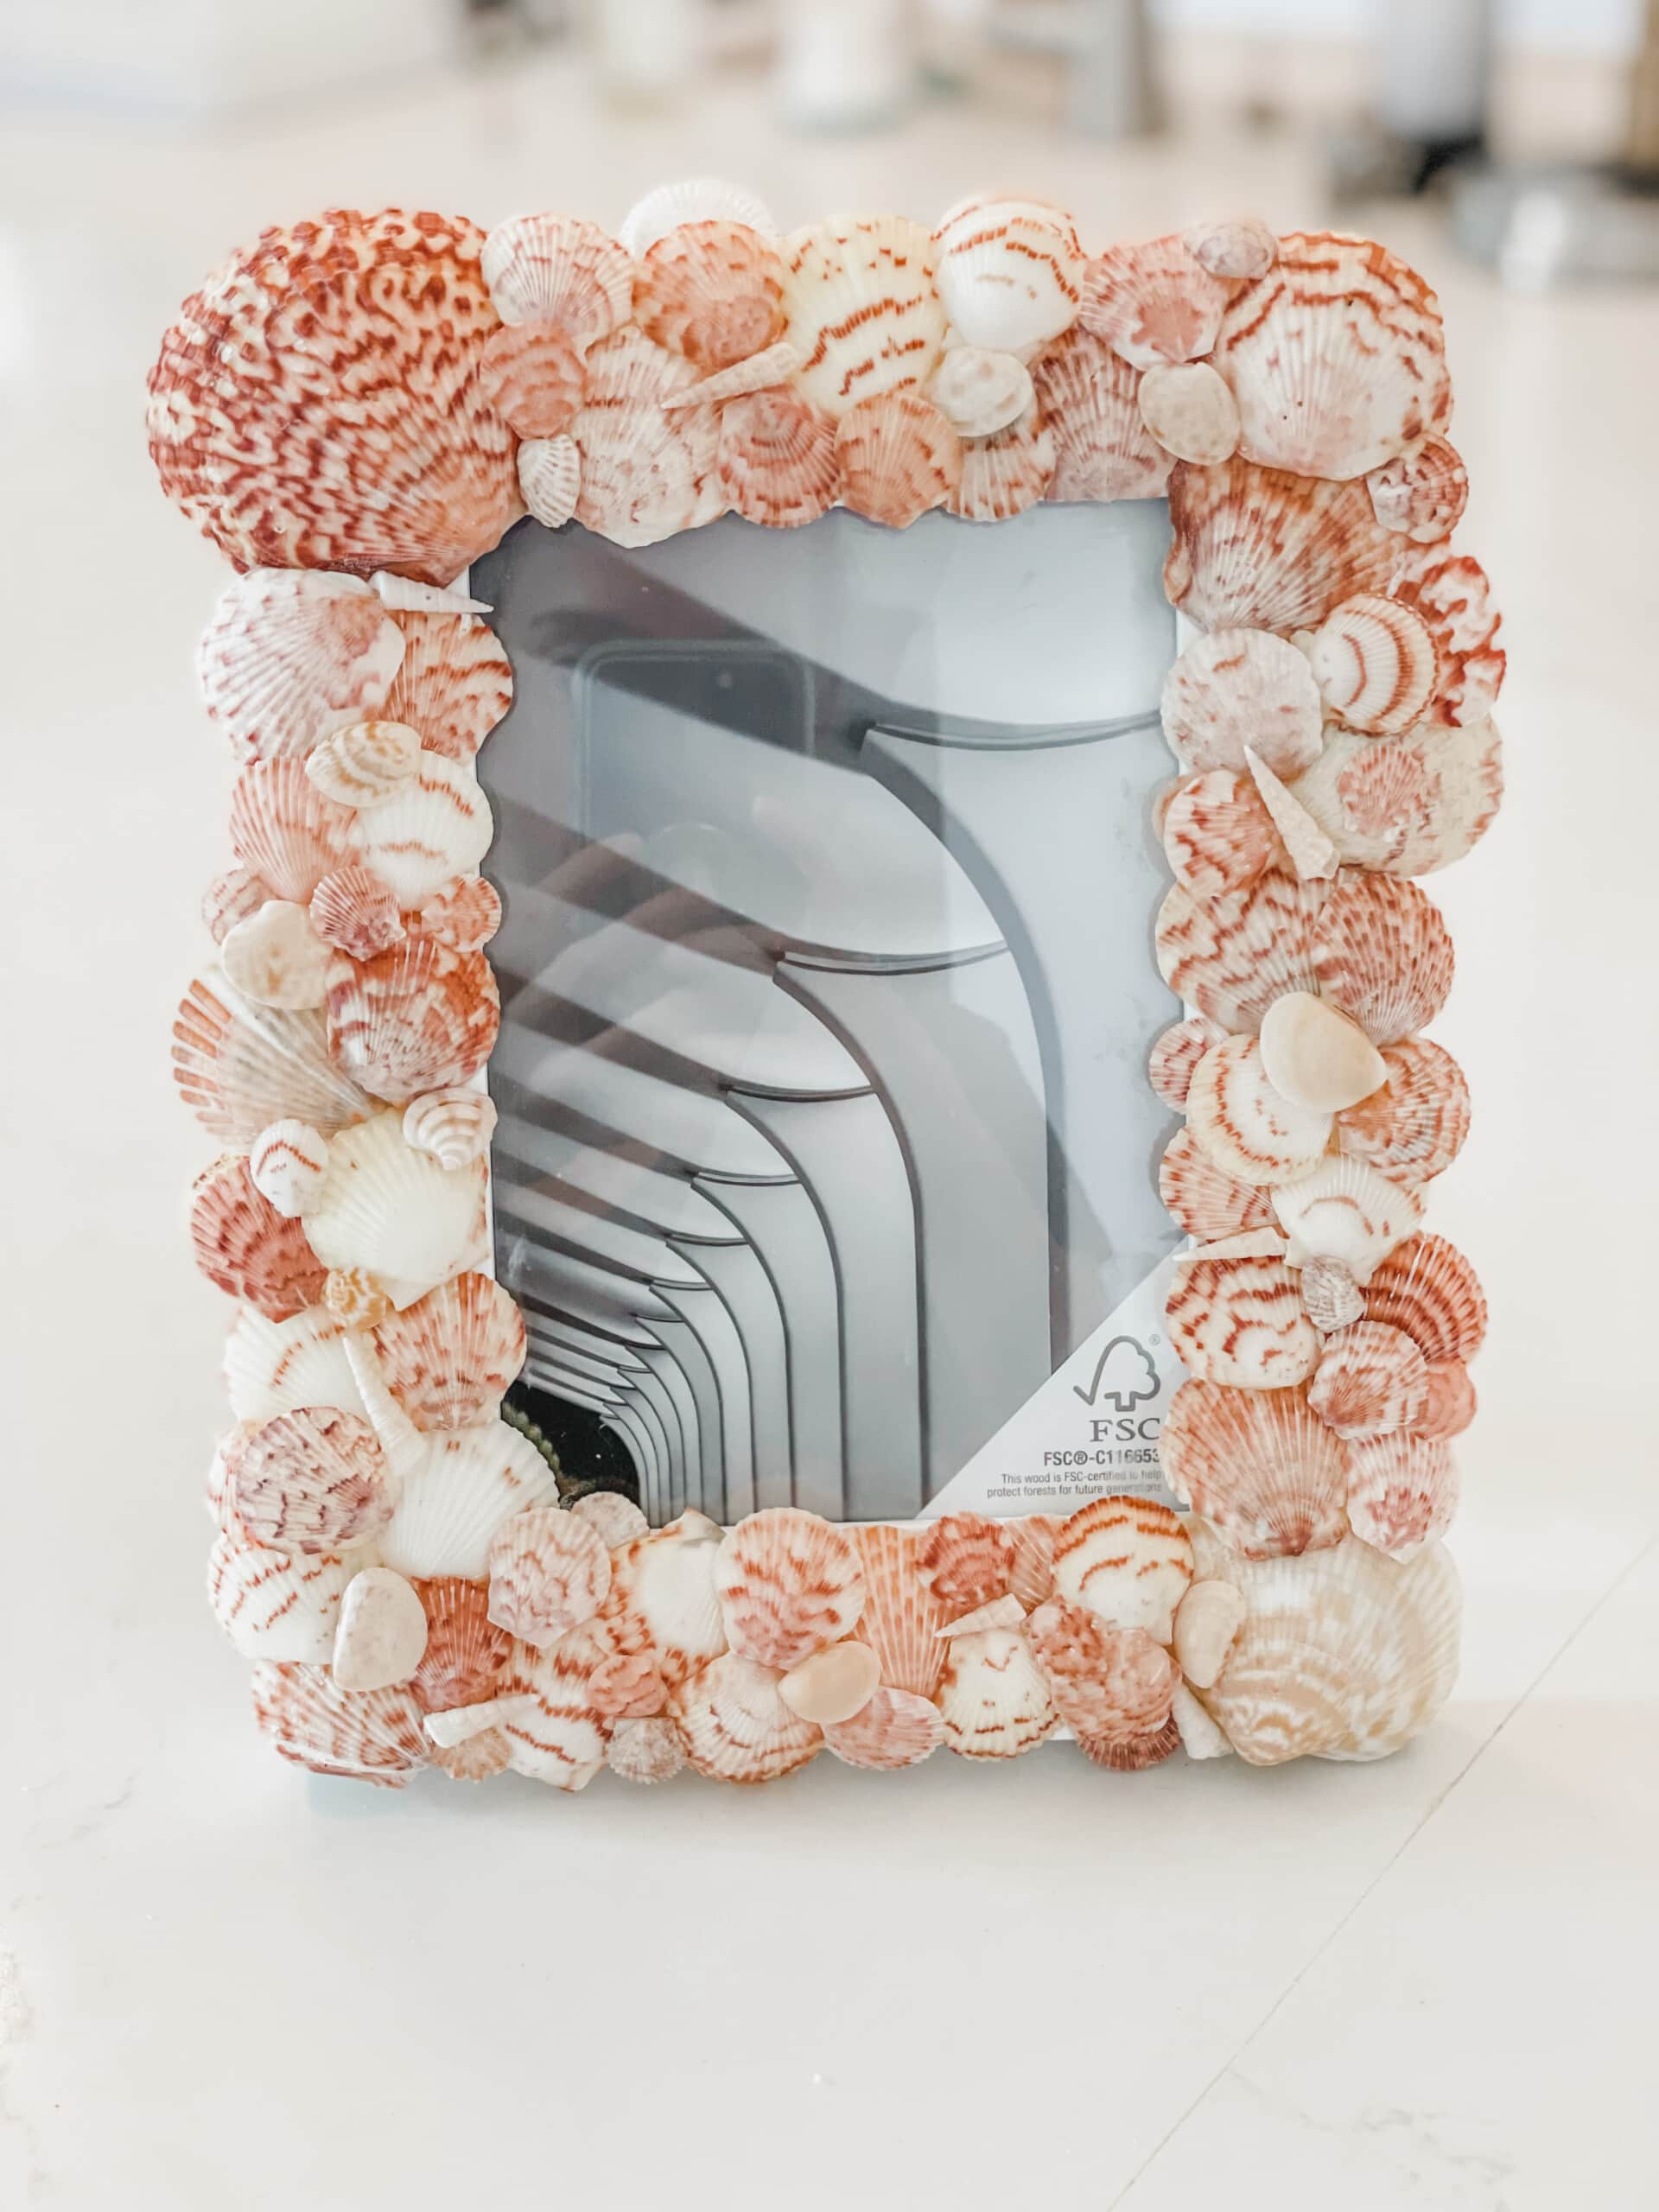
It makes for a gorgeous and memorable piece in any home. It also is a perfect gift to make and give to a family member or friend. So the next time you go on a beach, remember to save your favorite shells so you can make your own DIY shell frame!