


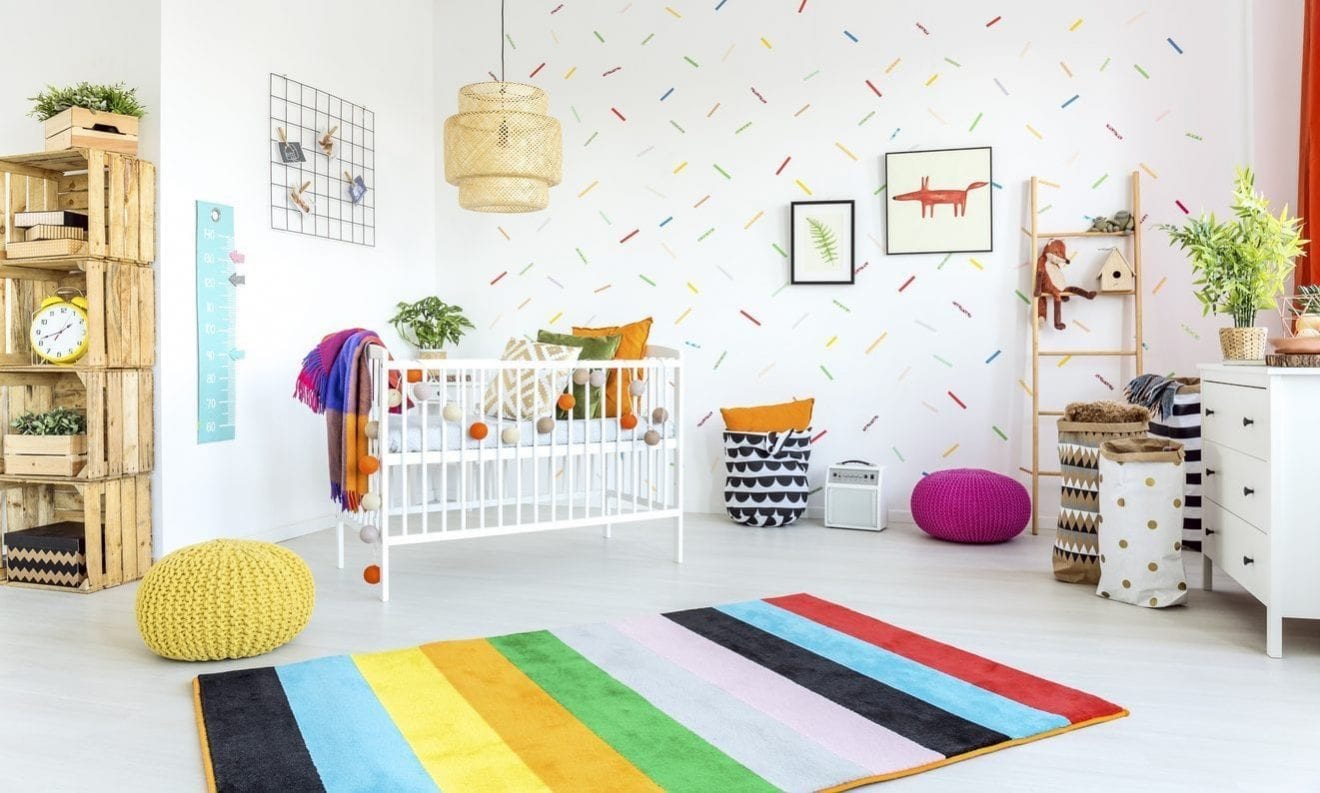
Decorating your little one’s room is such a rewarding experience. They will be so appreciative of all the time and attention to detail that was put into making their space perfect for their individual likes and style. Decorating projects of this sort don’t have to break the bank; there are so many amazing DIY ideas for decorating your kid’s room. Also, it’s been said that DIY projects are incredibly beneficial and good for you.
DIY Wall Stencils
There’s no need to shell out the big bucks for those stick-on vinyl wall decorations when you can make your own right at home. For this project, you will need:
- Painters Tape
- Acrylic or Interior Wall Paint
- Sponge Paintbrush
- Cardboard (cereal boxes are great for this!)
- Your Own Stencil Image
Choose an image that you know will appeal to your child, such as hearts, stars or flowers. You can draw this image onto a piece of paper or print out a picture off the internet. The steps are super easy:
- Trace your chosen image onto the cardboard and cut it out.
- Use painters tape to attach your DIY stencil to the wall.
- Pour a little bit of paint into a shallow dish.
- Using the sponge paintbrush, dab paint all around the stencil.
- Remove the stencil and move it to where you want the next design to appear.
- Repeat.
Create a Place for Their Masterpieces
When thinking of ideas for decorating your kid’s room, why not use their own artwork to decorate their special space? It’s easy to make a cute piece of wall decor that will allow them to hang and change out what they choose to display. If they are learning how to draw, paint or write, they will be proud to hang up their hard work for all to see.
You will need:
- A Piece of Scrap Wood (about 2 feet long)
- Paint
- 6 Clothespins
- Hot Glue Gun & Hot Glue Sticks
To put this project together, all you need to do is sand and paint the wood. You can always paint your child’s name or a design (or use stickers) on the top section of the wood. Next, evenly space out the clothespins and hot glue them so they are facing down. It can be cute to add washi tape or paint the exposed surface of the clothespins. Hang the board on the wall and it’s ready to hold your child’s latest creation.
Use a DIY Projector
A fabulous way to add decor and provide a nightlight is to create a DIY projector! For this project, you will need:
- Clear Plastic (Re-Use a Takeout Food Container)
- Sharpie Markers
- Flashlight
- Solid, Light Colored Wall
Have your kids draw on the plastic with the markers. They can write their name, draw their pet or make shapes. Turn off the lights, hold up the plastic and shine the flashlight through the plastic. Their image will be projected onto the wall and they will love seeing their artwork come alive!
Spice Rack Bookshelves
Using wall space for storage is a fabulous way to save floor space for playing and toys. It can be easy to become overwhelmed by books, so this cute little DIY project takes care of that problem for your little one!
You will need:
- Wooden Spice Racks
- Wall Mounting Hardware
- Paint, Stickers, Etc.
This DIY is so gratifying because it can be completed so quickly. If you choose to embellish your wooden spice racks, do so before hanging them on the wall. They can easily be painted, have stickers applied or words written on them with markers. Once they are looking fabulous, install the wall mounting hardware and hang them on the wall.
It’s advisable to screw them into studs or use strong wall anchors since they will be supporting the weight of several books. Consider hanging them at a height that your little one can easily reach to encourage them to help themselves to their favorite books whenever the mood strikes.
Easy Message Board
What you will need for this project is:
- 8×10 Picture Frame
- Scrapbook Paper
- Dry Erase Marker with Attached Eraser
- Ribbon
- Hot Glue Gun & Hot Glue Sticks
The beauty of this idea is its simplicity! Simply insert a piece of scrapbook paper into your frame. Tie one end of the ribbon to the dry erase marker and hot glue the other end of the ribbon to the frame. Now you have an adorable message board where you can write notes to each other!
When it comes to ideas for decorating your kid’s room, doing it yourself is the best! It is the ideal way to save money, get creative and create a truly unique and personal space for your son or daughter. As they grow, and their interests change, having some of these DIY skills under your belt will definitely come in handy. Whenever it’s time for some new decor in their room, you’ll know just what to do.