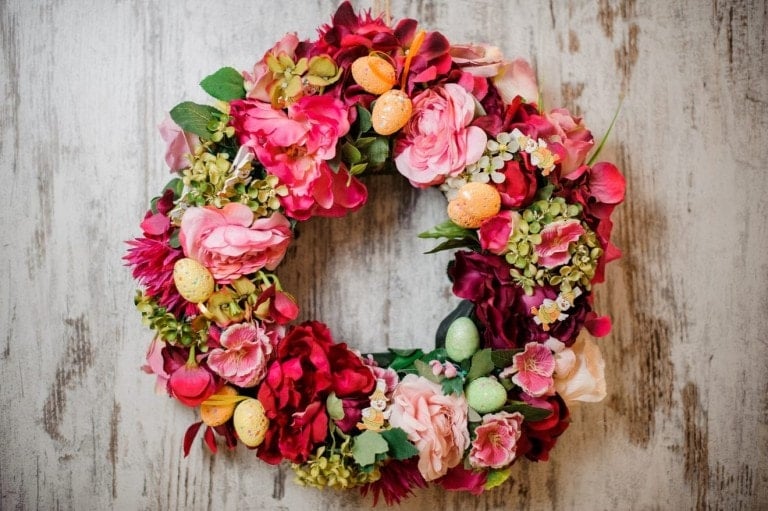


“If a year was tucked inside of a clock, then autumn would be the magic hour.” — Victoria Erickson
Ah, fall. The crisp, fresh air. The start of the school year. The feeling of “new beginnings” seems everpresent as the air cools in the evenings and the leaves experience a dazzling transformation outside our homes. Of all the seasons to celebrate, there is something extra magical about autumn. What better way to welcome the bridge between long, hot summer days and frigid winter nights than a front porch facelift? We love fall decor because there is so much variety depending on your style and what kind of a statement you want your house to make. Regardless of your budget, we’re offering our favorite fall wreaths that will bring a smile to your face every day you step onto your porch this fall.
20 Favorite Fall Wreaths
1. Pre-Lit Faux Harvest Pumpkin Wreath and Garland
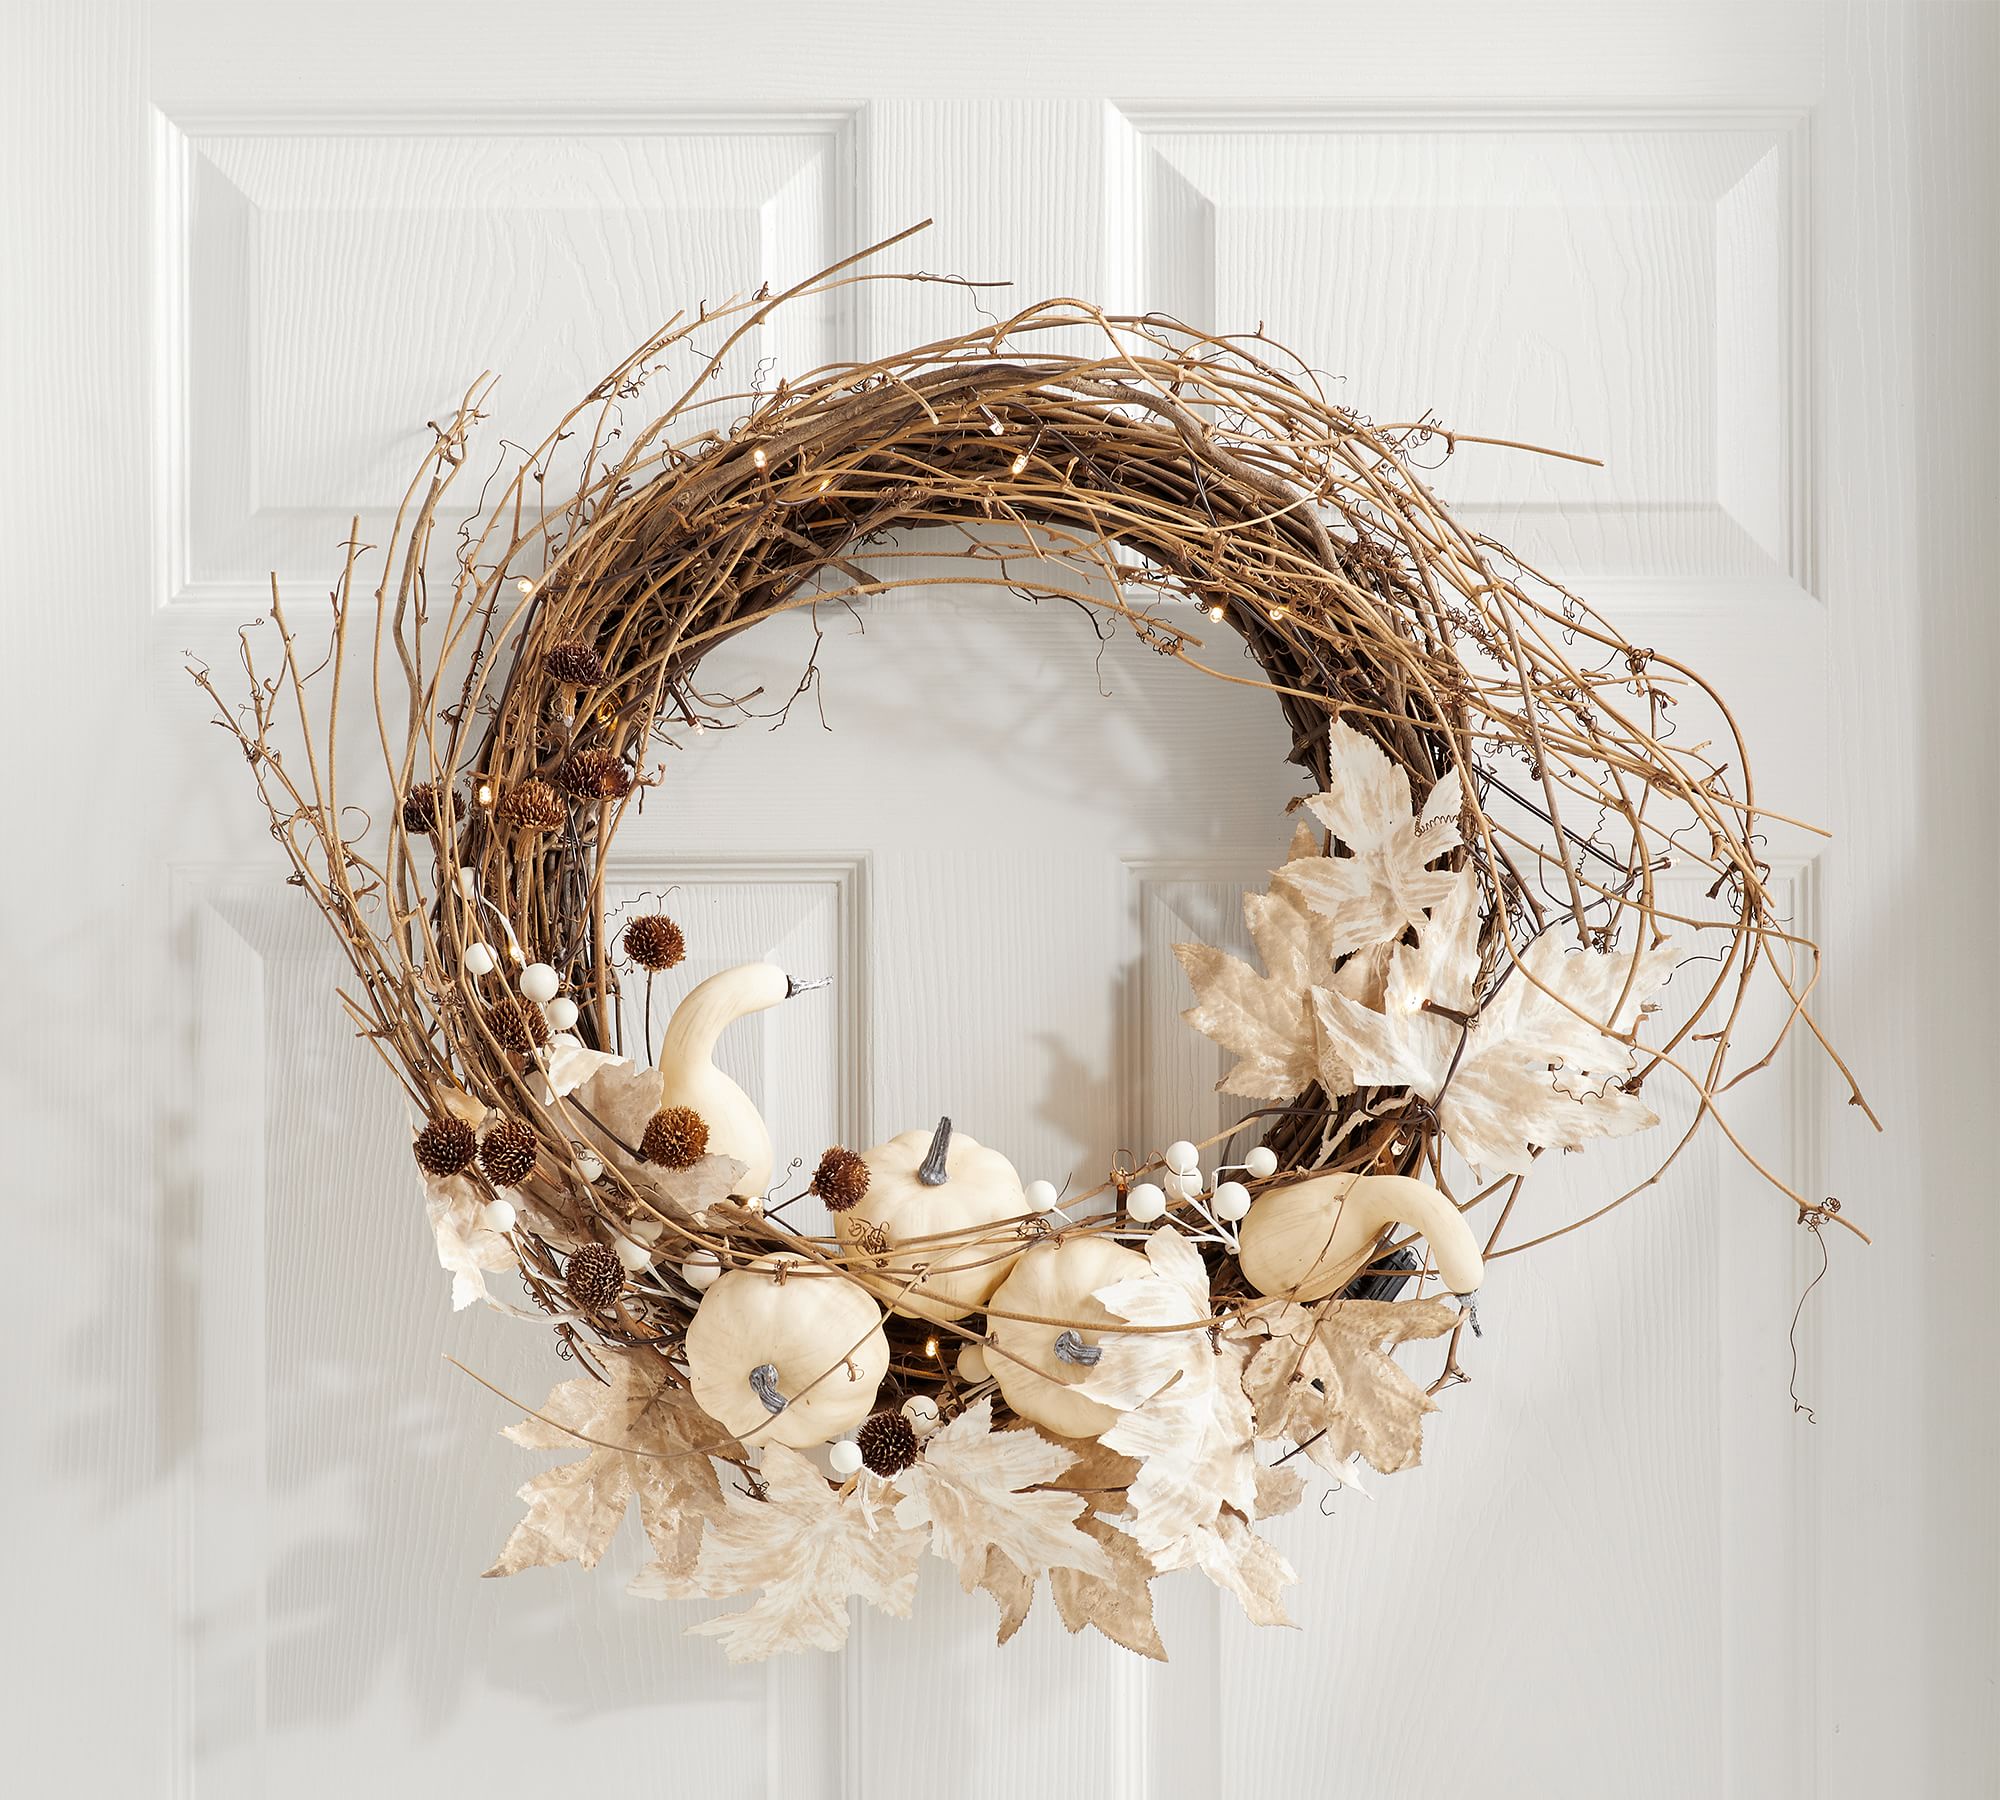
We love this contemporary twist on a fall classic featuring bright white mini pumpkins. The modern, dark-and-light contrast makes this wreath pop on front doors and shows fall festivity. It also lights up with 30 LED bulbs, making for a beautiful sight as the days get shorter.
2. Green Olive Wreath

Who says greenery goes away with fall? If classic autumn colors aren’t your thing, this timeless green olive wreath is impressive, natural-looking, and welcoming. Perfect for rustic farmhouse styles, olive leaves symbolize warmth, friendship, and peace for the season.
3. Faux Pomegranate and Pinecone Wreath

This wreath brings the look of outdoor autumn fruit, leaves, and seeds to life. It’s made of natural pine cones and has other sustainably sourced, upcycled materials, making it eco-friendly. This wreath is also backed with a loop for convenient hanging. Simple, elegant, and bright!
4. Faux Pumpkin Patch Wreath
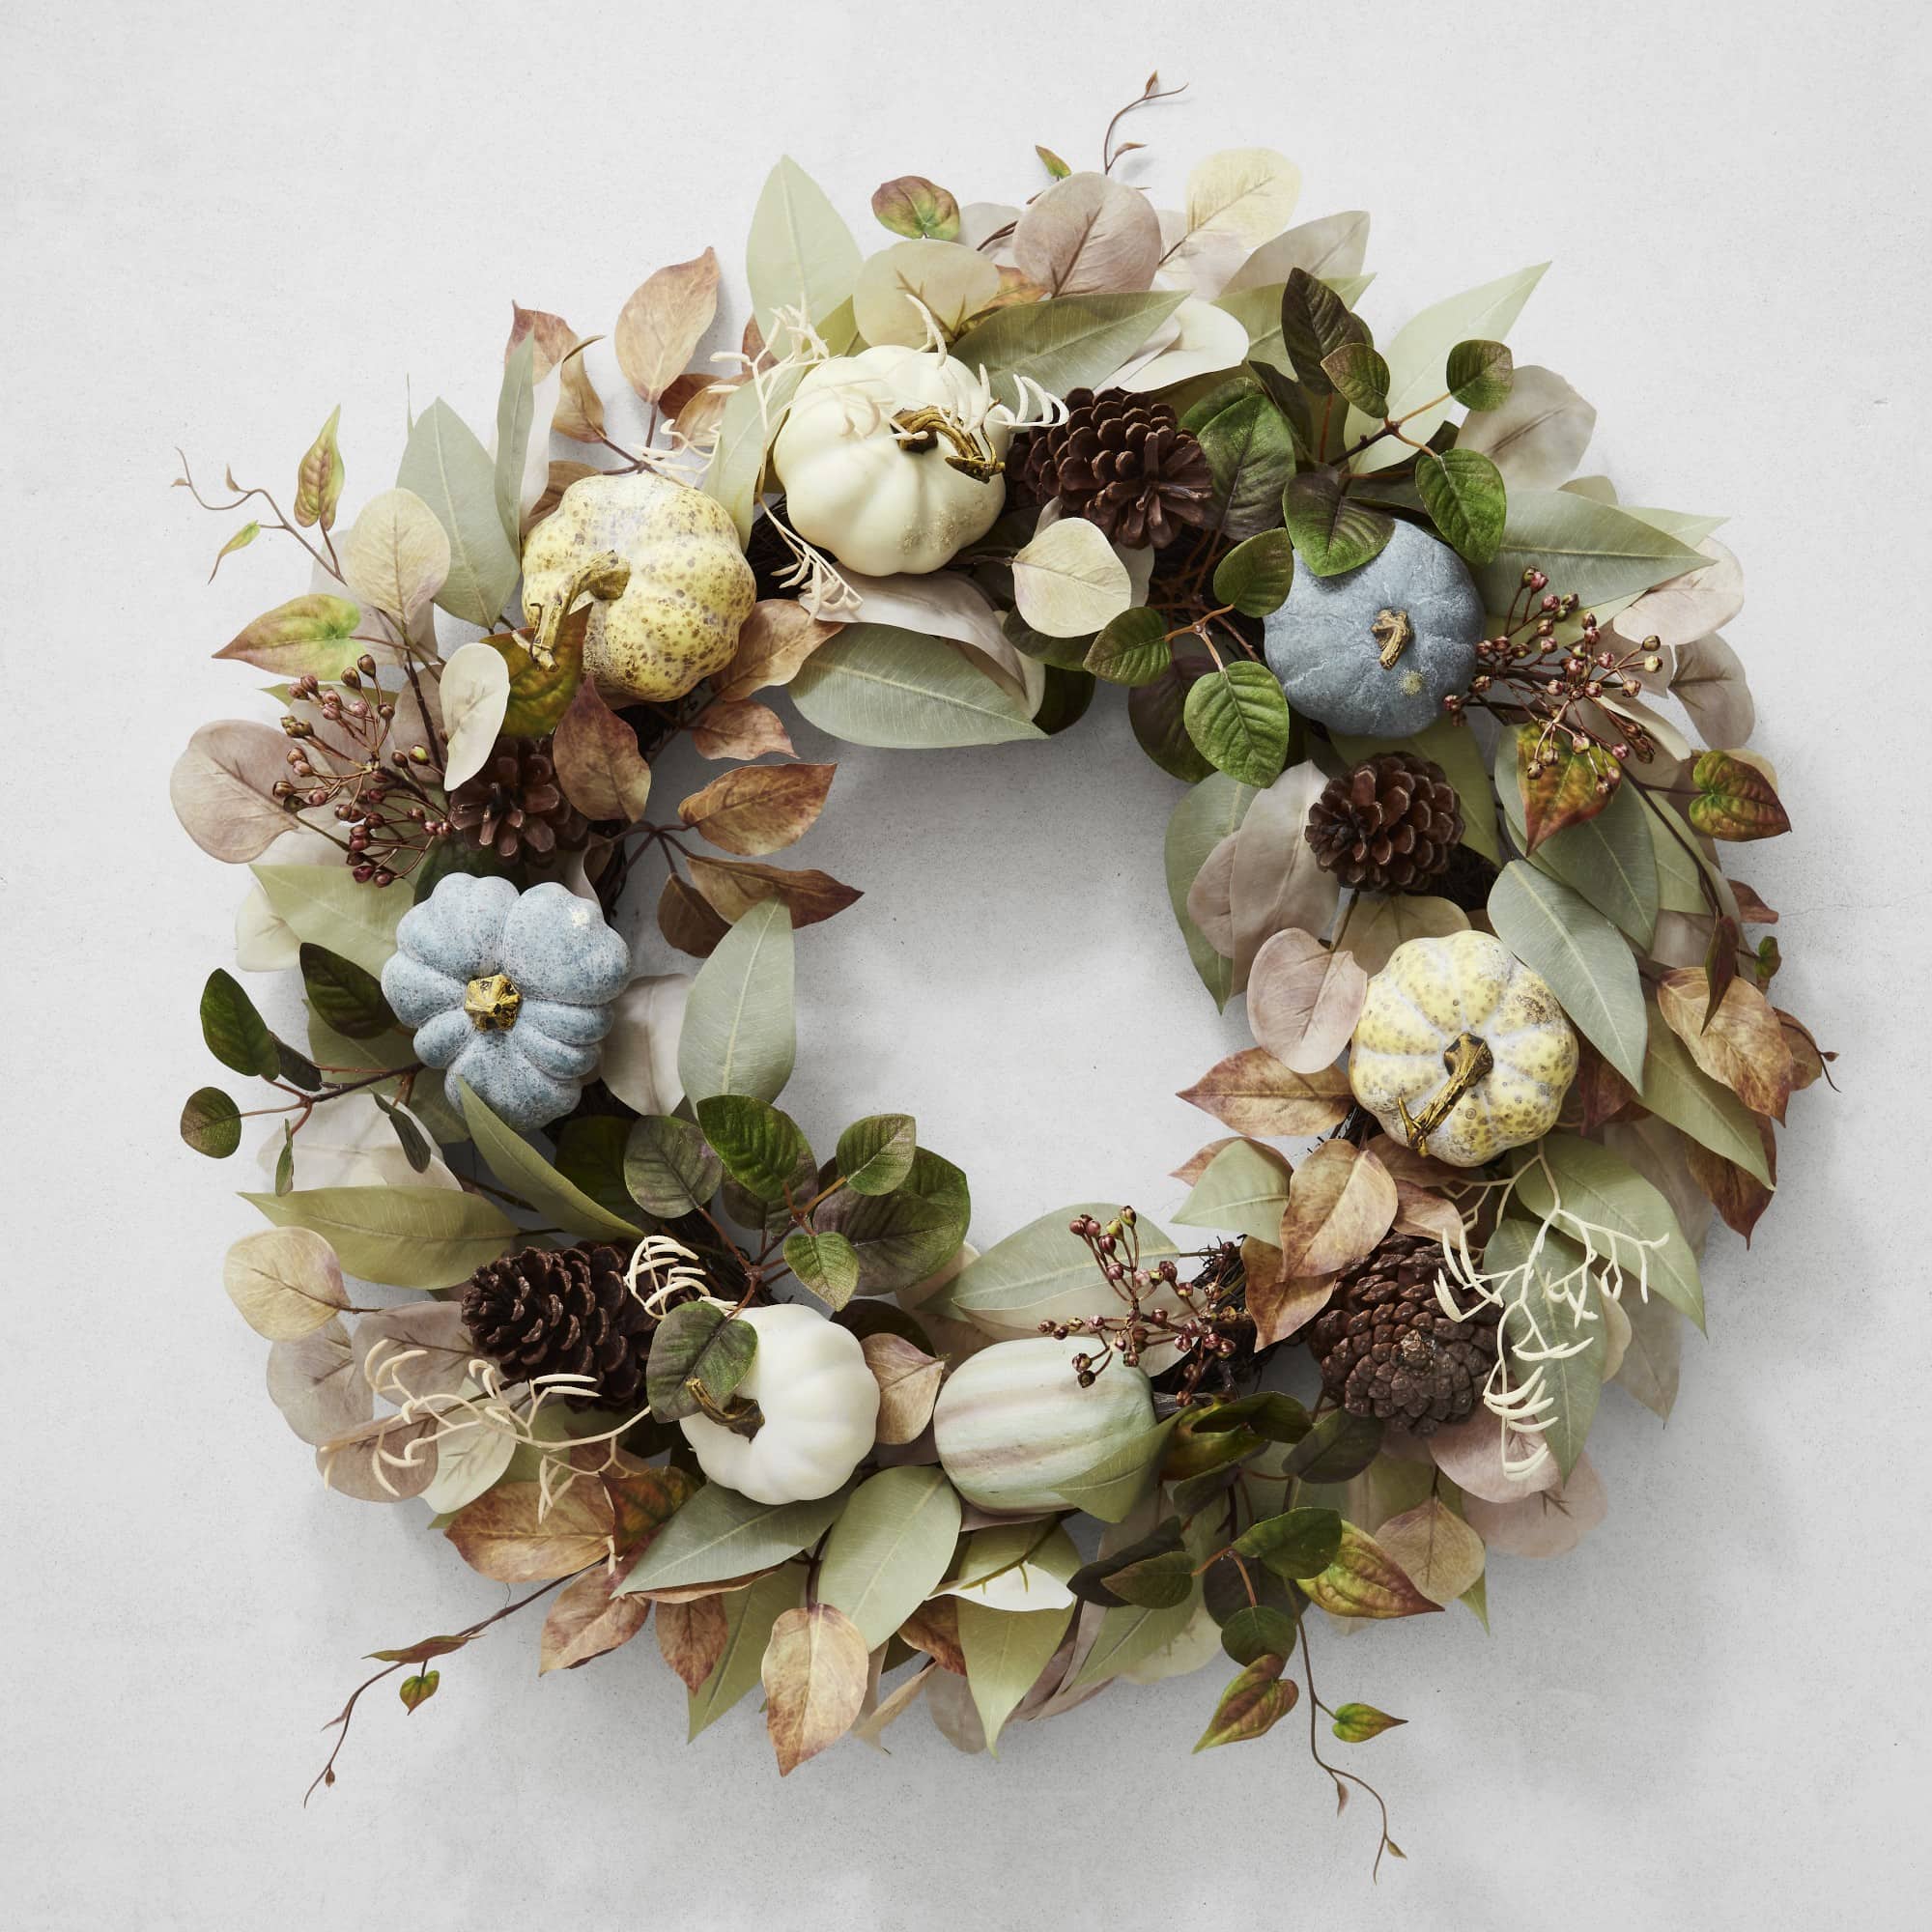
We love this unique and fresh take on a fall classic. This wreath’s hand-painted blue pumpkins and cool-toned, pastel color palette will draw attention and add style to any front porch. The faux leaves, pine cones, and berries complement the pumpkins and would brighten any entryway.
5. Handcrafted Sunflower Polyester Wreath
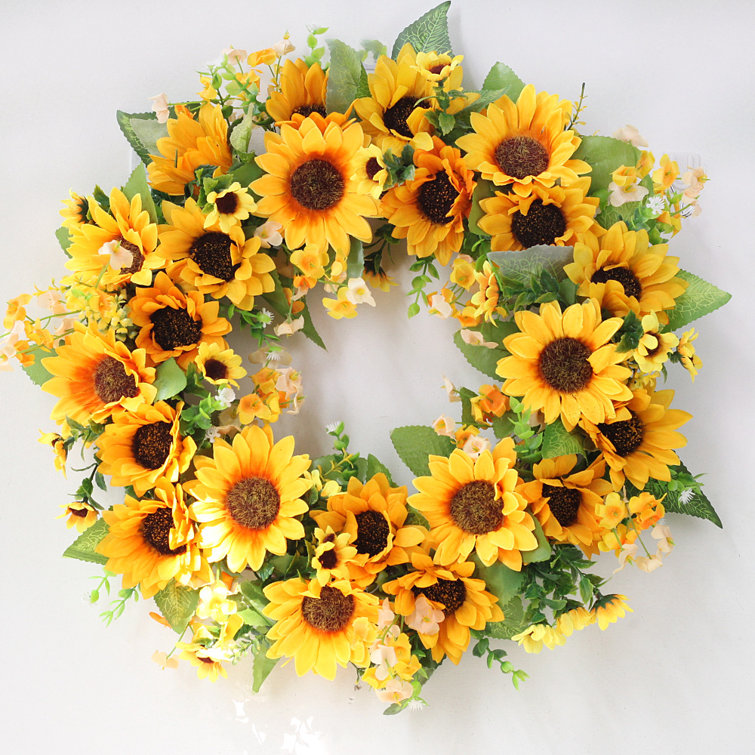
Sunflowers are a beautiful addition to any floral arrangement. What better way to add a bright pop of autumn yellow to your door and create a vibrant atmosphere? Often recognized as the symbol of joy and hope, sunflower wreaths are a great transition from summer to fall. This one is handcrafted and contains realistic sunflowers and leaves.
6. Mixed Apple Leaf Wreath
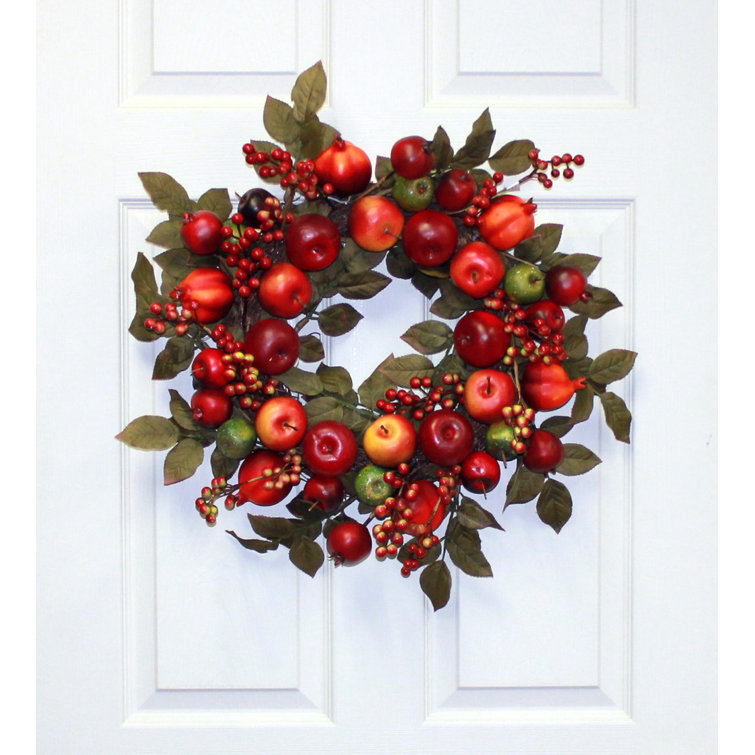
When you think fall, you think apple picking, right? Bring apple-picking vibes to your doorstep without even stepping foot on the farm. This wreath features richly colored mixed apples and pomegranate leaves. The only thing that could make this wreath more cheerful is if it came with an apple-scented candle or a slice of pie.
7. Autumn Daisy Wreath

Are daisies more your thing? If so, this fall daisy wreath with autumn leaves and wildflowers is an excellent choice. The orange and yellow daisies look pretty enough to pick, and the handmade petals and leaves are a lovely touch. This wreath will add vivid color and rustic charm to any front door, fireplace, or other indoor spot.
8. Accent Autumn Leaf Wreath

Keeping things neutral can add sophistication to any outdoor space. This wreath features assorted leaves in subdued white hues flowing from a woven branch base, and individual twigs spread out from the center. Festive gourds, pine cones, and berry clusters complete the look and add warmth and depth to this stunning decoration.
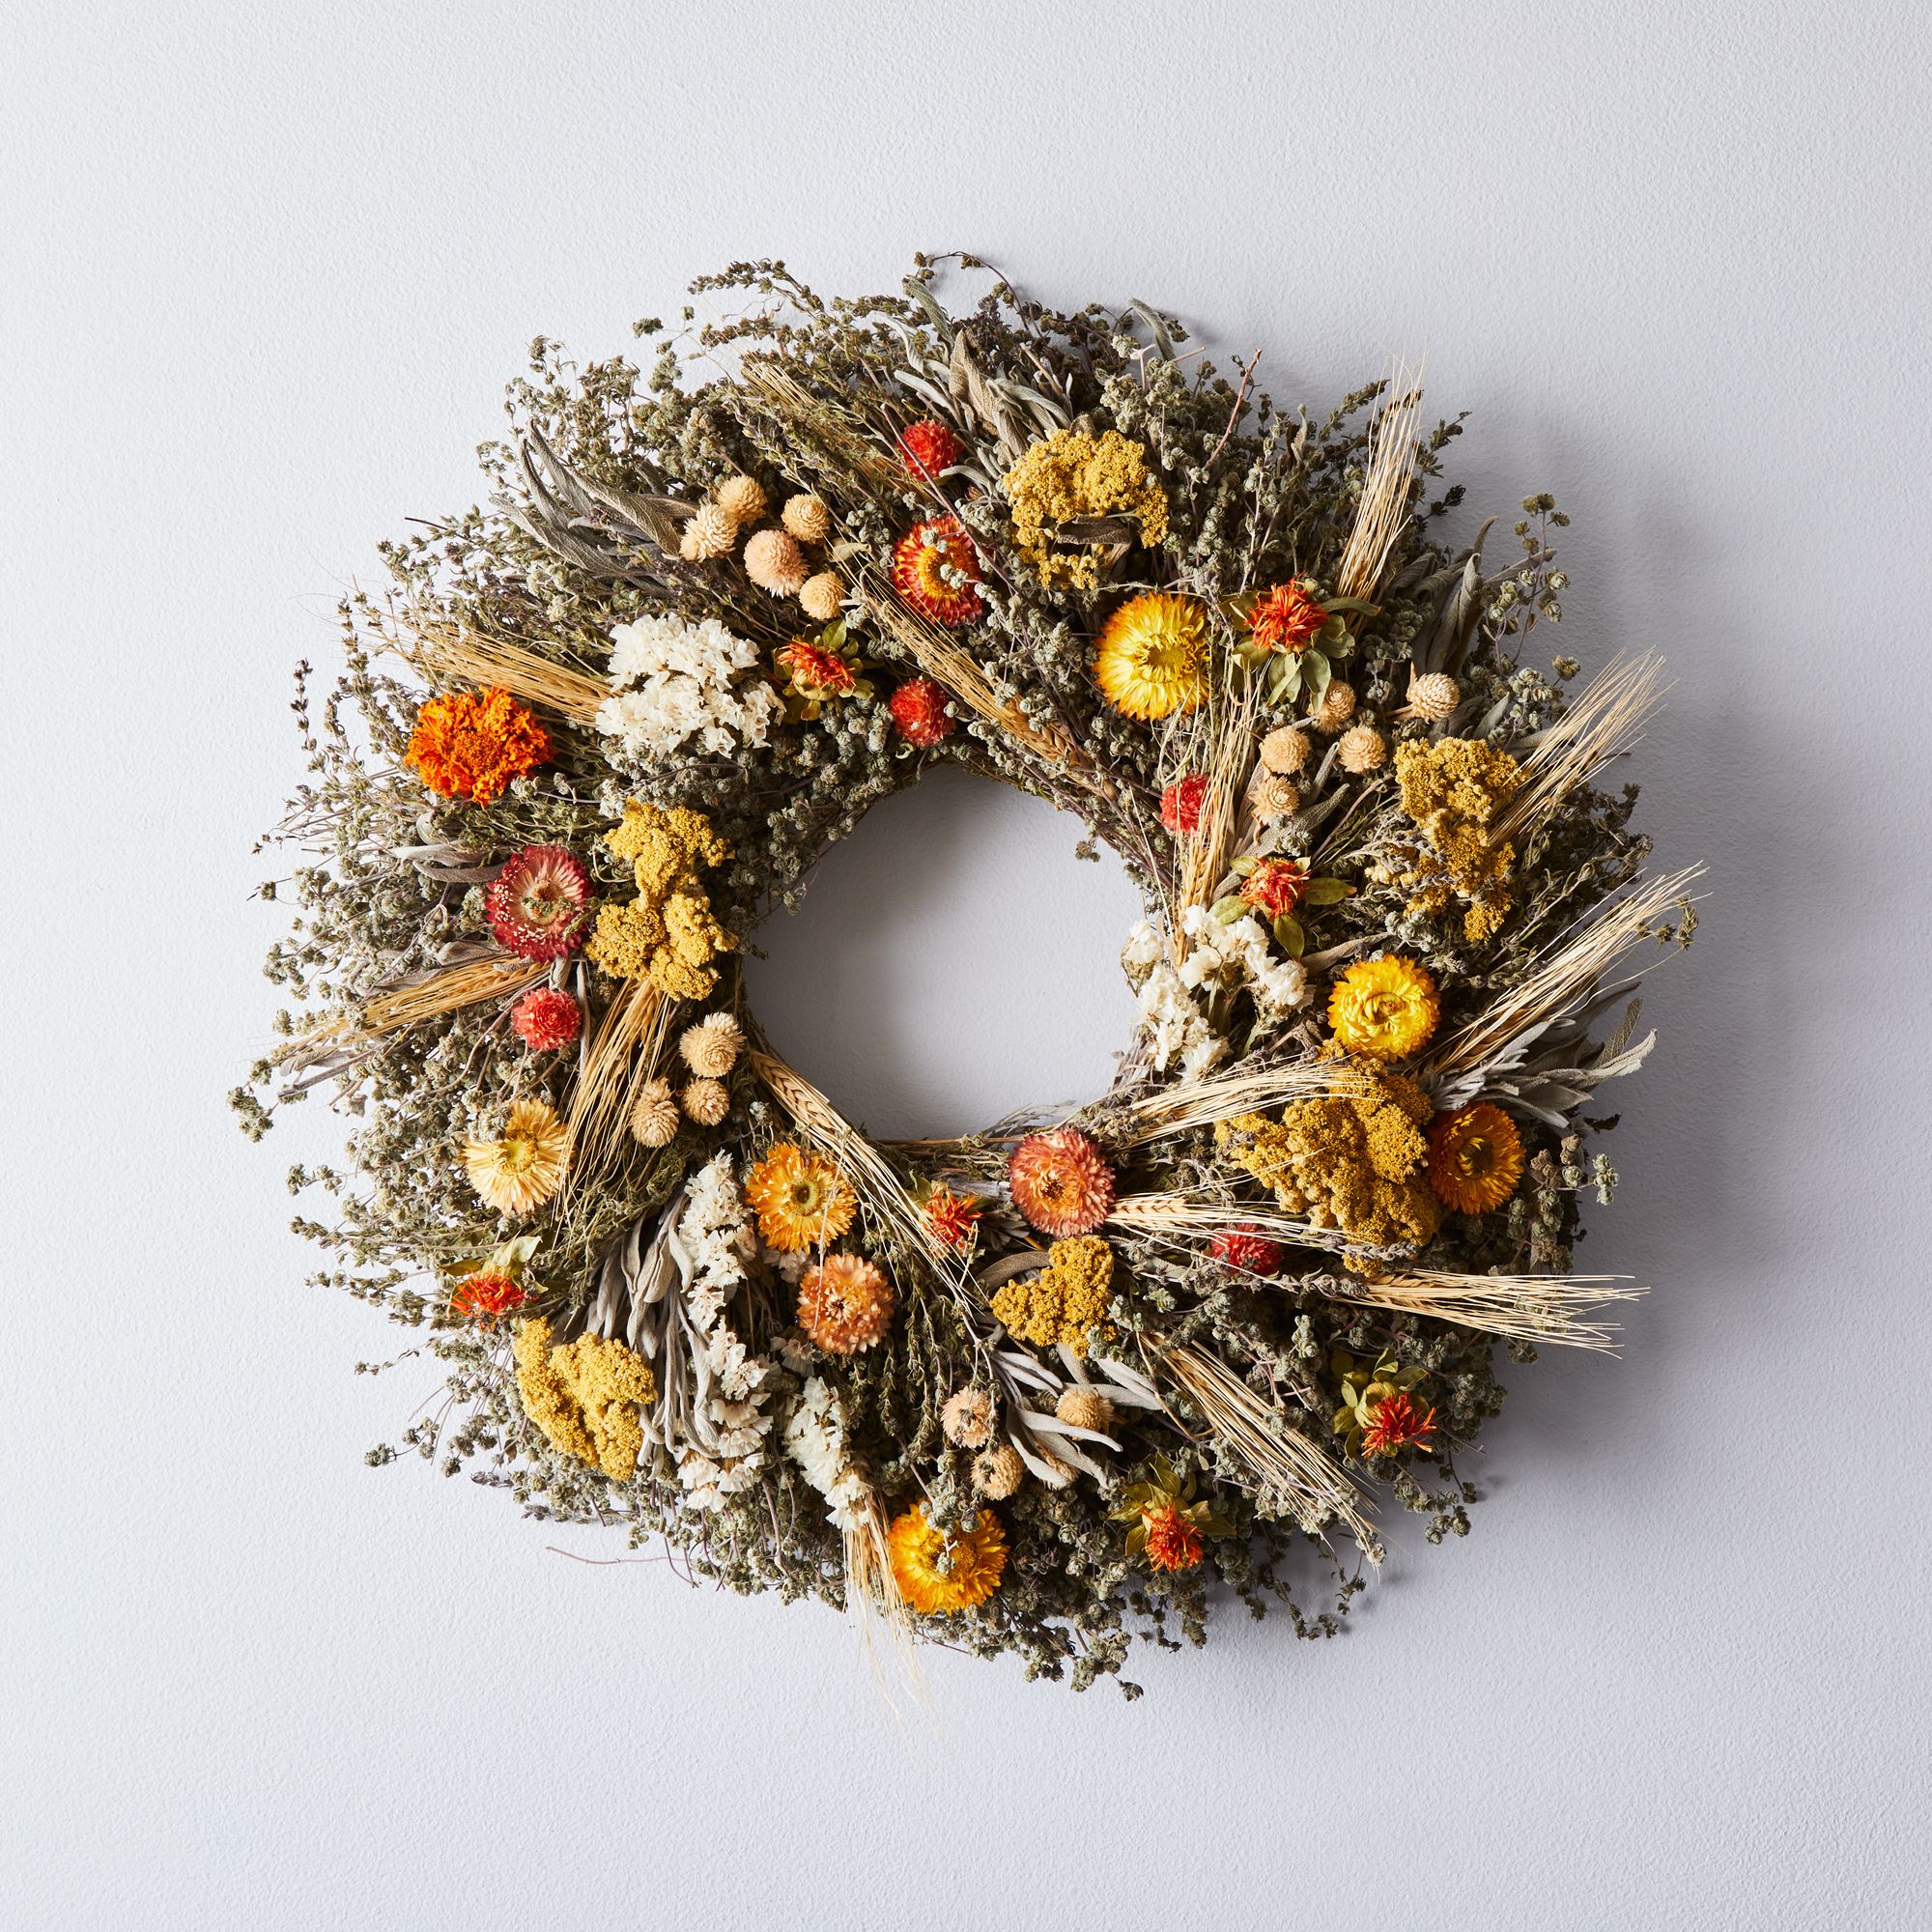
9. Fall Safflower Wreath
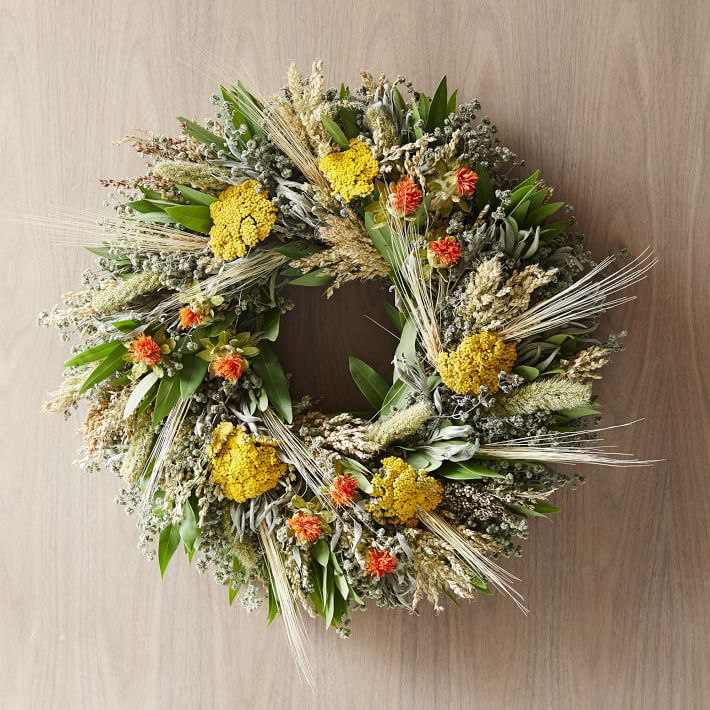
We love this fall wreath made up of freshly cut plants and flowers. It is comprised of safflower, sage, bay leaves, marjoram, broom corn, yarrow, and wheat. This scented herbal wreath is the perfect addition to the home of passionate chefs or kitchen enthusiasts.
10. Modern Fall Hoop Wreath
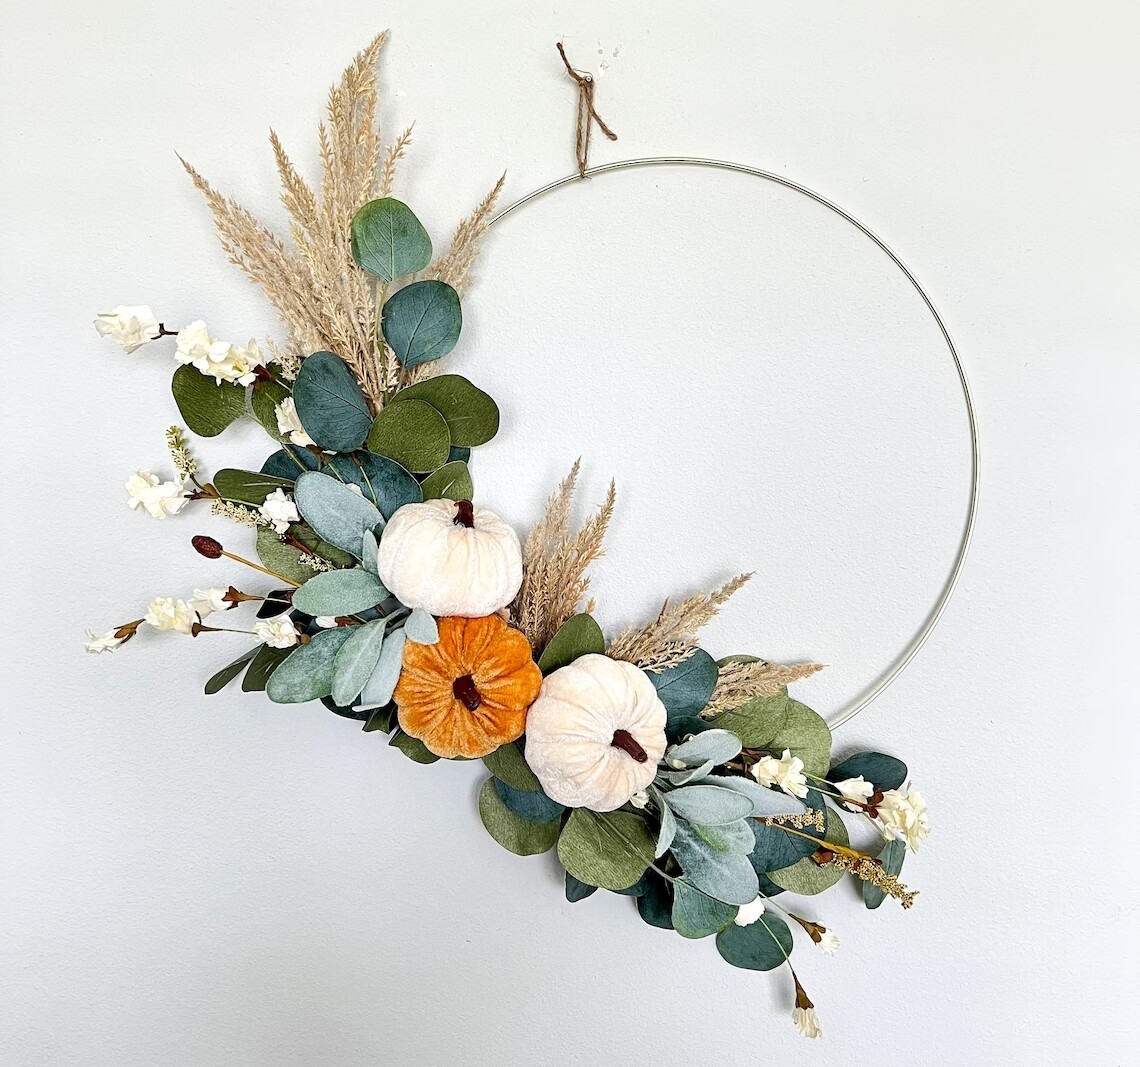
This handmade hoop wreath has a gathering of artificial greeneries, pampas, and small pumpkins made of velvet. It’s perfect for a modern, minimalist, or rustic farmhouse vibe, depending on how you customize it. You can personalize it with a silver, gold, or beaded hoop to add your touch and make this piece fit your home.
11. Autumn Fall Pumpkin Wreath
Give your home that fall feel with this inviting pumpkin wreath, which includes berry clusters and oak and maple leaves on a vine base. The combination of cool and warm tones creates a beautiful display that would enhance any indoor or outdoor space. This wreath also has a convenient hook to hang it on your door.
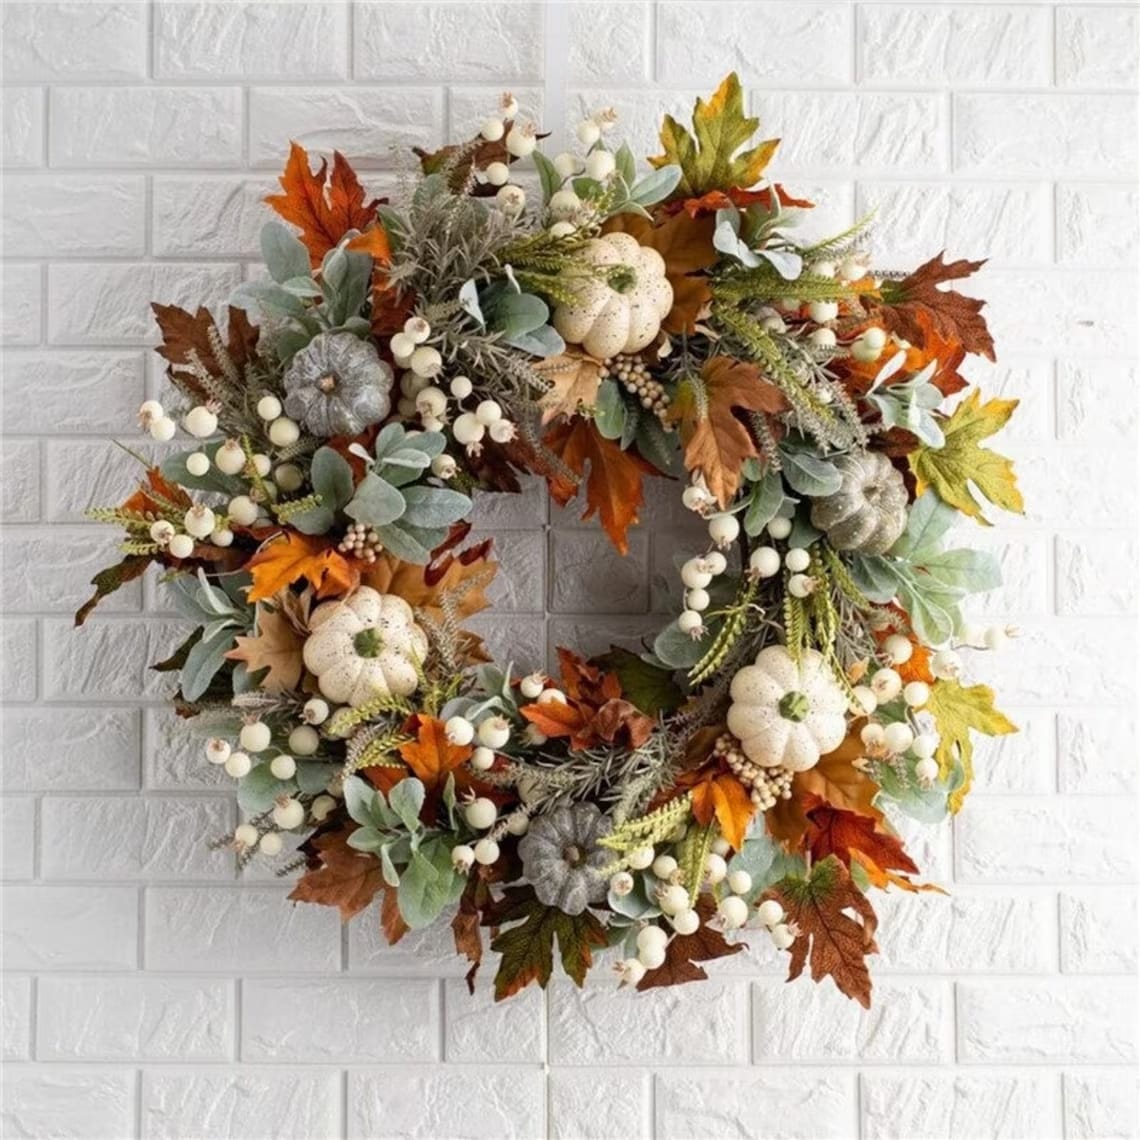
12. Farmhouse Fall Wreath Decor

Hello, farmhouse vibes! This handmade wreath incorporates classic fall foliage colors using pinecones, berries, and yellow leaves. It also features eucalyptus leaves, frosted lamb’s ear, and matte white pumpkins. The black and white gingham bow gives this wreath a vintage feel that would make it stunning on a barn door or above a fireplace.
13. Halloween Pumpkin Wreath With Glitter
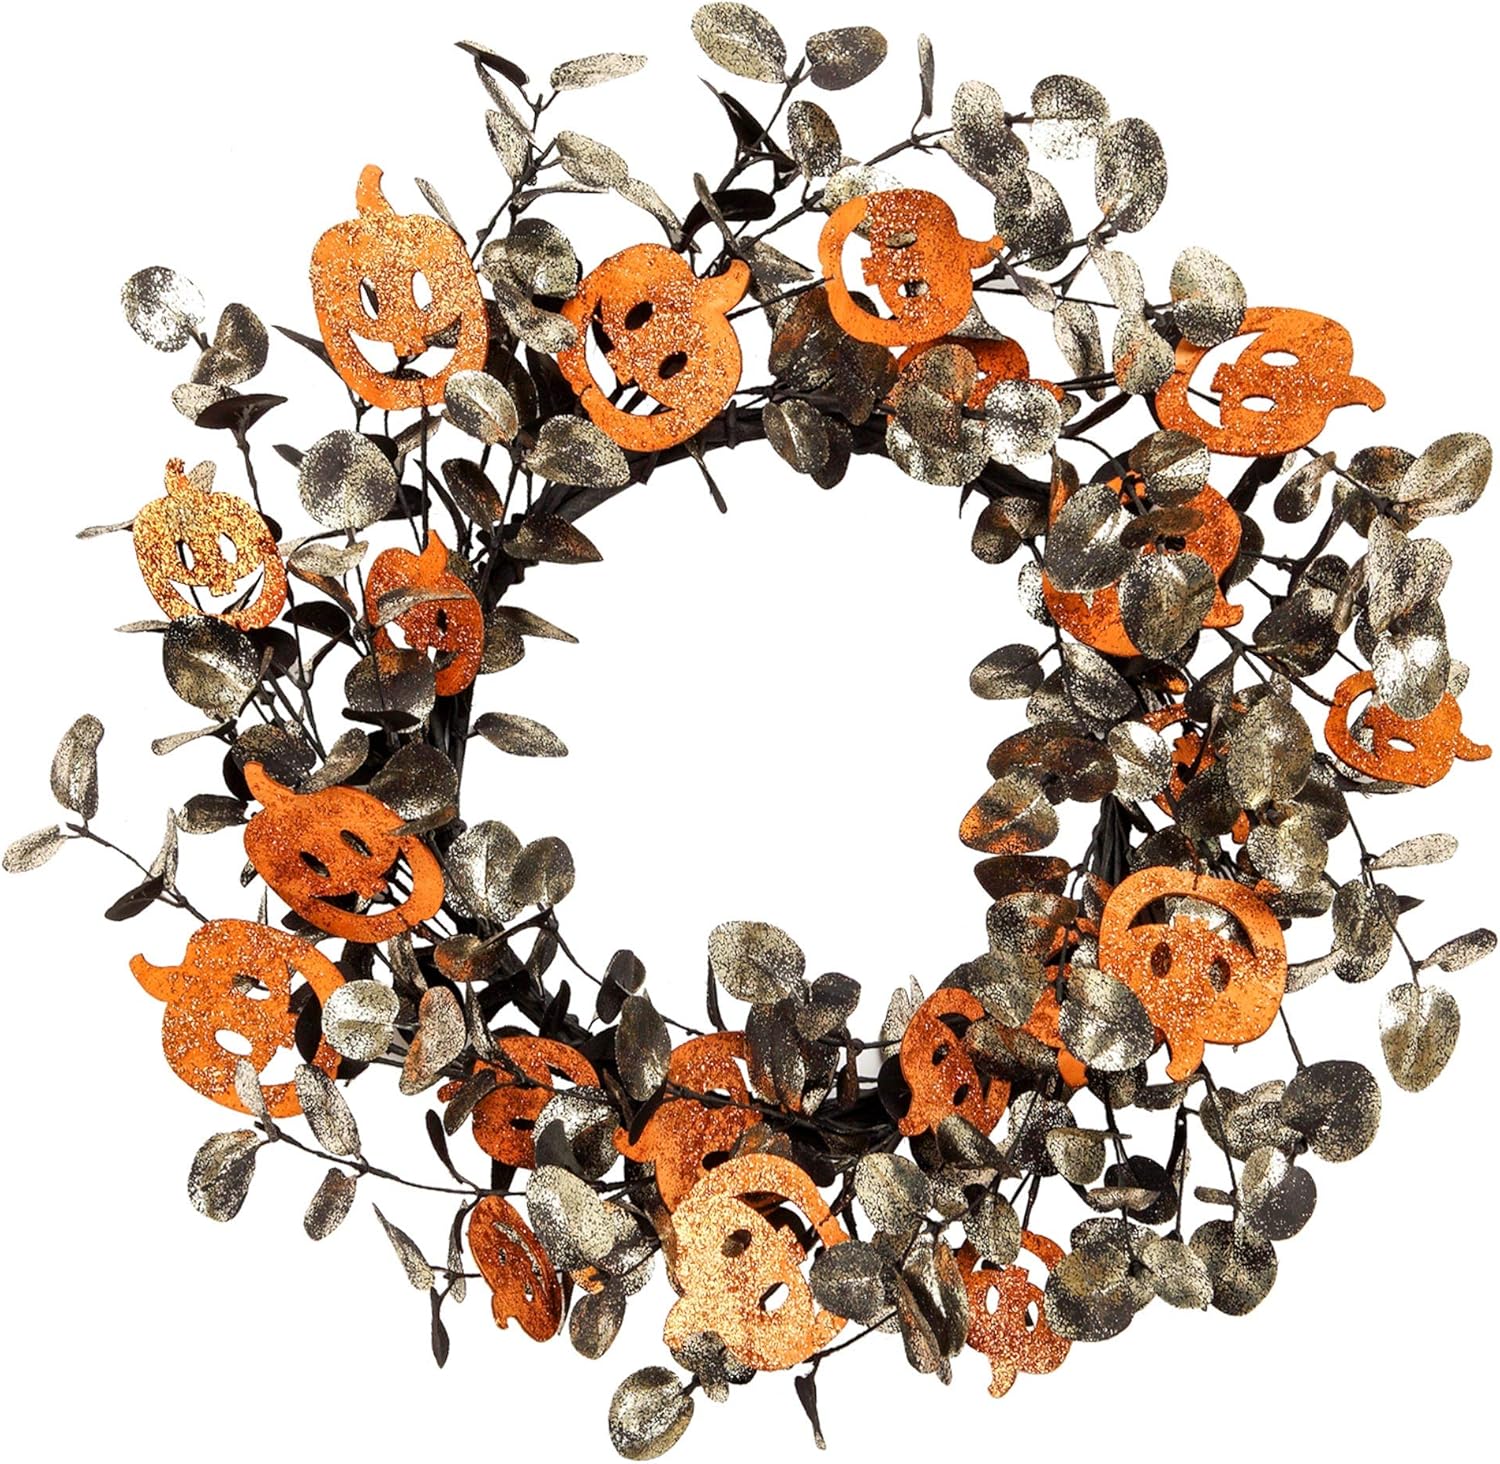
For all the Halloween enthusiasts out there, fall means spooky season. This fall wreath is embellished with orange wood pumpkins (in the style of jack-o’-lanterns), silk leaves, and other glittering decorations, bringing a Halloween atmosphere to your home. It’s perfect to greet guests or trick-or-treaters and makes your door stand out in the street!
14. Pre-Lit Black Glitter Branch Wreath With Bats
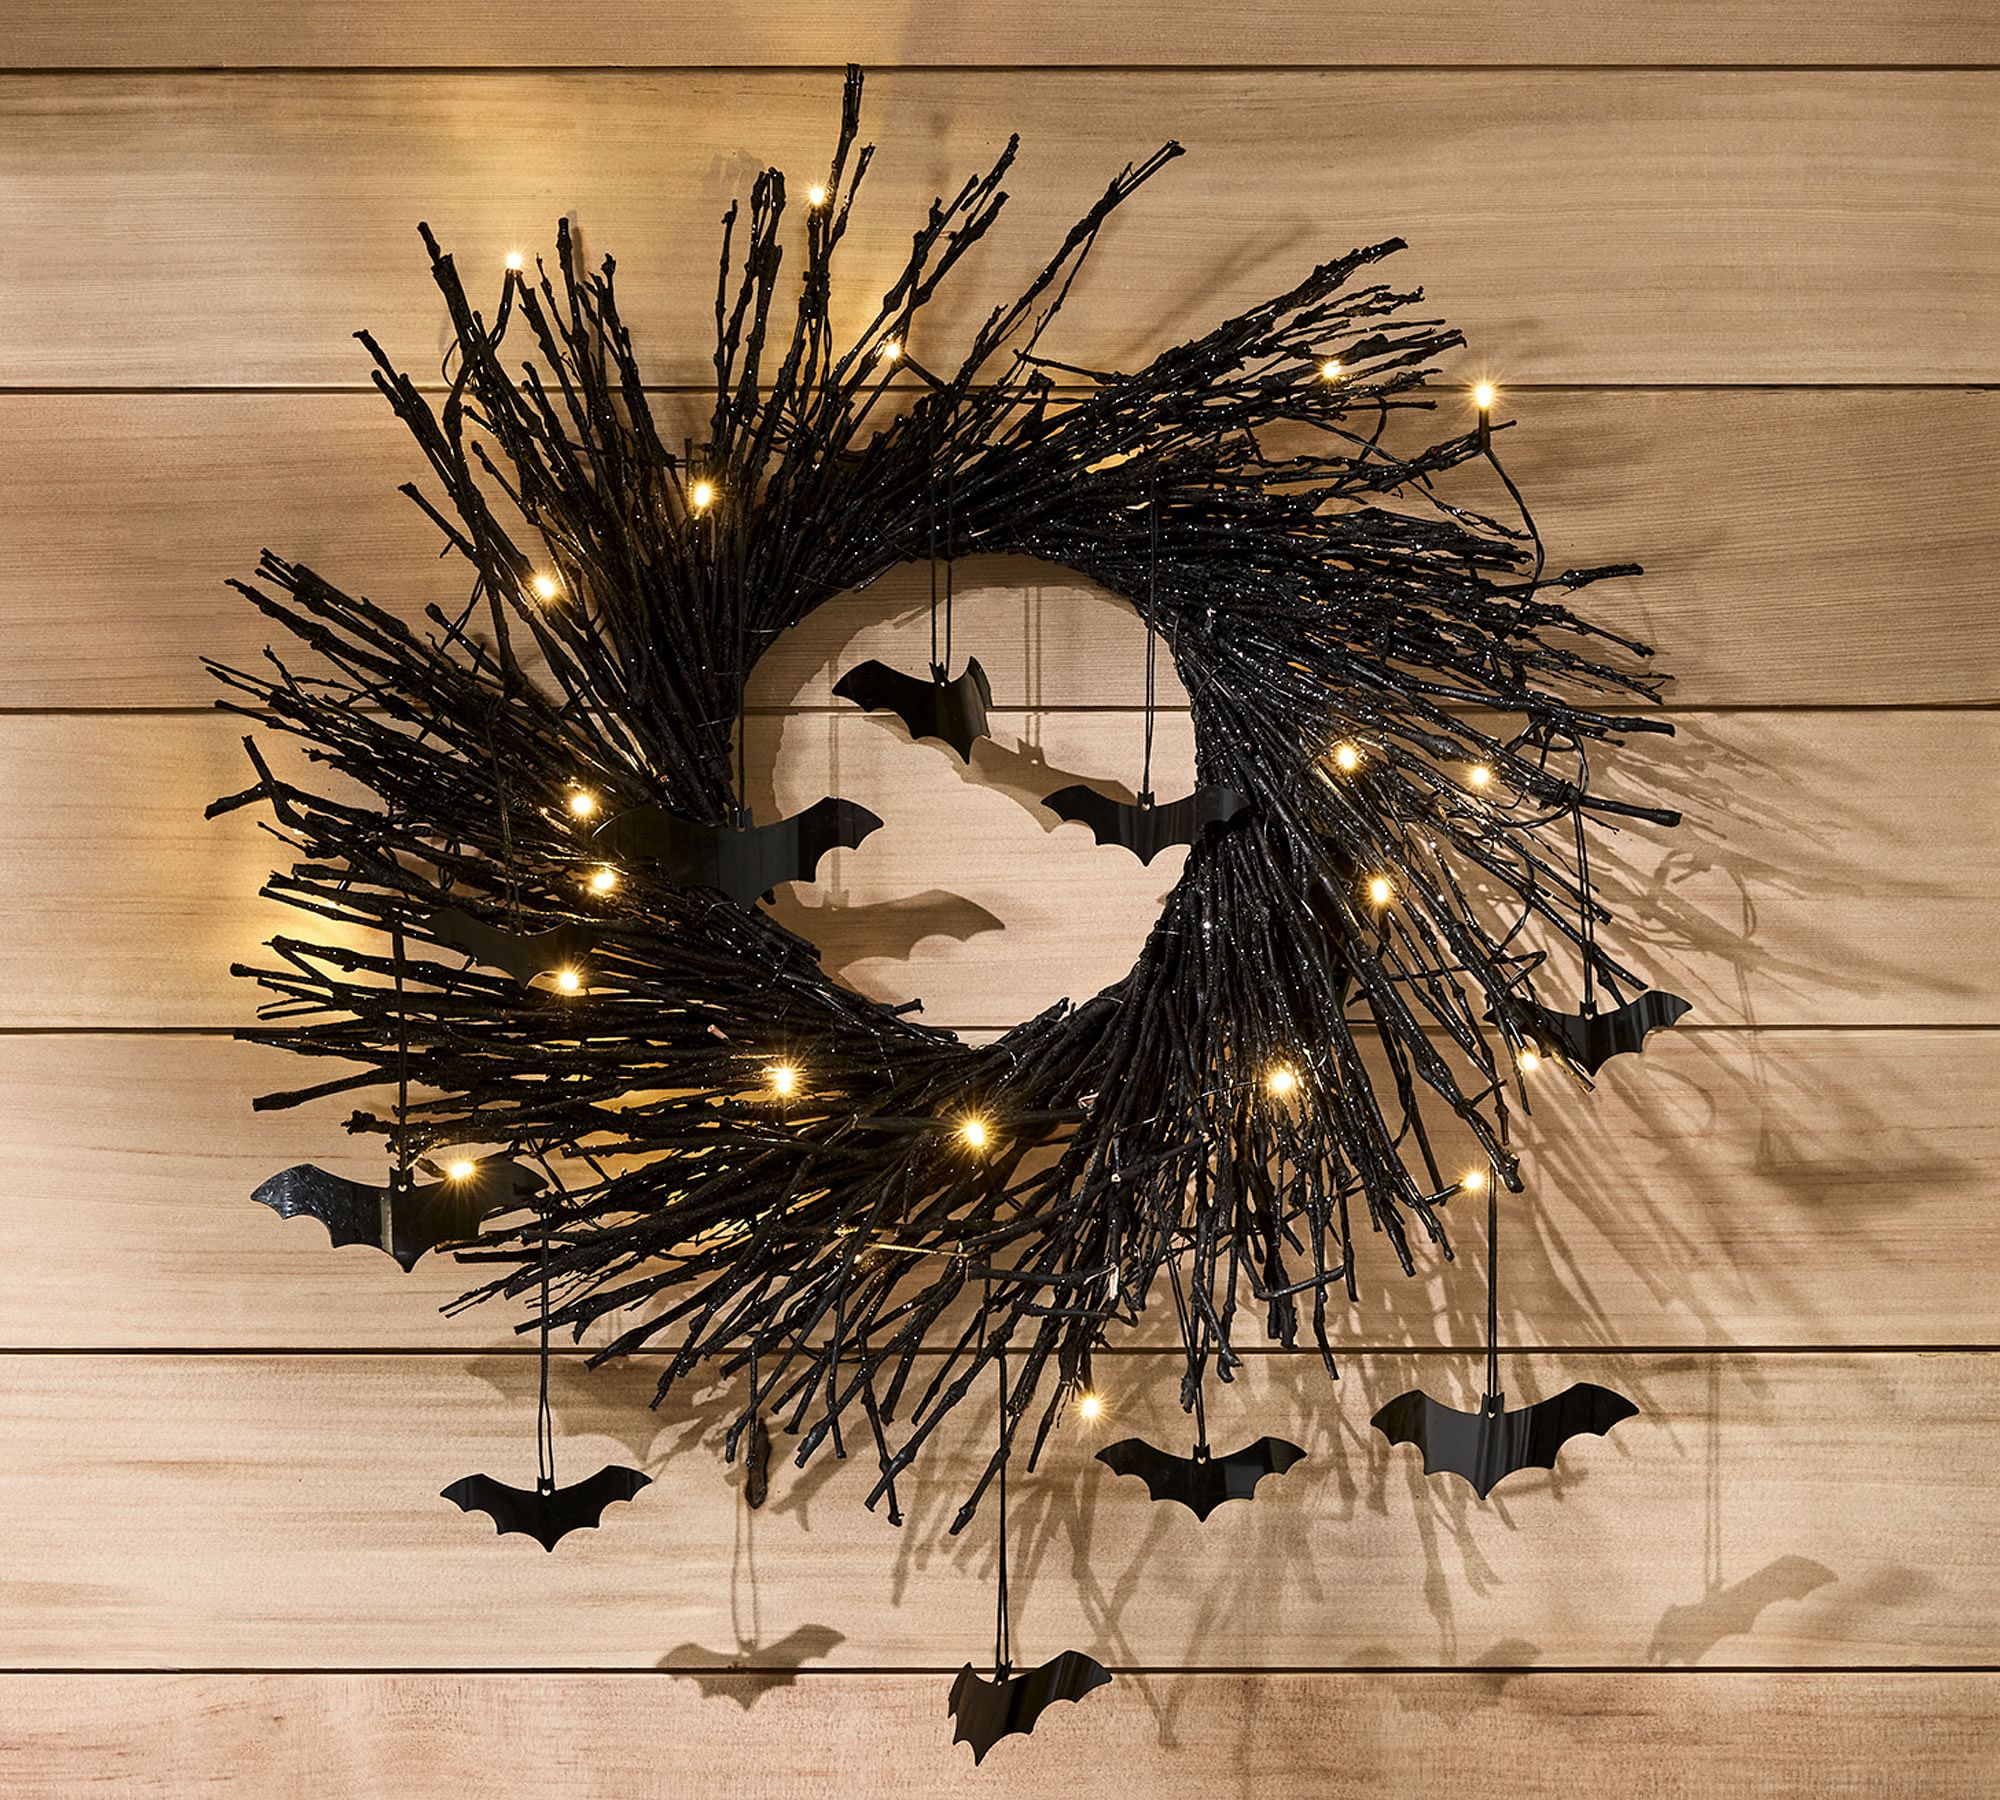
Here’s one more wreath for those with Halloween in their hearts. This bat wreath is a dark twist on a fall classic, and the pre-lit, twinkling accent lights are perfect for lighting up the night sky. The flying bats and pointed, black rattan branches set a perfectly eerie tone for Halloween festivities.
15. Autumn Modern Minimalist Wreath
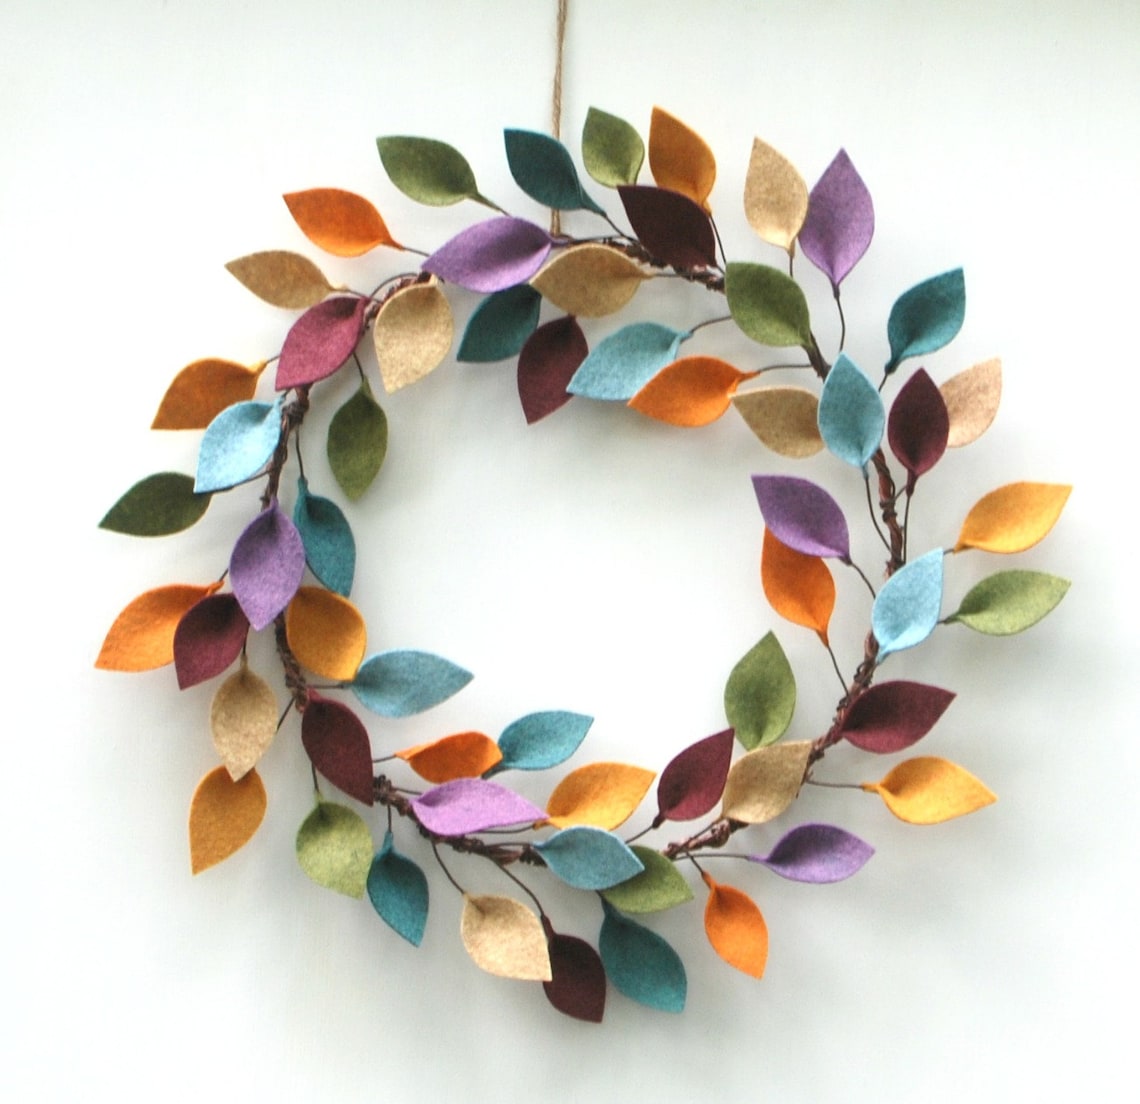
What a beauty this wool-blend, felt-leaf fall wreath is! It comes with various shades of leaves individually attached to brown floral and grapevine-covered wire. Unlike some bulky alternatives, we love that this wreath is very lightweight and has a more shallow profile to fit into any space, including between a front door and a storm door.
16. Eucalyptus and Pine Cone Wreath
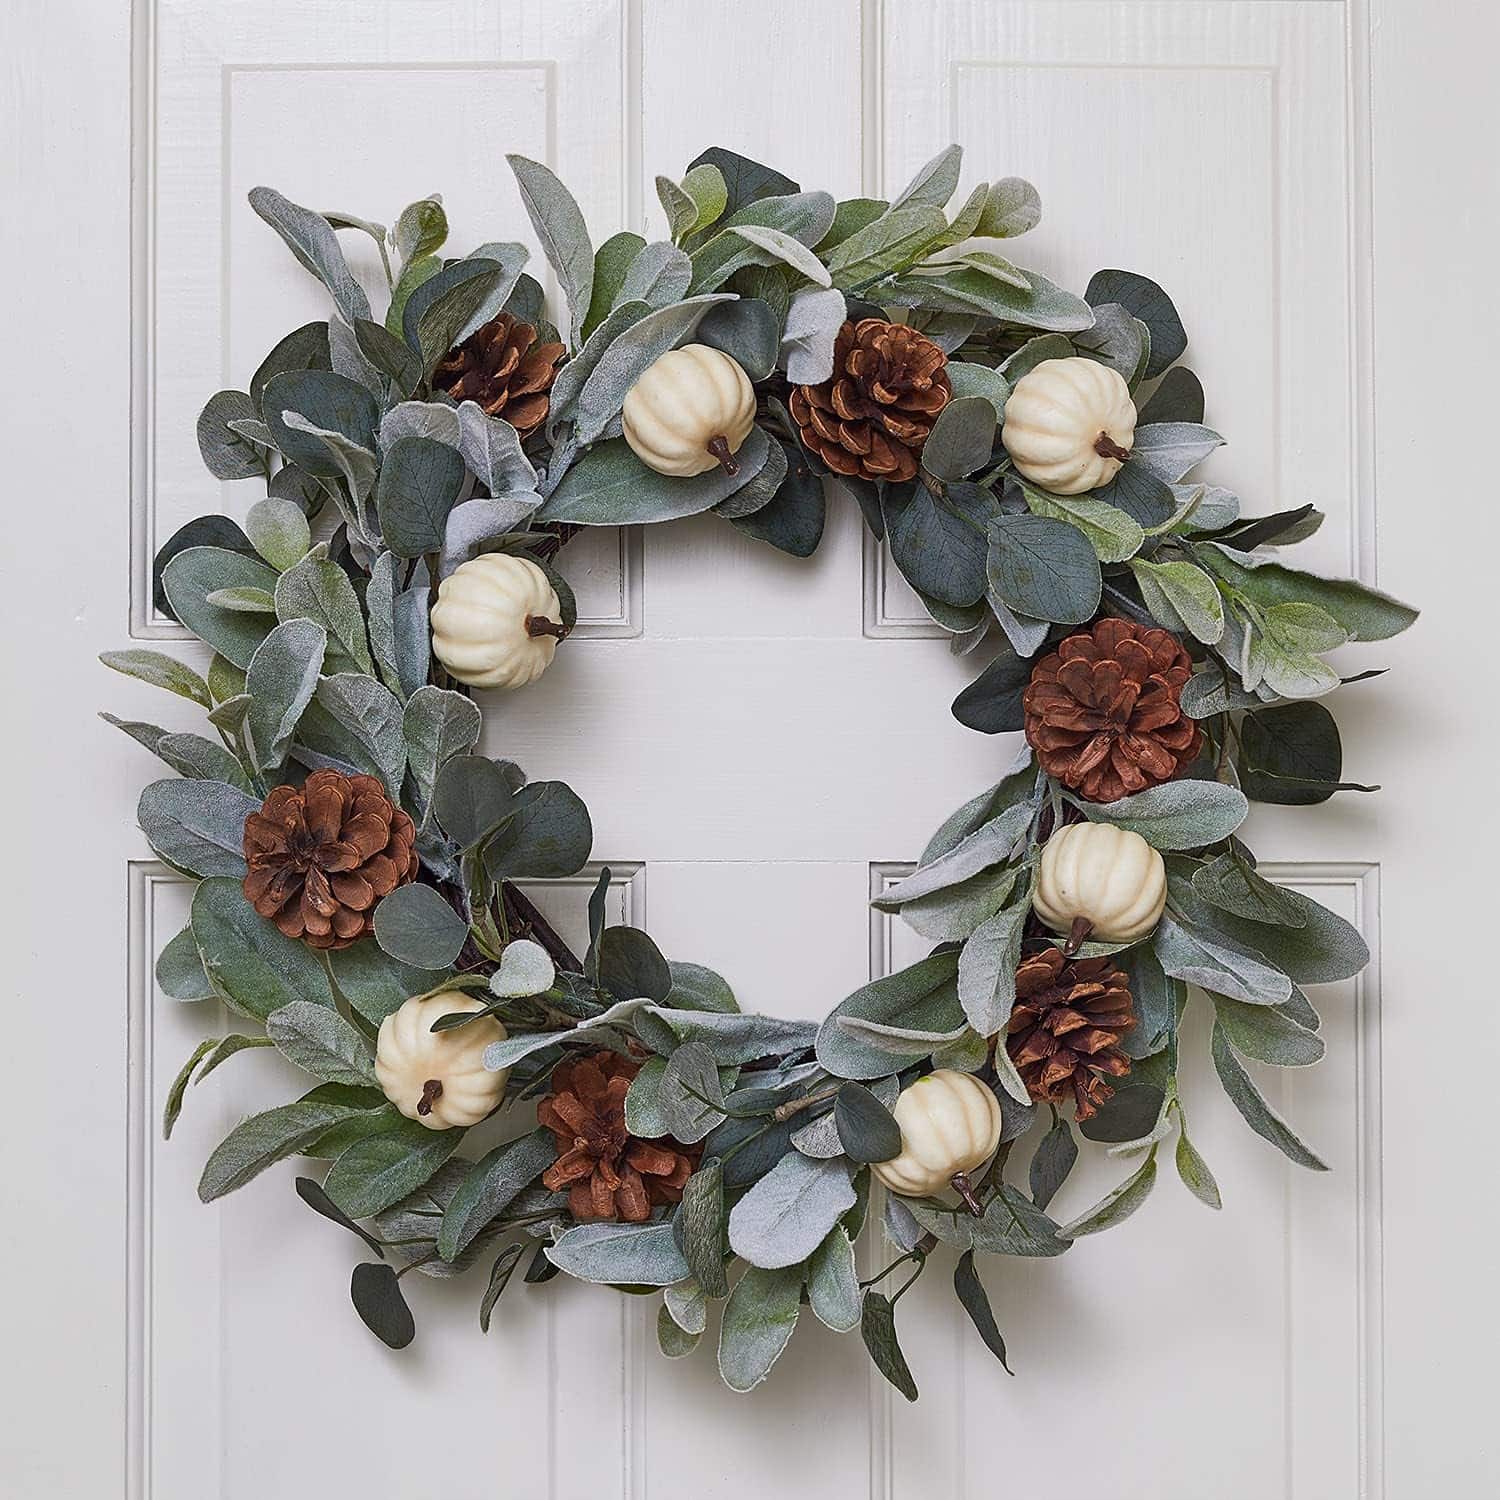
Made of faux leaves and foliage, this eucalyptus and pinecone wreath is wonderfully arranged on a natural twig structure. The off-white pumpkins with brown stems contribute to the wreath’s neutral, autumnal hues. Another perk? The eucalyptus leaves create a cozy look to welcome guests and set the tone for a warm visit.
17. Dried Mixed Marigold Wreath
This dried mixed marigold wreath is made on Creekside Farms by hand and features orange and yellow herbs and flowers, including yarrow, white statice, and marigolds. What a delicate yet unique piece of decor for any porch! If you like this fall wreath, you might also enjoy a seasonal wreath subscription from Creekside Farms so you can have decorations for every season.
18. Dried Herb Wreath in Blue
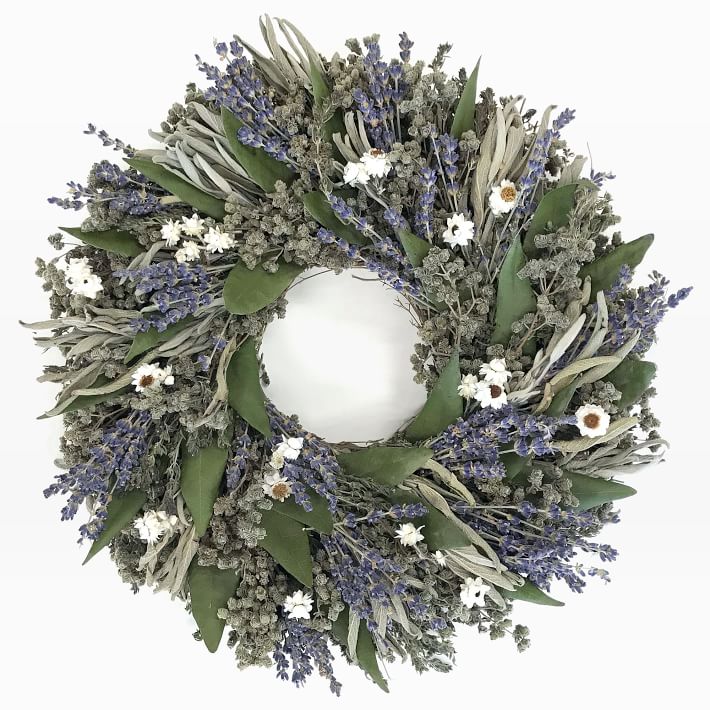
This mixture of seasonal flowers and herbs brings natural beauty to your door. Made with freshly cut plants and flowers (such as sage, bay, dried marjoram, and lavender), this wreath is arranged to order and adds a pop of blue. We think it’s the perfect accent for a more subtle style and can work as you transition from summertime!
19. Golden Yellow Wheat Wreath

This large-tail harvest wreath is simple, joyful, and so very autumn. Bring the farm to your front door with this golden fall wreath featuring yellow wheat leaves and orange and brown tails. This could be an excellent, warm addition to rustic country-style or farmhouse-style homes.
20. Fall Straw Wreath

If you like the previous fall wreath but want a more floral, leafy equivalent, check out this lush straw wreath. Grains, berries, wildflowers, and straw leaves in autumn tones make up this simply stunning arrangement. It’s mostly natural and can add charm and sophistication to your space.
Well, there you have it! We hope this roundup of our favorite front-door fall wreaths inspires you to decorate your home and add your personal touch. It’s not fall without one, so grab the one that caught your eye and add that festive charm to your home, sweet home.