Mother’s Day is right around the corner, which means it’s time for those sweet homemade gifts. Kids already love to craft, but when it’s something made especially for Mom, it becomes even more meaningful.
Whether you’re a partner, caregiver, or a mom who knows you might need to gently encourage a handmade gift yourself, finding a thoughtful idea matters. Mothers give so much all year, and a simple, heartfelt craft can be a beautiful way to show appreciation.
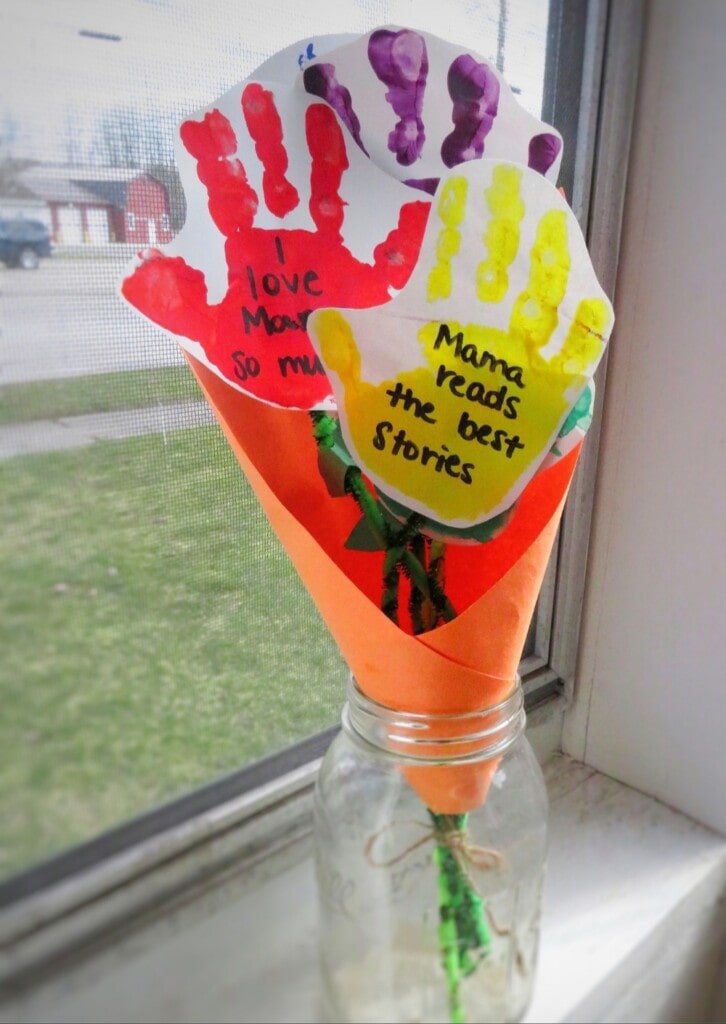
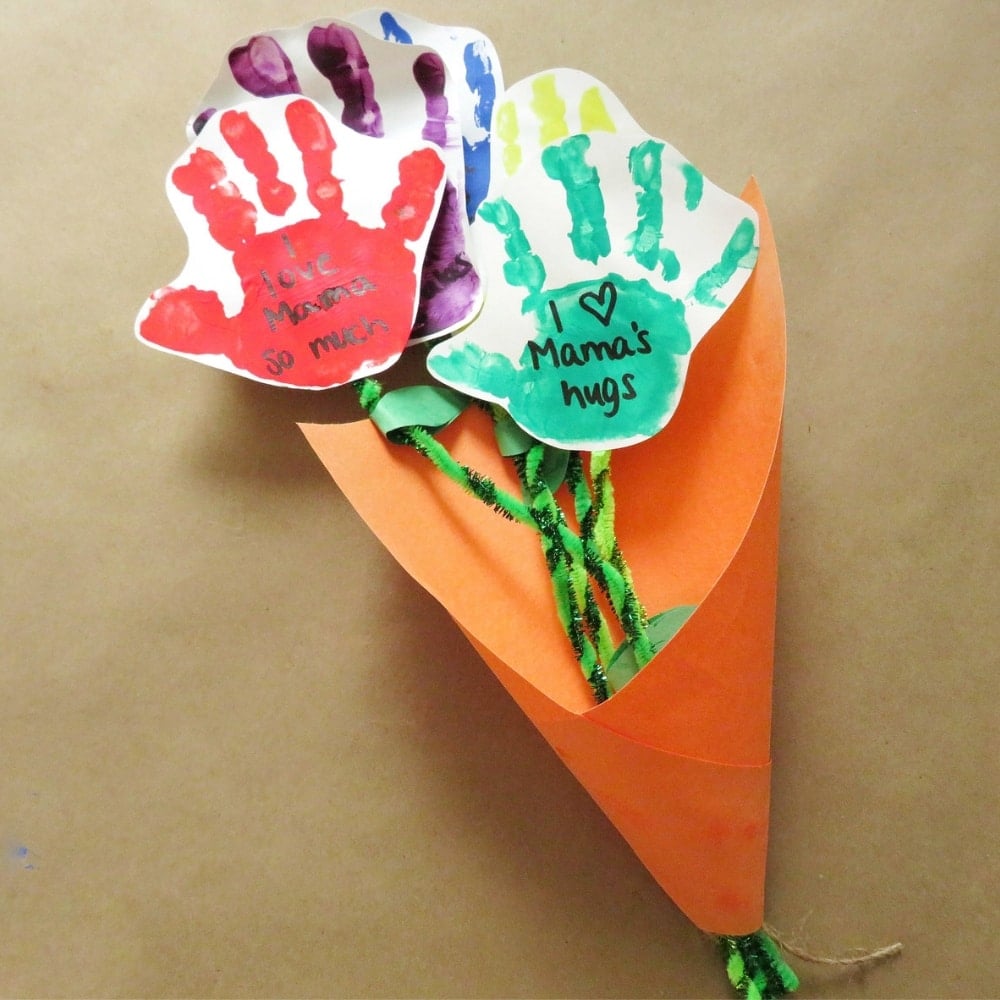
This handprint flower bouquet is one of those keepsake crafts that combines creativity, love, and a little personality in every detail.
How to Make a Mother’s Day Handprint Flower Bouquet
Since Mother’s Day falls in the spring and flowers are a classic gift, this personalized craft is a fun and meaningful option for kids to make. This simple Mother’s Day craft combines handprints, kind words, and bright colors to create a bouquet that doubles as a keepsake. It incorporates all the best things: loving affirmations, handprints for memories, and beautiful flowers to brighten the room. Kiddos will love making these, and their mom will adore receiving them!
What You’ll Need for This Mother’s Day Craft
To make this Mother’s Day craft, you only need a short list of supplies:
- White paper
- Different colors of paint
- Permanent marker
- Scissors
- Pipe cleaners
- Hot glue
- 1 sheet of colored paper
Pretty simple list, right? You probably have this stuff kicking around already! Now onto making the craft.
Related: Best Mother’s Day Quotes to Celebrate Mom
1. Make Colorful Handprints
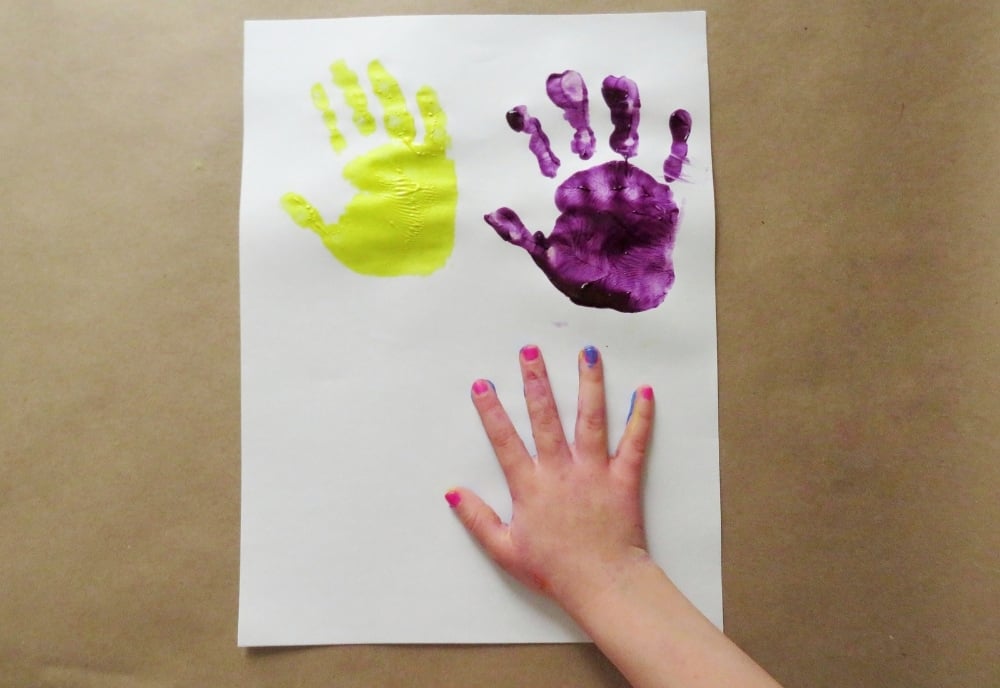
The first part of this Mother’s Day craft is simple: get the handprints! Let the kids choose what color flowers they want, and cover their hands in that color paint. Then they just leave handprints on white paper for each “flower” they want to make.

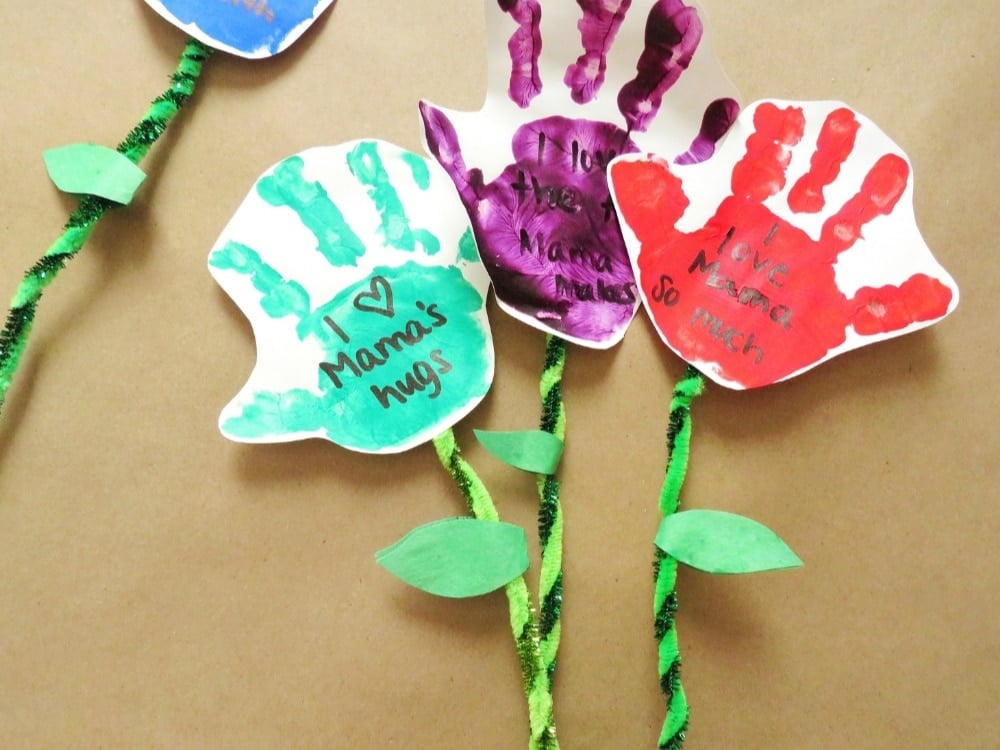
Once the handprints are dry, cut them out around the shape of each hand. Then ask the kids to share things they love about their mom and write those on the flowers. If they are old enough, they can write their own messages. If not, you can help write their words for them.
2. Make the Flower Stems
Once the flowers are all done, move on to the stems. We used two green pipe cleaners for each and wrapped them together. Using two helps to make them more sturdy, although the paper flowers are pretty light anyway.
Then hot glue the stems onto the back of the flowers, going about ⅓ of the way up the flower. This is to help the top of the flower not flop over. I used hot glue instead of regular glue because pipe cleaners don’t always stick well with regular glue, helping them stay together better.
Related: DIY Spa-in-a-Box Gift for Mother’s Day
3. Add Leaves to the Stems
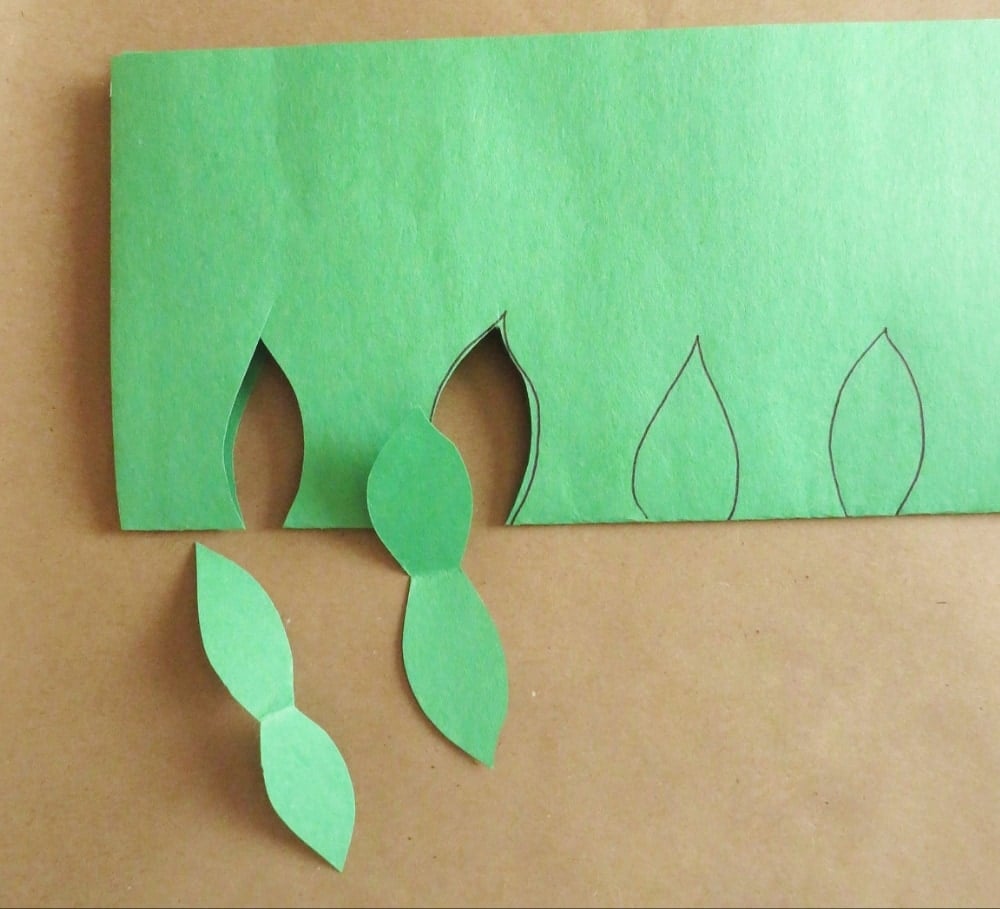
All flowers have leaves on the stems, right? This step is super easy. Cut out a leaf shape on the folded edge of green paper, like you would when making a heart. Then fold it around the stems and glue the two sides together. Easy peasy leaves! I recommend putting them at different heights towards the top so they don’t get covered in the next step.
4. Turn the Flowers into a Bouquet
Once you have all your Mother’s Day craft flowers done, all that’s left is to put them in the perfect bouquet to give to Mom! Take a piece of paper in a vertical position (or “hotdog style” in kid speak) in whatever color the kiddos choose, and cut 3 inches off the bottom. Wrap the two bottom edges over each other without folding the paper to make it round.
Wrap it until a small hole is at the bottom and glue it in place.
If you want the wrap to be smaller and/or all the flowers can’t fit through the hole, cut off an inch or so above the hole.
Then take all your flowers and place them into the paper, poking them through the hole a little bit to keep them in there. Put them in at different heights and tie a string around the part that’s poked through the hole once they’re all at the right height. That will keep them in place and keep the wrap from coming off.
This is such a sweet craft for kids to make for Mother’s Day. It’s simple, meaningful, and creates a keepsake Mom will treasure for years to come.
Handprint crafts have a way of capturing a moment in time, and this flower bouquet adds a personal touch that makes it even more special. If you’re looking for an easy and heartfelt Mother’s Day craft, this one is a beautiful choice.