Knowing when and how to use a breast pump is essential, whether you are headed back to work or have a baby who needs expressed milk for medical reasons. Or maybe you want another caregiver to share in feeding your baby. Whatever your reasons, it’s helpful to know the different types of pumps on the market today. Finding out what pump is best for you will be helpful in successfully pumping milk for your little one.
To ease your worries about using your pump, you’ll want to learn how to use your pump, take care of the parts, and how to store expressed milk ahead of time. With practice and patience, you can use your pump easily and have a cleaning and storage routine that you will not have to think twice about.
Different Types of Breast Pumps
Everyone is different, and each situation may require a different type of pump. The two main breast pump types to consider are a manual hand pump and an electric pump:
What Is a Manual Pump?
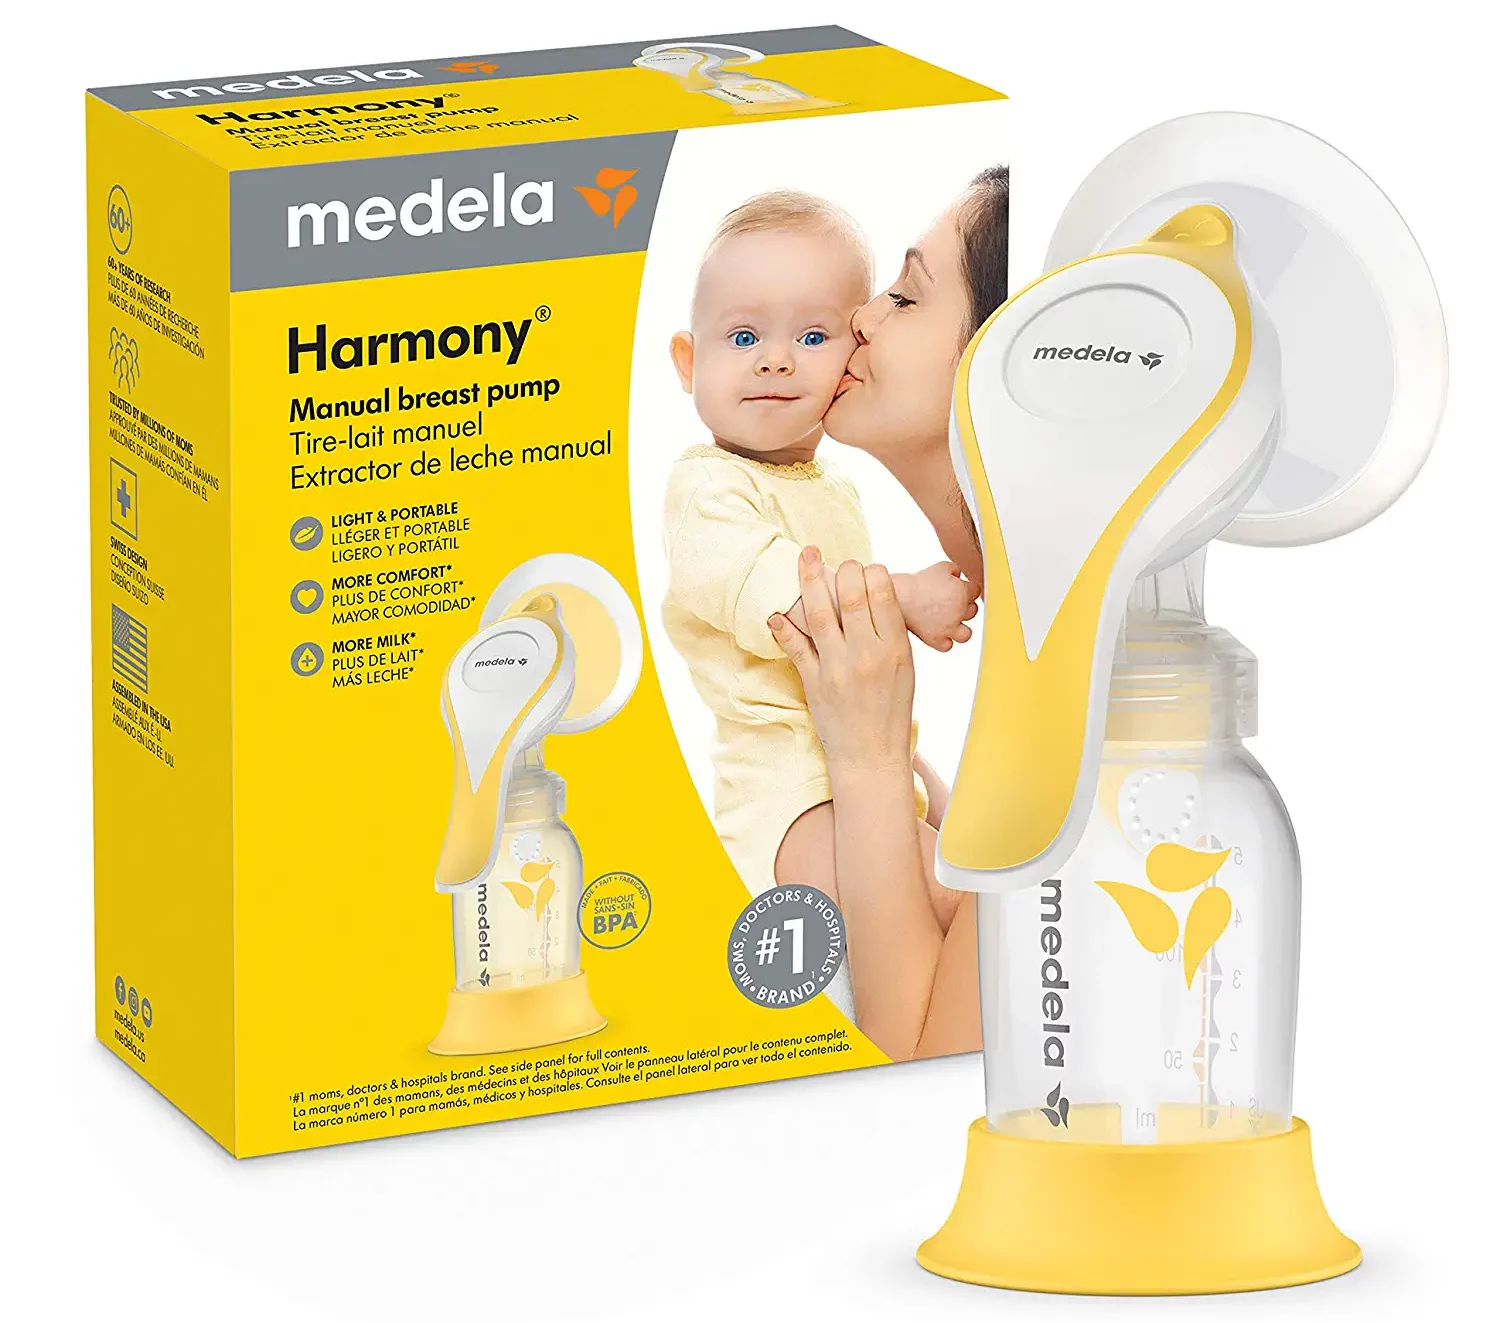
A manual hand pump is an easy-to-use, inexpensive pump option that may be ideal for a mother who is not frequently away from her baby for extended periods of time. It is a good option for mothers who only need to pump occasionally. This pump type also has a convenience factor because it can be used anywhere and is easy to pack and store.1
What Is an Electric Pump?
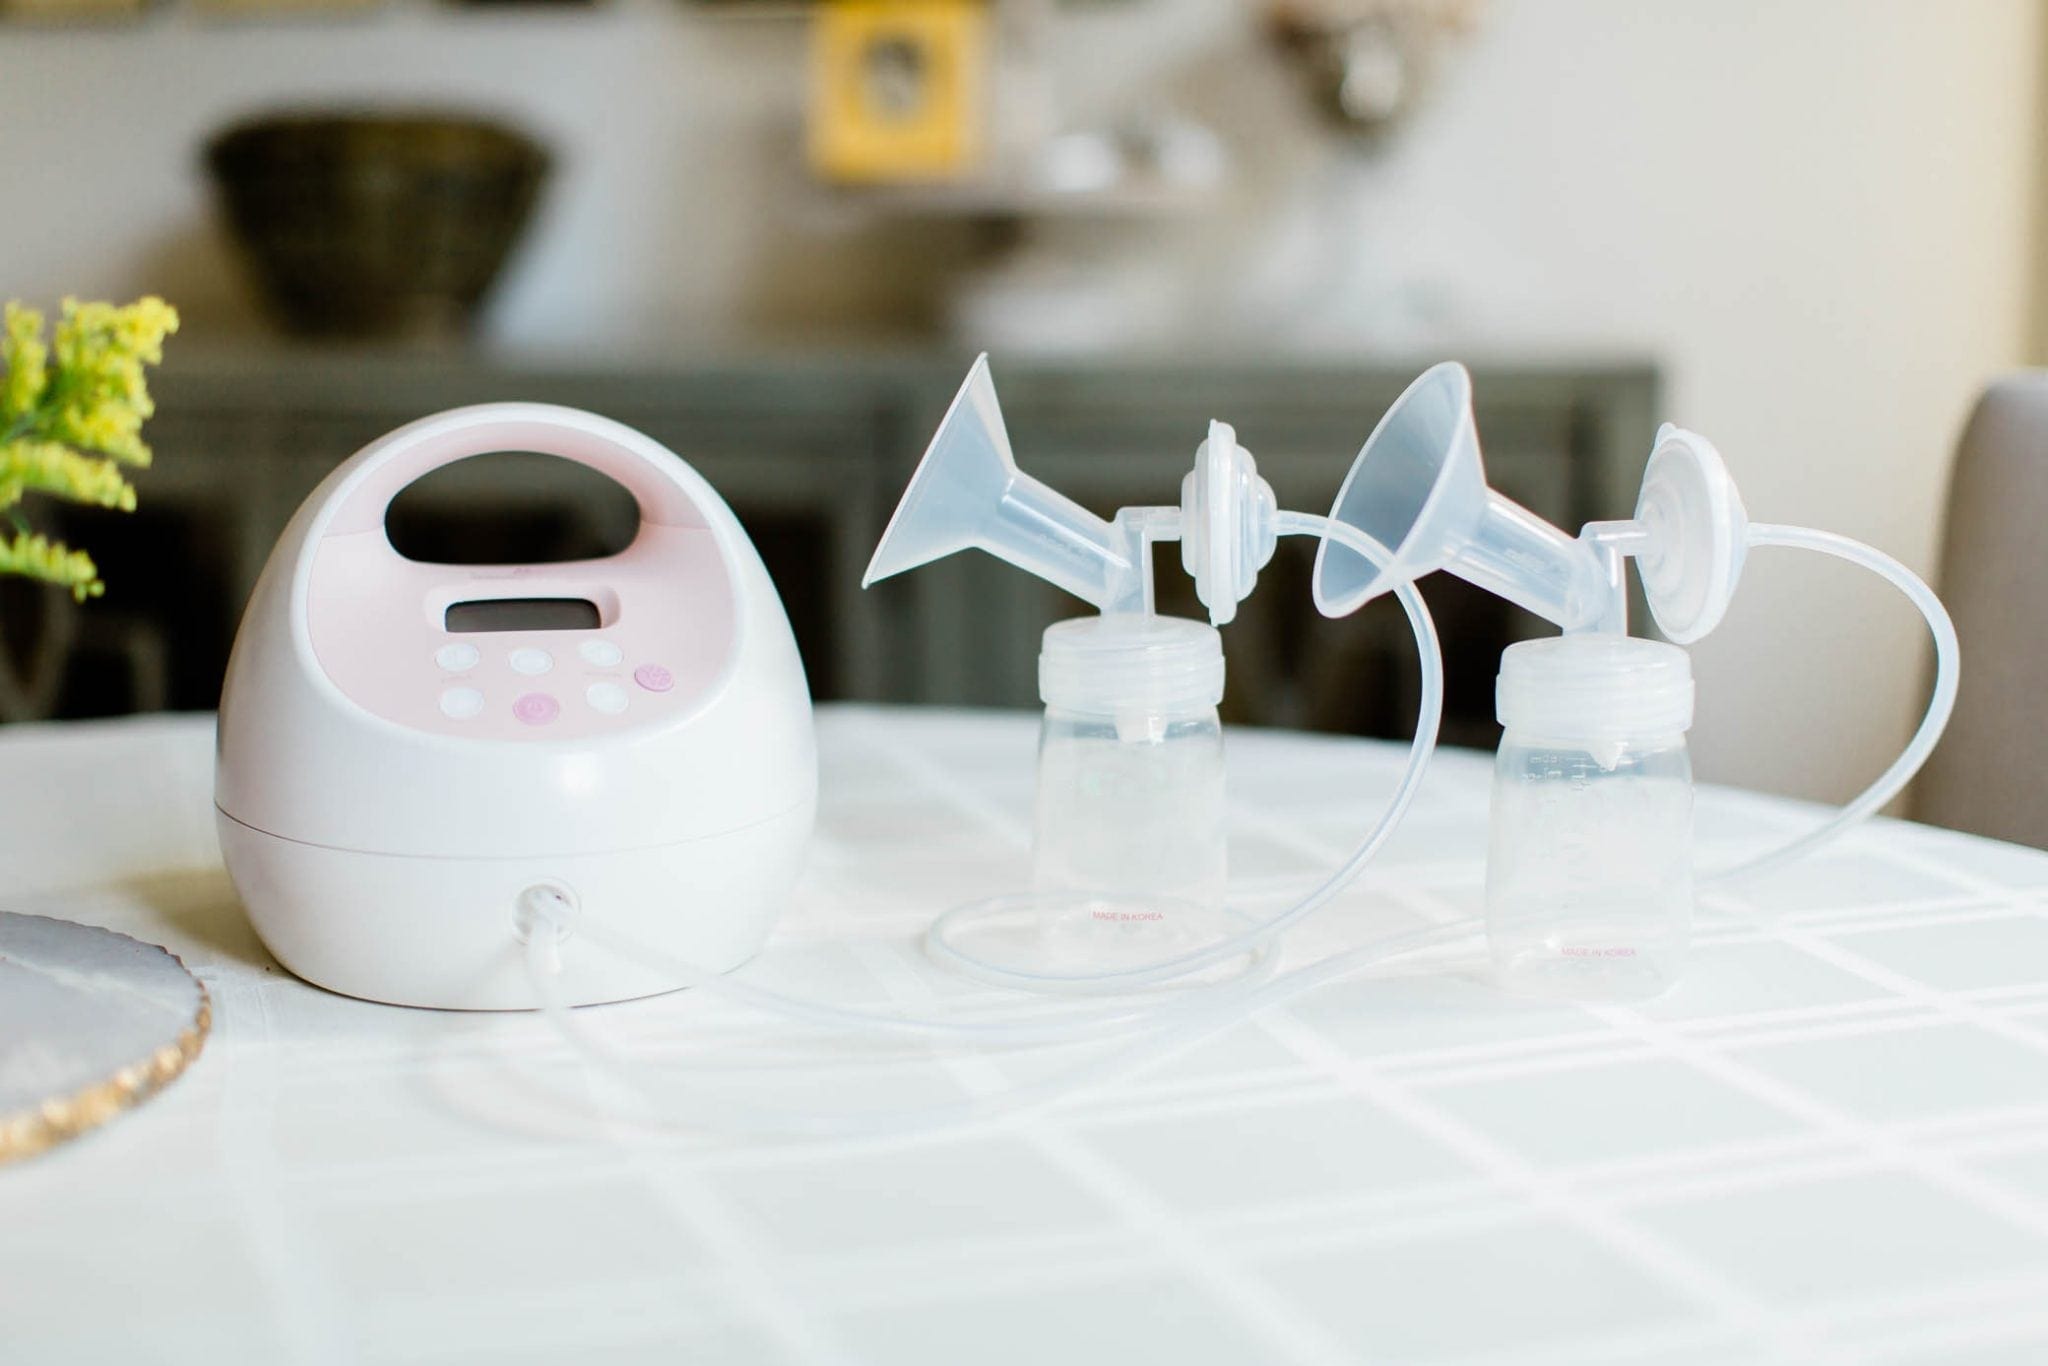
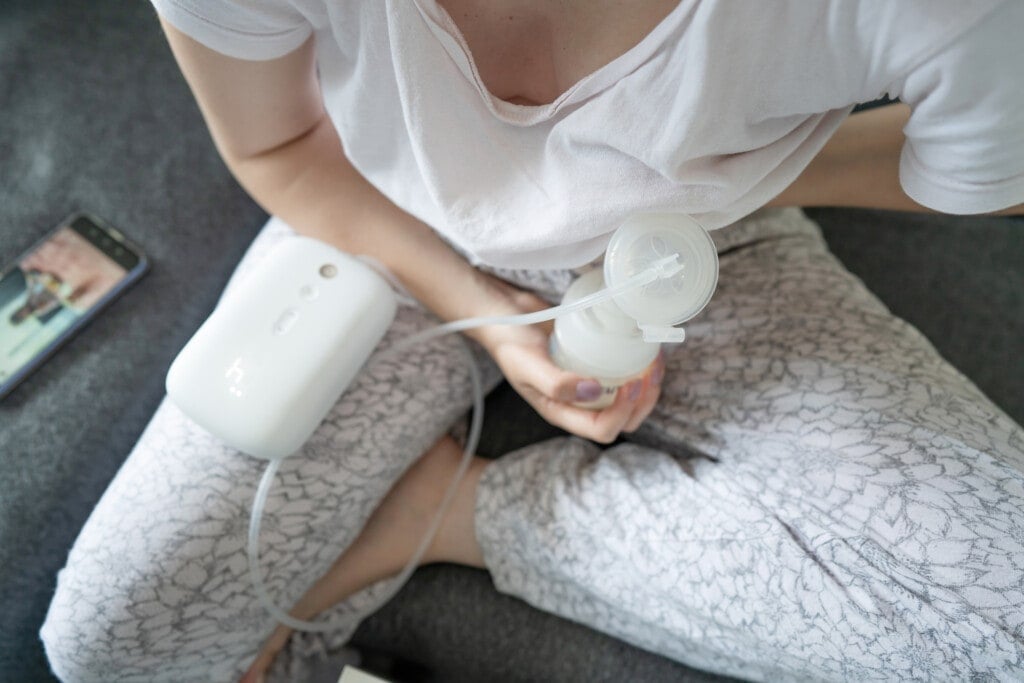
An electric breast pump is considered the most effective way to express milk for your baby. This type of pump offers great support for a mother who will be away from her baby for extended periods. It’s especially helpful for a mother who is expressing milk for her child with specific medical needs. Electric pumps can be found as single or double pumps. Research has shown that a double electric breast pump is the most effective in removing maximum amounts of milk.1
Do Your Research
There are many breast pump companies on the market that all have electric pumps that slightly differ. It is essential to research pumps to find which one will work best to meet your needs. Some pumps require an electrical outlet to plug them into, while others have a battery you can charge to pump on the go. Some now even offer the convenience of being completely hands-free.
Electric pumps are more expensive than the manual pump option. Make sure to check with your health insurance provider to see the insurance coverage they offer because many will offer coverage on specific breast pumps.
How to Use a Breast Pump
Every breast pump system is different. Reading your instruction manual and talking with your lactation consultant to ensure you are using your pump correctly is essential. Regardless of the pump you choose, general best practices are important to follow:
1. Wash Your Hands
Make sure your hands are clean before touching any pump parts. You are using the pump to provide milk for your baby and do not want to introduce any unnecessary germs to the system.
2. Find a Quiet Space
Being relaxed can help in the expression of milk using a pump. Especially in the workplace, try to find a quiet and clean space where you can set up your pump.1 Putting on relaxing music and looking at a picture of your baby or a video of your baby can produce a calming feeling.2
3. Assemble Your Pump
Both electric and manual pumps require assembly. This is a good time to make sure all parts are intact and working well.
4. Find the Correct Fit and Proper Placement
A flange is the funnel-like part of your pumping system. How it fits is crucial to a successful pumping experience and expression of milk. The flange is where your nipple and areola are “pulled in” during pumping to create a seal. Your nipple should not rub on the sides of the flange during pumping because this could be very painful. Incorrect flange size can also prevent breasts from emptying fully.3 Most pump kits come with one or two different flange sizes. If these are not correct, you can usually purchase additional sizes. Lactation consultants are an excellent resource for helping fit the correct flange size for your breast.
5. Start Pumping
Find a cycle speed and suction level that is comfortable for you. Many moms will start using a fast cycle speed, and once their milk starts to flow (let-down), they will slow the speed. Pump suction should be to a level that is strong, but comfortable.10
6. Fully Drain Breasts
You’ll want to pump until your breasts feel empty and milk output slows. This time frame will vary, but for a mom who is pumping and did not just have a baby at their breast, it will usually be around 15 minutes.
When Do You Need To Pump?
For a healthy baby who is breastfeeding well, you can wait to start pumping until you know you will have a period when you will be away from your baby. When to start will depend on the amount of time away and the amount of expressed milk your baby will need.
If you are a mom who knows they will be headed back to work, it will be important to start pumping at least two weeks ahead.4 You can begin storing and freezing expressed milk to prepare for your return to work. Breastfeeding moms can pump after each breastfeeding session to start a collection of stored expressed milk. You can also pump the other breast after your baby feeds on one side. Find out what works best for you. Returning to work is never easy, but having a freezer supply of expressed milk can offer some comfort!4
If your baby is born with advanced medical needs and cannot breastfeed right away, you will need to start pumping immediately after birth. Because your baby is not able to remove milk, the pump will assist in maintaining your milk supply. Your medical team should offer support in the hospital, giving you an electric pump, storage kits for expressed milk, and directions for how frequently you should pump for your baby.1
Cleaning and Storing Pump Parts
Cleaning your pump parts after each pumping session will become part of your routine. You will disassemble your parts and thoroughly clean them. You can wash them by hand or in a dishwasher, and even sanitize them. Make sure to review the cleaning and care instructions included with your breast pump before the first use:
1. Hand Wash Your Pump Parts
To wash your pump by hand, simply add gentle soap and hot water to your bowl or wash basin. Scrub the parts with a brush and then rinse. Make sure to designate a specific basin and brush just for pump parts. Let the parts air dry.
2. Wash Parts in the Dishwasher
Many dishwashers today can wash pump parts. Use a dishwasher-safe basket or bag to ensure the parts do not fall out of the rack. Set to hot water and see if you have a sanitizing drying setting. You’ll want to ensure your dishwasher states it is a recommended use before trying. When the dishwasher is done, remove the parts and let them dry completely before reuse.
3. Sanitizing Your Pump Parts
The Centers for Disease Control (CDC) recommends sanitizing breast pump parts at least once a day for extra protection against germs.5 It is important that you first clean the parts before sanitizing.6 Here are three sanitizing options:
- Steam: Sanitizing bags are specifically made for the microwave. Read the instructions for use that are included with the bag.7
- Boil: Add the pump parts to a boiling pot of water. Boil for five minutes.5
- Sterilize: Use an electric bottle sterilizer.8
Monitor breast pump tubing for water droplets, mold, or breakage, but do not add it to the cleaning process. You don’t need to clean tubing after each use because it never touches your expressed milk. If soiled on the outside, tubing can simply be wiped clean, and if mold appears, throw it out and replace it immediately. If you see droplets inside the tubing, you can run the pump with only the tubing attached until the tubing is fully dried.6
Using clean hands, make sure the parts are thoroughly dry before storing them. Avoid using a cloth towel to dry the parts because they can carry germs.7 Reassemble your parts so they are ready for use at your next pumping session. Store them in a clean and safe area. A tub with a lid is a great option.6
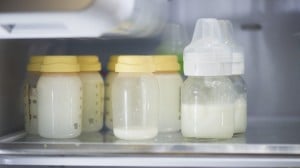
Storing Pumped Breast Milk
Knowing how to store pumped breast milk properly will ensure you do not waste any of your precious milk. Always make sure your hands are clean throughout the storage process. Add milk to a sealable breast milk storage bag or a plastic or glass bottle with a top. Mark the bag or bottle with the date when the milk was expressed and the volume of milk.4
You can store milk at room temperature, in the refrigerator, or the freezer after you pump:9
- Room temperature (77 degrees F or colder): For four hours
- Refrigerator: Up to four days
- Freezer: About six months for best practice (the CDC states that “up to 12 months is acceptable “)
The CDC offers a free printable sheet with storage guidelines that you can print for easy reference.
Quick Tips for Storage
Here are some additional tips for storing breast milk:
- Store milk in volumes that your baby tends to eat during one feeding.
- Label your bag or bottle with the date and time the milk was pumped and the amount.
- Freeze the milk immediately if you know you will not use it in the next few days.
- If pumping away from home, travel with a cooler and ice packs. You can store milk this way for up to 24 hours.9
Assemble, pump, disassemble, clean, sanitize, store, and repeat. These are the steps some moms need to take to ensure their baby continues to receive breast milk, even while away from their little ones. This may sound overwhelming, but with practice and repetition, every step in the pumping process will become second nature before you know it. You are working hard for your baby; keep up the fantastic work!